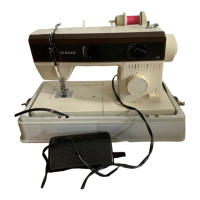
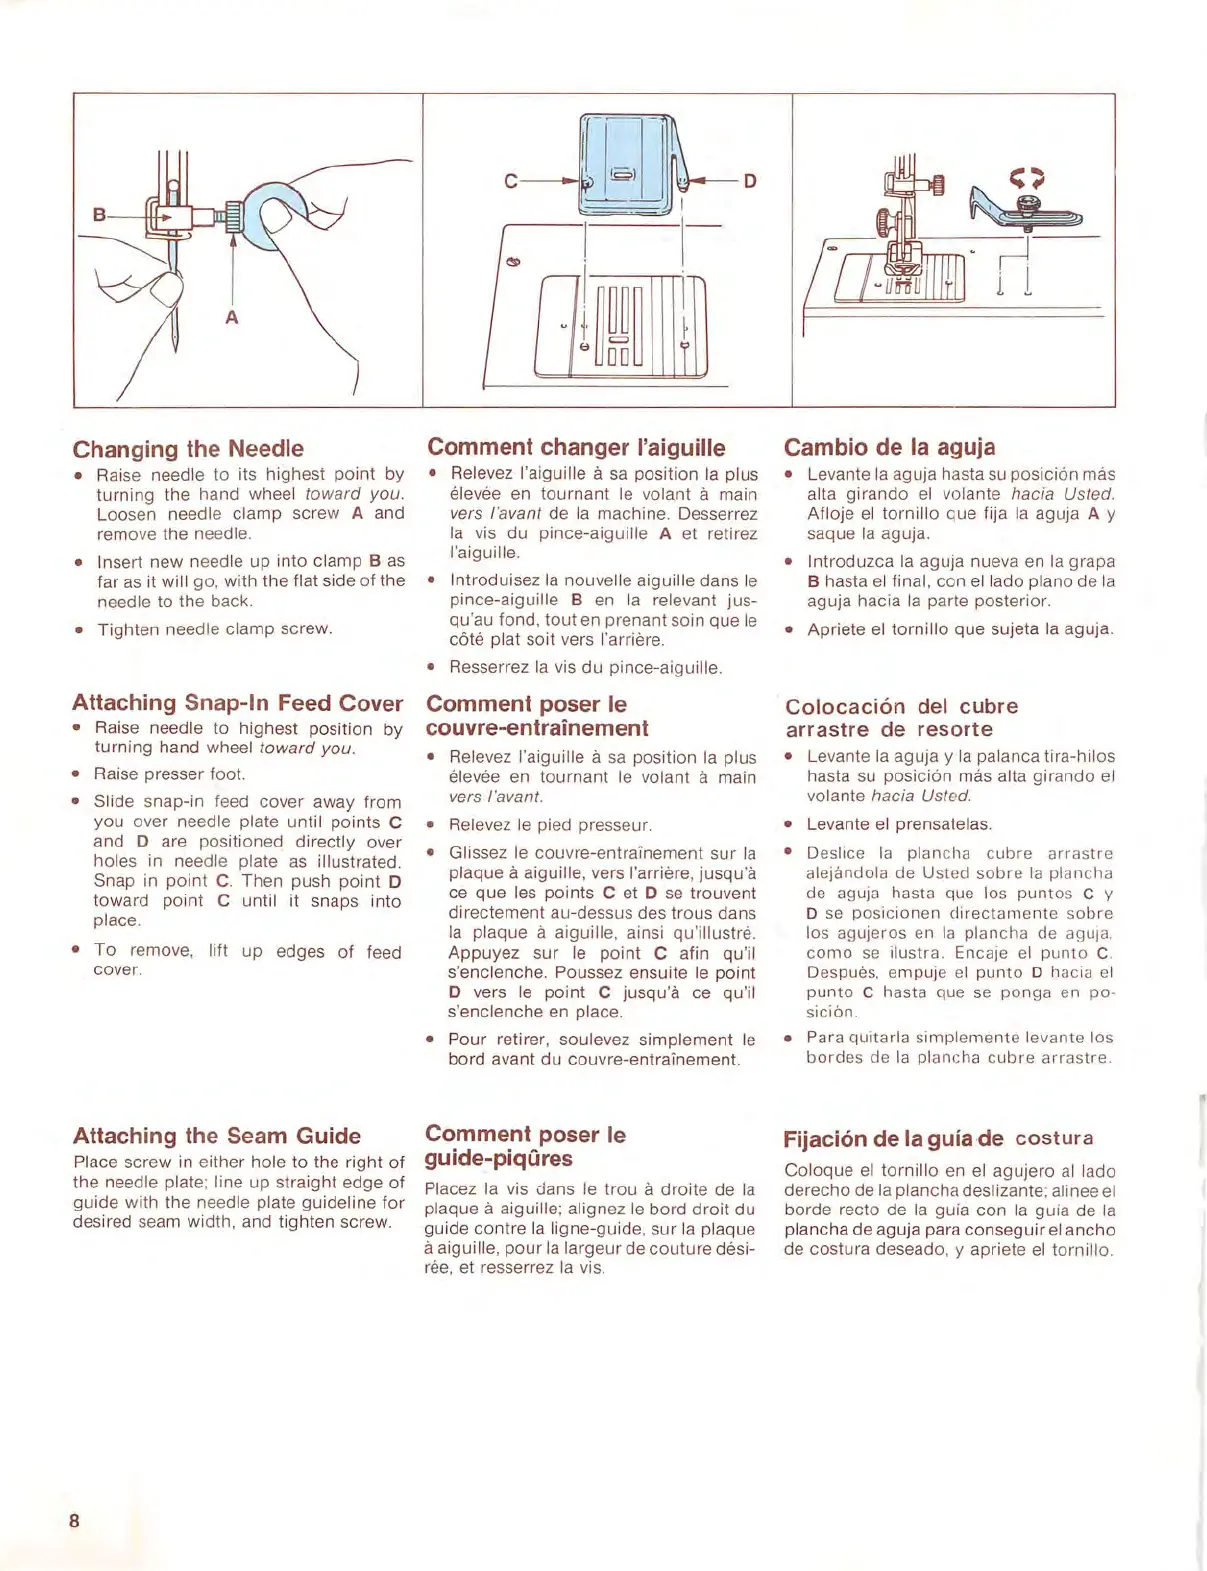
Changing the Needle
• Raise needle to its highest
point
by
turning
the hand wheel
tow
a
rd
you.
Loosen needle
clamp
screw A and
remove the needle.
• Insert
new
ne
ed
le up into clamp
Bas
far
as
it will
go
, with the flat side
of
the
needle to the back.
•
Tight
en needle
clamp
screw.
Attaching Snap-In Feed Cover
• Raise needle
to
highest position by
turning
hand wheel
toward
you.
• Raise presser foot.
• Slide snap-in feed cover away
from
you over needle plate until points C
and
D are positioned
directly
over
holes in needle plate
as
illustrated.
Snap in
point
C Then push
point
D
toward
point
C until it snaps
into
place.
•
To
remove, lift up edges
of
feed
cover.
Attaching the Seam Guide
Place screw in either hole to the
right
of
the
needle plate; line up straight edge
of
guide
with the needle plate
guideline
for
desired seam width, and tighten screw.
8
D
Comment changer l'aiguille
• Relevez l'aiguille a
sa
position
Ia
plus
elevee en
tournant
le volant a main
vers /'avant de
Ia
machine. Oesserrez
Ia
vis du pince-aiguille A et retirez
l'aiguille.
• lntroduisez Ia nouve
ll
e aiguille dans le
pince-aiguille
B en
Ia
relevant JUS-
qu'au fond,
tout
en prenant soin que
le
cote plat soit vers l'arriere.
• Resserrez Ia vis du pince-aigui
ll
e.
Comment poser le
couvre-entrainement
•
Rel
evez l'aiguille a sa position
Ia
plus
elevee en
tournant
le volant a main
vers /'avant.
• Relevez le pied presseur.
• Glissez
le
cou
vre-entra1nement
sur
Ia
plaque a aiguille, vers l'arriere, jusqu'a
ce que les
points
C et D
se
trouvent
directement
au-dessus des
trous
dans
Ia
plaque a aiguille, ainsi qu'illustre.
Appuyez
sur
le
point
C afin qu'il
s'enclenche. Poussez ensuite le
point
D vers le
point
C jusqu'a ce qu'il
s'enclenche en place.
•
Pour
retirer, soulevez
simplement
le
bard avant
du
couvre-entra1nement.
Comment poser le
guide-piqOres
Placez
Ia
vis dans
le
trou
a droite de
Ia
plaque a aiguille; alignez le
bard
droit
du
guide
contre
Ia
li
gne-guide, sur Ia plaque
a aiguille,
pour
Ia
largeur de
couture
desi-
ree
, et resserrez
Ia
vis.
Cambio de Ia aguja
• Levante
Ia
aguja hasta
su
posicion
mas
alta
girando
el volante
hacia
Usted.
Afloje el tornillo que fija
Ia
aguja A y
saque
Ia aguja.
•
lntroduzca
Ia
aguja nueva en
Ia
grapa
B hasta el final, con el I ado plano de
Ia
aguja hacia
Ia
parte posterior.
• Apriete el
tornillo
que sujeta
Ia
aguja.
·
Colocaci6n
del
cubre
arrastre
de
resorte
• Levante Ia aguja y
Ia
palanca tira-hilos
hasta
su
posicion
mas al
ta
girando
el
volante
hacia Uste
d.
• Levante
el
prensatelas.
• D
es
li
ce
Ia
planc
ha
cubr
e arr
as
tr
e
alejandola de Ust ed
sobr
e
Ia
pl
ancha
de aguja hasta que l
os
punto
s C y
D
se
posicionen
directament
e s
obre
los agujeros en
Ia
plancha de
ag
uj
a.
como
se ilustra. Encaje el pu
nto
c .
Despues, empuje el
punto
D h
ac
ia
el
punto
C hasta que
se
ponga
en po-
sicion.
• Para quitarla
simplemente
levante los
borde
s de
Ia
planc
ha
cubre
arras
tre
.
Fijaci6n de Ia guiade costura
Coloque
el
tornillo
en el
agujero
al lado
derecho
de
Ia
plancha deslizante; ali nee el
borde recto de
Ia guia
con
Ia
guia de
Ia
plancha de aguja para
consegu
ir
el
ancho
de costura deseado, y apriete el
tornillo
.
 Loading...