Do you have a question about the Singer 211G166 and is the answer not in the manual?
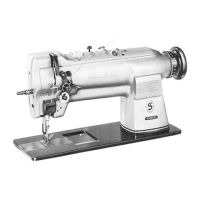
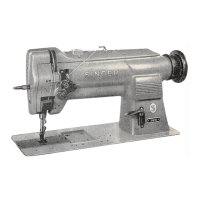
Details specifications like needle bar stroke, stitch length, and differences between models 166, 265, and 266.
Specifies RPM for models and guides machine installation steps.
Specifies Singer oil type and frequency of lubrication for machine parts.
Details oiling points for the hook, oil reservoir, and felt saturation.
Instructions for filling hook saddle reservoir and lubricating hook gears.
Explains how to check and adjust oil flow to the bobbin case raceway.
Describes how to fill and regulate oil flow for thread lubrication.
Details Singer needle catalog numbers, sizes, and how to identify thread twist.
Step-by-step guide to remove the bobbin from the machine.
Instructions for threading and winding the bobbin, including tension adjustment.
Details how to correctly place the bobbin into the bobbin case.
Steps to insert and align the needle correctly in the needle bar.
Detailed steps for guiding the needle thread through various tension and guide points.
Instructions for bringing up the bobbin thread and positioning for sewing.
Explains how to adjust needle and bobbin thread tension for proper stitch formation.
Illustrates how to identify correct tension by examining stitch appearance.
Describes the procedure to set the desired stitch length using a specific button.
Explains how to adjust the pressure of the presser foot for correct feeding.
Steps to re-engage the safety clutch after it has been disengaged.
Instructions on how to engage and use the reverse feed mechanism via lever or treadle.
Details on adjusting the thread controller spring tension and travel.
How to adjust the tension release mechanism for presser feet.
Procedures for adjusting the needle bar rock frame for synchronous and differentiated feed.
Further details on aligning the needle bar rock frame for specific models.
How to adjust the needle bar height using timing marks or by setting.
Instructions for adjusting the hook's distance and timing relative to the needle.
Fine-tuning hook timing and adjusting the needle guard.
Steps involved in removing and installing a new sewing hook.
Procedure to adjust the sewing hook's vertical position relative to the needle eye.
How to adjust the gap between the hook point and the needle to prevent thread damage.
Steps to ensure the sewing hook is correctly timed with the needle.
Instructions for detaching the bobbin case from the sewing hook assembly.
Detailed steps to remove the sewing hook and its shaft.
Guidance on correctly installing a replacement sewing hook.
How to adjust the bobbin case opener for proper thread passage.
Procedure to time the bobbin case opener mechanism.
Instructions for adjusting the feed dog's sideways position, height, and alignment.
How to adjust the height of the presser bar and feet.
Procedure to adjust the lift amount of the alternating presser feet.
How to adjust the feed driving eccentric for stitch length and timing.
Steps to adjust the reverse feed mechanism for equal stitch length.
Instructions for replacing the connection belt on the arm shaft.
| Type | Mechanical |
|---|---|
| Max Stitch Length | 4 mm |
| Built-in Needle Threader | No |
| Drop Feed | Yes |
| Free Arm | Yes |
| Buttonhole Styles | 4-step |
| Stitch Type | Straight |