EasyManua.ls Logo

Singer 15-91 - ELECTRICAL INFORMATION; To Connect Machine to Electric Service Line

Singer 15-91
23 pages
Print Icon
To Next Page IconTo Next Page
To Previous Page IconTo Previous Page
Loading...
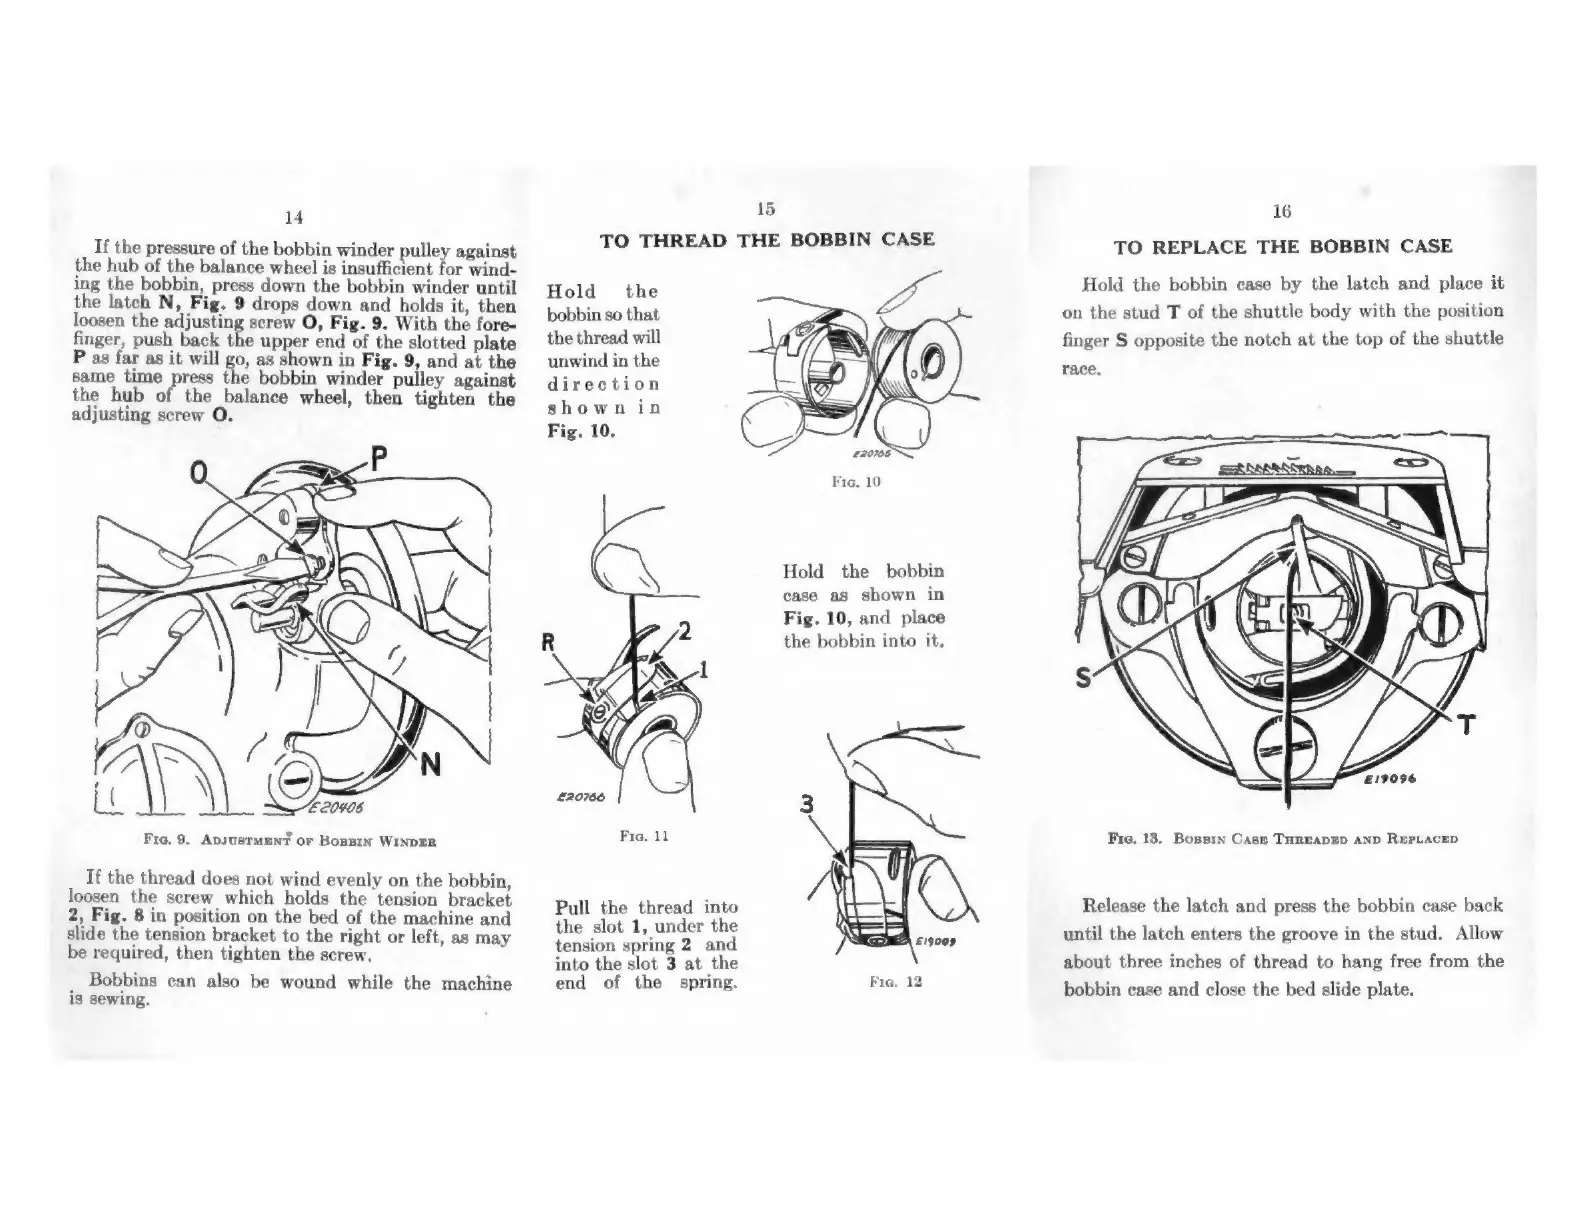
14
If
the
pressure
of
the
bobbin
winder
pulley
against
the
hub
of
the
balance
wheel
is
insufficient
for
wind-
ing
the
bobbin,
press
down
the
bobbin
winder
until
the
latch
N,
Fig.
9
drops
down
and
holds
it,
then
loosen
the
adjusting
screw
O,
Fig.
9.
With
the
fore-
finger,
push
back
the
upper
end
of
the
slotted
plate
P
as
far
as
it
will
go,
as
shown
in
Fig.
9,
and
at
the
same
time
press
the
bobbin
winder
pulley
against
the
hub
of
the
balance
wheel,
then
tighten
the
adjusting
screw
O.
Fie.
9.
ApsustMENT
or
Bopsrn
WINDER
If
the
thread
does
not
wind
evenly
on
the
bobbin,
loosen
the
screw
which
holds
the
tension
bracket
2,
Fig.
8
in
position
on
the
bed
of
the
machine
and
slide
the
tension
bracket
to
the
right
or
left,
as
may
be
required,
then
tighten
the
screw.
Bobbins
ean
also
be
wound
while
the
machine
is
sewing.
15
16
TO
THREAD
THE
BOBBIN
CASE
TO
REPLACE
THE
BOBBIN
CASE
Hold
the
bobbin
case
by
the
latch
and
place
it
ld
the
re
need
on
the
stud
T
of
the
shuttle
body
with
the
position
the
thread
will
finger
S
opposite
the
notch
at
the
top
of
the
shuttle
unwind
in
the
direction
shown
in
Fig.
10,
race,
bobbin
Hold
the
case
as
shown
in
Fig.
10,
and
place
the
bobbin
into
it.
Fie.
13.
Bossrn
Case
THREADED
AND
RepLaceD
Release
the
latch
and
press
the
bobbin
case
back
until
the
latch
enters
the
groove
in
the
stud.
Allow
Pull
the
thread
into
the
slot
1,
under
the
ion
spri
]
£19009
jefe
the
not
4
f
ne
about
three
inches
of
thread
to
hang
free
from
the
end
of
the
spring.
Brats
bobbin
case
and
close
the
bed
slide
plate.