Do you have a question about the Singer 2818 and is the answer not in the manual?
Describes manual coverage for specific sewing machine models.
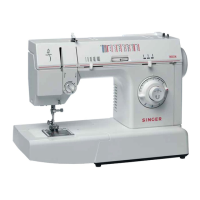
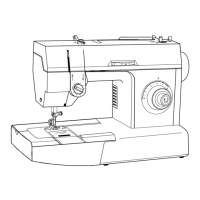
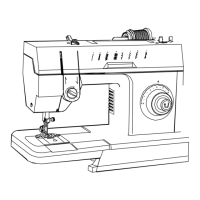
Details the features and specifications of the household sewing machine.
Lists essential tools for servicing and repairs.
Explains the use and procedure for "Duratec" casting components.
Instructions for removing and replacing the sewing machine's face plate cover.
Procedure for replacing the sewing machine's light bulb.
Steps to remove and replace the top cover of the sewing machine arm.
Guide for removing bottom and end covers on free arm and flat bed models.
Detailed steps for the removal and replacement of the needle bar.
Procedure for disassembling and reassembling the sewing machine's head end.
Steps to remove and replace the take-up lever and connecting link.
Instructions for removing and replacing the handwheel and associated driver assembly.
Procedure for removing and replacing the cam stack mechanism.
Steps to remove and replace the disc follower quick out lever.
Guide for removing and replacing the disc follower component.
Steps for removing and replacing the arm shaft and bevel gear assembly.
Procedure for removing and replacing the pattern selector assembly.
Guide for removing and replacing the thread tension assembly.
Instructions for removing and replacing the motor and its drive belt.
Procedure for removing and replacing the sewing machine's hook assembly.
Steps to remove and replace the feed lifting lever assembly.
Guide for removing and replacing the feed rock shaft assembly.
Procedure for removing and replacing the feed forked connection.
Steps for removing and replacing the vertical shaft bevel gear.
Guide for removing and replacing the vertical shaft.
Procedure for removing and replacing the stitch length control assembly.
Steps for removing and replacing the pattern selector mechanism.
Guide for removing and replacing the needle position selector lever.
Procedure to check and adjust vertical shaft end play.
Adjusting bevel gear mesh and arm shaft end play for smooth operation.
Adjusting clearance between the disc and disc follower for proper function.
Procedure to check and adjust radial play in the cam stack.
Adjusting for lost motion in the take-up lever and needle bar link.
Adjustment procedure for needle bar bearings to prevent stitching issues.
Adjusting the needle bar height for correct thread loop formation.
Adjusting pendulum timing for the needle bar's lateral movement.
Procedure to centralize needle movement during zigzag stitching.
Ensuring correct needle positioning within the needle plate slot.
Adjusting needle-to-hook alignment to prevent skipping and damage.
Adjusting the zigzag lever's bight stop for maximum stitch width.
Adjusting the needle bar safety bight stop for left-side zigzag positioning.
Adjusting presser bar height and alignment for proper feeding.
Procedure to check and adjust the hook drive belt tension.
Synchronizing hook and needle timing for proper stitch formation.
Adjusting the bobbin case position finger for correct placement.
Adjusting the bobbin case position plate for proper clearance.
Checking and adjusting clearance between the bobbin case and related parts.
Adjusting the needle thread tension for optimal stitch quality.
Adjusting the bobbin winder for correct thread winding.
Checking and adjusting end play in the feed rock shaft.
Centering the feed dog within the needle plate slots.
Adjusting the height of the feed dog relative to the needle plate.
Adjusting the feed dog's forward and backward movement range.
Adjusting spring tension for the stitch length regulator.
Adjusting the motor belt tension for optimal speed and noise reduction.
Procedure to set zero feed for specific models.
Procedure to set zero feed for specific models.
Adjusting the flexi stitch feed balance mechanism.
Adjusting the space for buttonhole cutting to avoid thread damage.
| Number of Stitches | 18 |
|---|---|
| Needle Threader | Yes |
| Max Stitch Length | 4 mm |
| Max Stitch Width | 5 mm |
| Speed | 750 stitches per minute |
| Presser Feet | Buttonhole Foot, Button Sewing Foot |