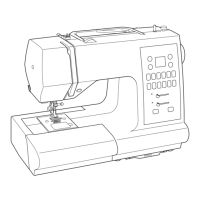
Do you have a question about the Singer 7422 and is the answer not in the manual?
Steps for safely removing the front cover of the sewing machine.
Instructions for detaching the rear cover of the sewing machine.
Guidelines for removing bottom covers based on specific sewing machine model numbers.
Step-by-step guide to enter the sewing machine's diagnostic test mode.
Explanation of different test modes (Mode 1, 2, 3) and their functions.
Procedure to verify the correct height of the feed dog mechanism.
Steps to adjust the feed dog height using screws and nuts.
Verifying the correct vertical position of the needle bar.
Steps to adjust the needle bar height using a screw.
Verifying needle alignment within the needle plate hole for zigzag.
Adjusting needle position for correct zigzag stitching using an eccentric pin.
Measuring the gap between the needle and shuttle hook.
Adjusting the needle position relative to the shuttle hook.
Verifying the synchronization of needle movement with feed dog movement.
Adjusting the timing gear for correct needle-feed dog synchronization.
Verifying the synchronization of needle and shuttle hook movement.
Adjusting the gear position for correct needle-shuttle hook timing.
Verifying the needle stopper function at the rightmost position.
Adjusting the needle stopper screw for proper function.
Verifying thread tension using a gauge or by sewing.
Adjusting the spring pressure screw for proper thread tension.
Procedures for checking and adjusting the zigzag stitch width mechanism.
Adjusting motor gear and origin point for stitch length and feed balance.
Verifying the needle stops at its correct highest position.
Adjusting the sensor cam collar for proper needle stopping.
Details and labeling of the AC power board components and part numbers.
Information on CPU Board 1, including component numbers for different versions.
Information on CPU Board 2, including component numbers for different versions.
Details on Switch Board 1, including its component number.
Details on Switch Board 2, including component numbers and variations.
Details on Switch Board 3, including component numbers and variations.
Details on Switch Board 4, including its component number.
Details on Switch Board 5, including its component number.
Schematic showing electrical connections for sewing machines 7422, 7442, and 7462.
Electrical connection schematic for sewing machines 7444, 7446, 7448, 7464, 7466, 7468.
Schematic illustrating electrical connections for sewing machines 7424, 7426, and 7428.
| Automatic Needle Threader | Yes |
|---|---|
| Drop Feed | Yes |
| Free Arm | Yes |
| Stitch Width | 5mm |
| Stitch Length | 4 mm |
| Type | Mechanical |
| Speed | 750 stitches per minute |
| Voltage | 110V |
| Warranty | 25-year limited |
| Buttonhole Styles | 4-Step |
| Stitch Functions | Decorative |
| Presser Feet | All-purpose, zipper, buttonhole, button sewing |