EasyManua.ls Logo

Singer CONFIDENCE 7463 Service Manual

Singer CONFIDENCE 7463
59 pages
To Next Page IconTo Next Page
Page #1 background imageLoading...
Page #1 background image
Service Manual
7463
7465
7467
7469
Confidence
104 72 89-26
16 Oct 2007

Other manuals for Singer CONFIDENCE 7463

Question and Answer IconNeed help?

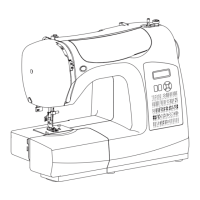
Do you have a question about the Singer CONFIDENCE 7463 and is the answer not in the manual?

Singer CONFIDENCE 7463 Specifications

General IconGeneral
Stitch Applications30
Built-In Needle ThreaderYes
Buttonhole Styles2
Automatic TensionYes
Drop FeedYes
Free ArmYes
Adjustable Stitch LengthYes
Adjustable Stitch WidthYes
TypeElectronic
Bobbin TypeTop Drop-In
LCD ScreenYes
Speed750 stitches per minute
Warranty25 years limited warranty

Summary

Sec. 1 Disassembling of covers

Face Cover Disassembly

Procedure for removing the front face cover of the sewing machine.

Back Cover Disassembly

Procedure for removing the rear back cover of the sewing machine.

Sec. 2 Test Mode Operation

Entering Test Mode Procedure

Steps to activate and enter the sewing machine's diagnostic test mode.

Sec. 3 Feed Dog Height Adjustment

Checking Feed Dog Height

Verifies the correct height of the feed dog mechanism.

Adjusting Feed Dog Height

Instructions for adjusting the feed dog height.

Sec. 4 Needle Bar Height Adjustment

Checking Needle Bar Height

Verifies the correct height of the needle bar.

Adjusting Needle Bar Height

Instructions for adjusting the needle bar height.

Sec. 5 Needle Threader Height

Checking Needle Threader Height

Verifies the correct insertion of the needle threader hook.

Adjusting Needle Threader Height

Instructions for adjusting the needle threader height.

Sec. 6 Presser Foot Height and Direction

Checking Presser Foot Height

Verifies the clearance between needle plate and presser foot.

Adjusting Presser Foot Height

Instructions for adjusting the presser foot height and orientation.

Sec. 7 Zigzag Stitching Needle Position

Checking Zigzag Needle Position

Verifies needle clearance at left and right ends of needle plate hole.

Adjusting Zigzag Needle Position

Instructions for adjusting needle position for zigzag stitching.

Sec. 8 Needle and Shuttle Clearance

Sec. 9 Needle Timing with Feed Dog

Sec. 10 Needle Timing with Shuttle Hook

Sec. 11 Needle Stopper Right Position

Sec. 12 Thread Tension Adjustment

Sec. 13 Zigzag Bight and Stitch Balance

Zigzag Bight Adjustment Procedures

Steps for checking and positioning zigzag bight gears.

Stitch Balance Adjustment Procedures

Steps for adjusting stitch balance and zero feed.

Sec. 14 Needle Stop at Highest Position

Sec. 16 Motor Belt Tension

Sec. 17 Timing Belt Tension

Wiring Diagrams

Parts List for Feed Control Unit

Related product manuals