Do you have a question about the Singer Futura 4300 and is the answer not in the manual?
Instructions to reduce the risk of electric shock.
Instructions to reduce risks of burns, fire, electric shock, or injury.
Information on recycling and proper disposal of electrical appliances.
Manufacturer's right to modify product design or accessories.
Color coding for mains lead wires and terminal connections.
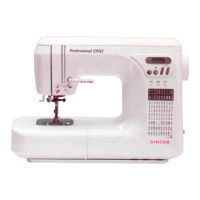
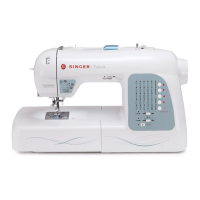
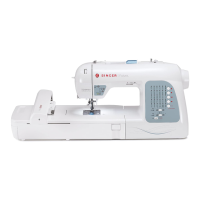
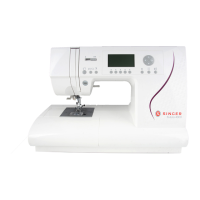
Lists and labels all main parts of the sewing machine.
Lists and describes all included accessories with corresponding numbers.
Instructions for detaching and attaching the extension table.
Instructions for opening the accessory storage compartment.
Warning to turn off power before changing the presser foot.
Step-by-step guide for changing the presser foot.
Instructions for removing the presser foot holder.
Warning to turn off power before removing the needle.
Steps for inserting a new needle into the machine.
Table guiding fabric type, thread size, and needle type/size.
Safety warning regarding electric shock.
General safety warnings for operation.
Information on polarized plugs and outlet compatibility.
Explanation of how the foot control operates the machine.
Safety warnings related to foot control use.
Operation of the start/stop button and monitor lamp.
How to use the reverse stitch button for reinforcing seams.
Functionality of the needle position and slow speed button.
How to adjust sewing speed using the speed control button.
Operation of the presser foot lifter lever.
How to use the automatic thread cutter and manual cutter.
Function and operation of the drop feed lever.
How to open the top cover and use the hand wheel.
Information displayed on the LCD screen.
Location and purpose of the stitch pattern chart.
How to select utility stitch patterns.
How to select decorative & letter stitch patterns.
Overview of control panel buttons and their functions.
How to adjust LCD contrast and turn off audible beep.
Steps to enter the adjustment screen.
Important note about using specific bobbin types.
Steps for removing the bobbin from the machine.
Instructions for placing the thread spool on the spool pin.
Step-by-step guide to winding a bobbin.
How to correctly place the bobbin in the bobbin holder.
How to draw thread through the notch while holding the bobbin.
Securing the thread within the bobbin holder mechanism.
Final steps for inserting the bobbin and closing the cover.
Preparatory steps before threading, like raising presser foot.
How to correctly place the spool of thread.
Importance of raising the presser foot before threading.
Detailed steps for threading the upper thread.
Safety warning about keeping fingers away from moving parts.
Information on needle threader compatibility.
Steps for inserting a needle and operating the threader.
Step 1: Raising the presser foot.
Holding thread and using the needle up/down button.
Pulling upper thread to bring bobbin thread up.
Positioning the threads after bringing bobbin thread up.
Safety warning about sewing near the needle.
Steps for starting and ending a seam.
How the upper thread sensor stops the machine.
Warnings about using the thread cutter button.
Descriptions of different straight stitch needle positions.
Recommended foot for straight stitch sewing.
Steps for sewing a basic straight stitch.
Steps for sewing straight stitch with auto-lock.
Technique for turning corners while sewing.
Tips for sewing heavy or thick fabrics.
Guidance for sewing over thick overlapped fabric areas.
Using guide lines on the needle plate for seam allowance.
How the machine automatically adjusts tension.
Steps to enter thread tension mode.
How to adjust upper thread tension up or down.
Description of the default pre-set thread tension.
Visual indicator of increased/decreased upper thread tension.
Tension adjustment for decorative stitches.
Troubleshooting tips for thread tension issues.
Location of utility stitch patterns.
Steps for selecting utility stitch patterns.
Options for setting pattern features like mirror/reverse.
How to elongate stitch patterns.
How to adjust stitch width and length settings.
Adjusting needle position for straight stitches.
Lists and illustrates various stitch types and their uses.
Explanation of symbols used in the chart.
Lists stretch stitch types.
Recommended foot for elastic stitch sewing.
Needle recommendation for knit/synthetic fabrics.
Details of the hand-look quilting stitch.
Recommended foot for quilting stitch.
Details of the zigzag stitch.
Recommended feet for zigzag stitches.
How to sew a satin stitch.
Details of the multi-stitch zigzag.
Sewing with elastic using multi-stitch zigzag.
Using zigzag for overcast stitching.
How to use the free arm feature.
Reference to instructions for removing the extension table.
List of stitch numbers for overcasting.
Recommended foot for overcasting.
Fabric placement for overcasting.
Specific overcasting stitch uses.
Trimming excess fabric after stitching.
Description of blind hem stitching.
Blind hem for stretch fabrics.
Blind hem for non-stretch fabrics.
Recommended foot for blind hemming.
Step 1: Folding fabric for blind hem.
Step 2: Adjusting the blind hem foot guide.
Step 3: Positioning fabric for blind hem stitching.
Step 4: Sewing the blind hem.
Step 5: Finishing the blind hem.
Importance of testing blind hem stitch on scrap fabric.
Description of crazy patch technique and stitch numbers.
Recommended feet for crazy patch sewing.
Steps for creating a crazy patch effect.
Stitch numbers and recommended foot for applique.
Positioning and sewing the applique edge.
Technique for sewing angles/curves during applique.
Alternative applique methods and using stabilizer.
Required stitch and needle position for centered zipper insertion.
Recommended zipper foot for centered insertion.
Safety warning about using the zipper foot.
Steps for centered zipper insertion.
Required stitch and needle position for lapped zipper insertion.
Recommended zipper foot for lapped insertion.
Safety warning about using the zipper foot.
Steps for lapped zipper insertion.
Technique for stitching around the zipper tab.
Overview of buttonhole styles available.
List of buttonhole types.
Recommended foot for buttonhole sewing.
Adjusting buttonhole side density.
Marking and setting up the buttonhole on fabric.
Threading the buttonhole foot.
Positioning fabric for buttonhole sewing.
Recommendation for using interfacing with stretch fabrics.
Step 5: Lowering the buttonhole lever.
Condition for machine to start sewing buttonholes.
Step 6: Starting the buttonhole sewing.
Description of bound buttonholes.
Specific stitch number for bound buttonhole.
Recommended foot for bound buttonholes.
Steps for creating a bound buttonhole.
Use of the eyelet stitch pattern.
Recommended foot for eyelet sewing.
How to choose eyelet sizes.
Steps for sewing and finishing an eyelet.
Note about eyelet punch not being included.
Overview of bar-tack and darning.
Use of bar-tack stitch.
Use of darning stitch.
Recommended foot for bar-tack/darning.
Steps for automatic bar-tack/darning.
Stitch number for sewing buttons.
Recommended foot for button sewing.
Steps for sewing buttons.
Safety warning about needle hitting the button.
Securing thread ends after sewing.
Re-engaging feed teeth after button sewing.
Technique for sewing 4-hole buttons.
Explanation of thread shank importance.
How to create a thread shank.
Use of Satin Stitch Foot for decorative patterns.
Feature of the Satin Stitch Foot.
Stitch numbers for decorative patterns.
Customizing pattern length and width.
Recommendation for using stabilizer on lightweight fabrics.
Benefits of using a twin needle.
Pattern compatibility with twin needles.
Recommended feet for twin needle sewing.
Information on purchasing twin needles.
Safety warnings for twin needle use.
Note that needle threader cannot be used.
Steps for twin needle setup and sewing.
Activating twin needle mode.
Safety warning about needle plate collision.
Testing the stitch.
Using twin needles with decorative/letter stitches.
Overview of combining decorative and letter stitches.
Steps for selecting decorative and letter stitch patterns.
How to move the cursor for pattern management.
Cursor functions for checking and managing patterns.
Checking patterns by shifting the cursor.
Steps for inserting patterns into a selected sequence.
Steps for deleting patterns from a sequence.
Overview of pattern editing options.
Step 1: Entering edit mode.
Step 2: Viewing pattern settings.
Step 3: Editing settings (mirror, elongation, twin needle).
Step 4: Exiting edit mode.
Limitation on editing letter stitches.
Accessing and adjusting pattern setting options.
Default stitch width/length settings.
How to adjust stitch width and length.
Adjusting width (narrower/wider) for straight stitches.
Adjusting length (shorter/longer) for straight stitches.
Returning to edit or select mode.
Tension affects all combined patterns.
Increasing/Decreasing upper thread tension.
Returning tension to pre-set.
Returning to editing/select mode from tension.
Recalling selected patterns.
Deleting all patterns.
Sewing a single selected pattern combination.
Repeating pattern combinations.
Steps for sewing decorative/letter stitches.
Controls for sewing patterns from the start.
Explanation of bold print in stitch chart.
Explanation of symbols used in the chart.
When stitch balance adjustment is needed.
Location and use of the balance adjustment screw.
Adjusting decorative stitches.
Adjusting letter stitches.
Safety warning before maintenance.
Cleaning the hook area and feed teeth.
Steps for cleaning hook race, feed teeth, and bobbin holder.
Information about the LED stitch lamp.
LCD message for bobbin winding.
LCD message to lower buttonhole lever.
LCD message after sewing buttonhole.
LCD message to release foot pedal.
LCD message to lower presser foot.
LCD message for full memory.
LCD message to select a pattern.
LCD message to release reverse button.
LCD message to release start/stop button.
LCD message to rethread upper thread.
LCD message for foot control connection.
LCD message to release needle up/down button.
LCD message to release thread cutter button.
LCD message to turn off power.
Troubleshooting for upper thread breakage.
Troubleshooting for lower thread breakage.
Troubleshooting for skipped stitches.
Troubleshooting for fabric puckering.
Troubleshooting for loose stitches or loops.
Troubleshooting for distorted stitch patterns.
Troubleshooting for needle threader issues.
Troubleshooting for fabric feeding issues.
Troubleshooting for needle breakage.
Troubleshooting for machine difficulty.
Troubleshooting for machine not starting.
| Sewing Speed | 850 stitches per minute |
|---|---|
| Display | LCD Touch Screen |
| USB Connectivity | Yes |
| Bobbin Type | Drop-in bobbin |
| Automatic Needle Threader | Yes |
| Built-in Memory | Yes |
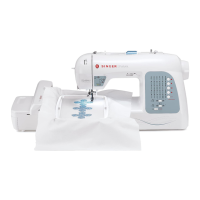
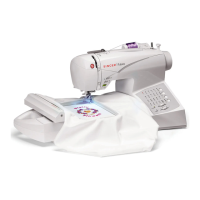
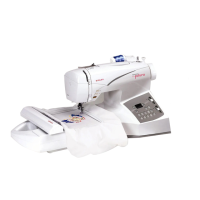
| Type | Sewing and Embroidery Machine |
| Embroidery Designs | 125 |
| Embroidery Area | Up to 6 x 10 inches (150 x 260 mm) |
| Hoop Sizes | 4" x 4", 10" x 6" |
| Stitch Functions | decorative stitches |