EasyManua.ls Logo

Singer Futura SES2000 User Manual

Singer Futura SES2000
124 pages
To Next Page IconTo Next Page
Page #1 background imageLoading...
Page #1 background image
1
1. Un appareil ne devrait jamais être laissé sans surveillance lorsqu’il est branché.
Débranchez toujours l’appareil de la prise externe de courant immédiatement après usage et avant le nettoyage.
Lorsqu’un appareil électrique est en usage, il faut toujours observer certaines mesures élémentaires de sécurité y compris les
suivantes.
Lire les instructions en entier avant d’utiliser cette machine à coudre.
DANGER
-
MESURES DE SÉCURITÉ IMPORTANTES
MISE EN GARDE
-
1. Cet appareil ne doit pas être utilisé comme un jouet. Une stricte surveillance doit être exercée lorsque l’appareil est en usage
par ou près des entants.
2. N’utilisez cet appareil qu’aux fins mentionnées dans ce manuel. N’utilisez que les accessoires recommandés par le
manufacturier tel qu’indiqué dans ce manuel.
3. N’utilisez jamais cet appareil si le cordon ou la fiche sont endommagés, si l’appareil fait défaut, s’il a é échappé ou
endommagé ou immergé. Retournez cet appareil au concessionnaire autorisé ou centre de réparations pour examen.
Réparation, réglage électrique ou mécanique.
4. N’utilisez jamais l’appareil lorsque les ventilateurs sont obstrués. Gardez les ventilateurs de la machine à coudre et du
rhéostat libres de mousse, poussière ou de tissu.
5. Gardez les doigts loin des pièces en mouvement spécialement autour de l’aiguille de la machine à coudre.
6. Utilisez toujours la plaque à aiguille recommandée. Une plaque inappropriée peut causer le bris de l’aiguille.
7. N’utilisez jamais d’aiguilles gauchies.
8. Ne tirez ni ne poussez le tissu pendant que vous cousez. Ceci peut faire dévier l’aiguille et la briser.
9. Arrêtez («0») la machine à coudre lorsque vous faites des réglages à l’aiguille, enlage, changement.
enlage de canette ou changement de pied presseur, etc.
10. Débranchez toujours la machine de la prise externe de courant lorsque vous retirez les couvercles,
effectuez la lubrication ou tout autre entretien mentionné dans le manuel d’instructions.
11. N’insérez ni ne laissez tomber aucun objet dans aucune ouverture.
12. N’utilisez pas en plein air.
13. N’utilisez pas ou des produits en aérosol sont en usage ni ou est administré de l’oxygene.
14. Pour débrancher, tournez tous les réglages en position d’arrêt («0»), puis débranchez la prise externe de courant.
15. Ne débranchez pas en tirant le cordon. Pour débrancher, saisissez la che, non pas le cordon.
CONSERVEZ CES INSTRUCTIONS
Cette machine à coudre est couçue pour usage domestique seulement.
Pour réduire le risque de brûlures, de feu, de décharge électrique ou de
blessures personnelles:
Pour réduire le risque de décharge électrique:
RHÉOSTAT (Etats-Unis et canada seulement)
Avec cette machine à coudre, utilisez le modèle YC-485 EC ou JF-1000.
Cet appareil est conforme à la directive CEE 2004/108/EC concernant les normes
électromagnétiques.
INFORMATIONS CONCERNANT LES FICHES POLARISÉES (Etats-Unis et canada seulement)
Cet appareil est équipé d'une fiche polarisée (une lame est plus large que I’autre). Pour réduire les risques de décharge
électrique, cette che ne peut être branchée dans la prise que d’une seule façon. Si la che ne peut pas être insérée entièrement
dans la prise, tournez la che. Si la che ne peut toujours pas entrer dans la prise, veuillez contacter un électricien qualié an
qu'il vous installe la prise murale appropriée. Ne modiez la che en aucun cas.
Veuillez noter qu’en cas de destruction, ce produit doit bénécier d’un recyclage sécurisé, conforme à la législation
nationale applicable aux produits électriques/électroniques. En cas de doute, veuillez contacter votre distributeur
agréé.
SINGER est une marque enregistrée de The Singer Company Limited ou de ses sociétés afliées.
©2009 The Singer Company Limited ou ses sociétés afliées. Tous droits réservés.

Table of Contents

Other manuals for Singer Futura SES2000

Question and Answer IconNeed help?

Do you have a question about the Singer Futura SES2000 and is the answer not in the manual?

Singer Futura SES2000 Specifications

General IconGeneral
DisplayLCD Touch Screen
USB ConnectivityYes
USB PortYes
Automatic Needle ThreaderYes
Needle PositionsVariable
Built-in MemoryYes
TypeSewing and Embroidery
Embroidery Designs125
Embroidery Area10 x 6 inch
Max Embroidery Area10 x 6 inch
Hoop Size10 x 6 inch
Bobbin SystemDrop-in

Summary

Important Safety Instructions

DANGER - To reduce the risk of electric shock

Instructions to reduce the risk of electric shock.

WARNING - To reduce the risk of burns, fire, electric shock, or injury

Safety precautions for use, including child supervision and proper handling.

Conserve These Instructions

Instruction to keep the manual for future reference.

Getting to Know Machine

Machine Identification

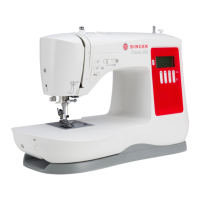
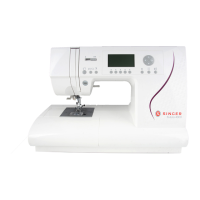
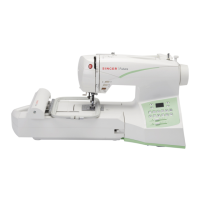
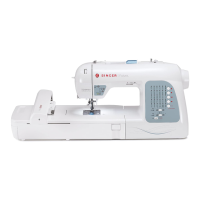
Identifies all the parts of the sewing machine.

Accessories

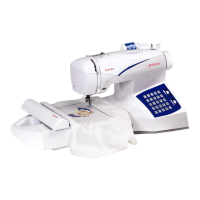
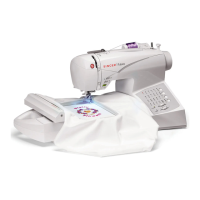
Lists all included accessories for sewing and embroidery.

Getting Started Sewing

Leveling Machine

Instructions for ensuring the machine is stable and balanced.

Setting Up Machine

Guide for preparing the machine for first use.

Power/Light Switch

Explanation of the main power and light switch.

Winding Bobbin

Step-by-step guide on how to wind a bobbin.

Threading the Bobbin Thread

Detailed instructions for threading the bobbin.

Setting the Top Thread

Guide for threading the upper thread correctly.

Automatic Needle Threader

Instructions for using the automatic needle threader.

Control Panel Functions

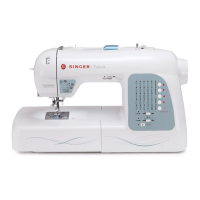
Overview of the control panel buttons and displays.

Straight Stitching

Basic guide to performing a straight stitch.

Keeping Seams Straight

Tips for maintaining straight sewing lines.

Inserting Zippers and Piping

Instructions for sewing zippers and piping.

Zigzag Stitching

Explanation of zigzag stitch and its uses.

Blind Stitch

Guide to performing blind stitches.

Shell Stitch

Instructions for creating a shell stitch.

Point Invisible

Steps for sewing an invisible stitch.

Point de Lingerie

Guide for sewing the lingerie stitch.

Multi-stitch Zigzag

Instructions for the multi-stitch zigzag.

Fagoting

Guide to performing the fagoting stitch.

Stretch Stitches

Information on using stretch stitches for various fabrics.

Straight Stretch Stitch

Guide to sewing the straight stretch stitch.

Overedge Stitch

Instructions for the overedge stitch.

Ric-rac Stitch

Guide to sewing the ric-rac stitch.

Feather Stitch

Instructions for the feather stitch.

Points Extensible

Guide to sewing extensible stitches.

Point Droit Extensible

Instructions for the straight extensible stitch.

Point Surjet

Guide to sewing the overlock stitch.

Point Ric Rac

Instructions for the ric-rac stitch.

Point Plume

Guide to sewing the feather stitch.

Honeycomb Stitch

Instructions for sewing the honeycomb stitch.

Slant Overedge Stitch

Guide to sewing the slant overedge stitch.

Blanket Stitch

Instructions for the blanket stitch.

Turkish Stitch

Guide to sewing the turkish stitch.

Point Nid d’Abeille

Instructions for the honeycomb stitch.

Point Languette

Guide to sewing the mock overlock stitch.

Surjet Oblique

Instructions for the slant overedge stitch.

Point Turc

Guide to sewing the turkish stitch.

Crossed Stitch

Instructions for the crossed stitch.

Chevron Stitch

Guide to sewing the chevron stitch.

Pin Stitch

Instructions for the pin stitch.

Entredeux Stitch

Guide to sewing the entredeux stitch.

Ladder Stitch

Instructions for the ladder stitch.

Criss-Cross Stitch

Guide to sewing the criss-cross stitch.

Greek Key Stitch

Instructions for the greek key stitch.

Fishbone Stitch

Guide to sewing the fishbone stitch.

Decorative Stitching

Overview of decorative stitches and tips.

Tips on Design Stitching

Guidance on using decorative stitches for designs.

Continuous Patterns

Information on using continuous patterns.

Novelty Patterns

Guide to sewing novelty patterns.

Sewing on a Button

Instructions for sewing buttons.

Preparation for Embroidery Sewing

Attaching Embroidery Foot

Steps to attach the embroidery presser foot.

Inserting the Bobbin

Guidance on inserting the bobbin for embroidery.

Attaching Embroidery Unit

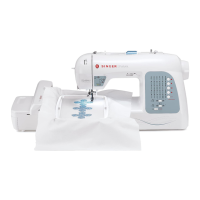
Instructions for attaching the embroidery unit.

Removing Embroidery Unit

Steps for safely removing the embroidery unit.

Securing Material in Embroidery Hoop

How to properly secure material in the embroidery hoop.

Using the Material and Stabilizer

Guidance on selecting and using materials and stabilizers.

Preparing the Machine Before Installing the Hoop

Steps to prepare the machine before hoop installation.

Attaching and Removing Embroidery Hoop

Instructions for attaching and removing the hoop.

Installation of Software

Guide to installing the FUTURA software on your PC.

Correct Start-Up Procedure When Embroidering

Steps for proper start-up protocol for embroidery.

Operation Switches When Embroidery Unit Is Attached

Operation Switches

Explanation of operation switches and indicators.

Thread Tension Control

How to adjust thread tension for embroidery.

Troubleshooting

Skipped Stitches and Thread Breakages Occur

Troubleshooting guide for skipped stitches and thread breaks.

Embroidery Pattern is Mis-aligned

Troubleshooting steps for mis-aligned embroidery patterns.

Helpful Information for Embroidering with Futura

If stitches are missing

Procedure for missing stitches due to thread breakage.

Computer screen says thread is broken...

Troubleshooting incorrect thread error messages.

When bobbin runs out of thread while sewing

Procedure for changing bobbin during sewing.

Renseignements d'Aide

1. S’il manque des points

Procedure for missing stitches due to thread breakage.

2. Le computadora indica con una luz parpadeante...

Troubleshooting incorrect thread error messages.

3. Quand il ne reste plus de fil dans la canette :

Procedure for changing bobbin during sewing.

Adjusting Top Thread Tension

Straight Stitching

How to adjust top thread tension for straight stitching.

Bobbin Tension

Information regarding bobbin tension adjustment.

Changing Presser Foot

Réglage de la Tension du Fil Supérieur

How to adjust top thread tension for straight stitching.

Tension de la Canette

Information regarding bobbin tension.

Remplacement du Pied Presseur

Steps for changing the presser foot.

Operation Switches

Needle Stop Position Selector Switch

Controls needle position when stopping sewing.

Reverse Stitch Button

Function for reverse stitching and tacking.

Start/Stop Switch

Switch for starting and stopping embroidery.

LED Indicator

Indicates machine status (ready, operating, error).

Touches de Fonctionnement

Témoin à Diode

Indicates machine status (ready, operating, error).

Touche de Position D’Arrêt D’Aiguille

Controls needle position when stopping sewing.

Touche Couture Arrière

Function for reverse stitching and tacking.

Touche Marche/Arrêt

Switch for starting and stopping embroidery.

Needle, Thread and Fabric Chart

Changing the needle

Steps for removing and inserting a needle.

Changement d’aiguille

Tableau des Aiguilles, Fiils et Tissus

Guide for selecting needles, threads, and fabrics.

Performance Checklist

General Problems

Troubleshooting common machine issues.

Stitching Problems

Troubleshooting issues related to stitches.

Thread Problems

Troubleshooting issues related to thread.

Vérification des Petits Problèmes de Couture

Cleaning Hook Area and Feed Dogs

Nettoyage des Griffes et du Crochet

Oiling Inside the Face Cover

Graissage dans la Plaque Frontale

Special Accessories

Satin Stitch Foot

Description and use of the satin stitch foot.

Twin Needle

Information about using a twin needle.

Threading the Twin Needle

Instructions for threading the twin needle.

Instructions for Magnifying Glass

Instruction pour Loupe

Helpful Messages

On number display

Displays helpful messages on the control panel.

On PC screen

Displays helpful messages on the PC screen.

Messages d’Aide

Les messages apparaissent sur l’écran numéraire...

Displays helpful messages on the control panel and PC.

Important Safety Instructions

DANGER--To reduce the risk of electric shock:

Instructions to reduce the risk of electric shock.

WARNING- To reduce the risk of burns, fire, electric shock, or injury to persons:

Safety precautions for use, including child supervision and proper handling.

Foot Control (USA & Canada only)

Specifies the compatible foot control models.

Polarized Plugs Caution (USA & Canada only)

Safety information regarding polarized plugs.

Save These Instructions

Instruction to keep the manual for future reference.

Related product manuals