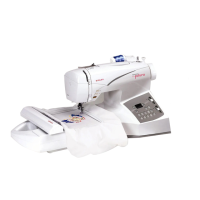
Do you have a question about the Singer FUTURA XL-400 and is the answer not in the manual?
| Built-in Embroidery Designs | 125 |
|---|---|
| USB Connectivity | Yes |
| Automatic Needle Threader | Yes |
| Embroidery Software Included | Yes |
| Built-in Stitches | 30 |
| Lettering Fonts | 5 |
| LCD Screen | Yes |
| Built-in Memory | Yes |
| Maximum Embroidery Area | 10" x 6" |
| Type | Embroidery and Sewing |
Critical safety warnings to prevent electric shock, emphasizing immediate unplugging after use and before cleaning.
General safety precautions to prevent fire, shock, and injury, including warnings about use by children and proper operation.
Safety advice regarding moving parts, emphasizing switching off and closing covers before operation or servicing.
Instruction to retain the safety guidelines for future reference.
Specifies the compatible foot control models for USA and Canada.
Safety information regarding polarized plugs and proper outlet usage.
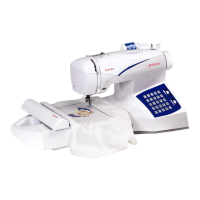
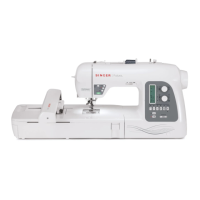
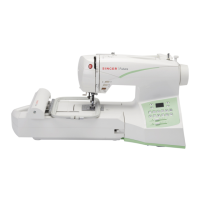
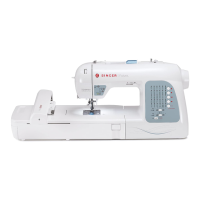
Diagram and list identifying all external parts of the sewing machine.
Lists all included accessories for sewing machine operation.
Lists all included accessories specific to embroidery functions.
Instructions for connecting the power cord and foot control.
Explanation of the power and light switch operation.
Details on using horizontal and vertical spool pins for thread.
Guidance on adjusting top thread tension for straight stitch quality.
Tension adjustments for zigzag, satin, decorative stitches, and buttonholes.
Information regarding the bobbin tension, noted as factory set.
Instructions on how to remove and attach presser feet.
Explanation of how to use buttons to select different stitch patterns.
Description of the machine's default stitch length and width settings.
Instructions for manually adjusting stitch length, width, and needle position.
Information on activating and using the twin needle sewing mode.
Function of the tacking stitch mode button for securing stitches.
Function of the button to select needle position (up or down).
Function of the button for sewing in reverse.
Function of the button to start and stop the sewing machine.
Explanation of the meaning of the LED indicator lights.
Function of the lever for controlling sewing speed.
A table providing quick reference for stitch settings.
Guidance on adjusting needle position for straight stitch sewing.
Tips for maintaining straight seams using needle plate guides.
Instructions for sewing zippers using the zipper foot.
Instructions for creating piping using the zipper foot.
Details on using the hand-look quilt stitch for topstitching and quilting.
How to adjust stitch width and length for zigzag stitches.
How pattern width changes with needle position.
Description and usage of the satin stitch for decorative purposes.
Recommended settings for blind stitch.
Recommended settings for the multi-stitch zigzag.
Description of the strong straight stretch stitch and its uses.
Description and decorative uses of the ric-rac stitch.
Instructions for creating the honeycomb stitch pattern.
Description of the overedge stitch for sportswear and edge finishing.
Description of the pin stitch for picot-like edges and applique.
Uses of the ladder stitch for drawn thread work and decoration.
Description of the blanket stitch for decorative and practical use.
Description of the crossed stitch for stretch fabrics and borders.
General information and examples of decorative stitches.
Illustrations and explanations of specific decorative stitch patterns.
Recommended settings for continuous decorative patterns.
Step-by-step guide for sewing buttons onto fabric.
Instructions for attaching and using the buttonhole foot.
Steps involved in creating buttonholes using the buttonhole foot.
Techniques for making buttonholes on difficult or multi-layered fabrics.
Essential steps before attaching the embroidery unit to the machine.
Instructions for attaching the specific embroidery presser foot.
Guidance on inserting the bobbin for embroidery, emphasizing a full bobbin.
Instructions for safely removing the embroidery unit from the machine.
Steps for preparing fabric by marking alignment lines for hoop placement.
Instructions for using the software to manage hoop and design placement.
Guidance on fabric types and their suitability for embroidery.
Information on types of stabilizers and their application in embroidery.
Specific techniques for embroidering fabric edges and narrow pieces.
Step-by-step guide for attaching and removing the embroidery hoop.
Essential steps for proper start-up to avoid transmission errors.
Function of the start/stop button during embroidery.
Function of the forward stitch button for advancing designs.
Function of the reverse stitch button for stepping back.
Meaning of the LED indicator lights during embroidery operation.
Recommended thread tension setting for embroidery.
Common problems related to skipped stitches and thread breakages.
Issue: Embroidery continues with tangled thread, potentially ruining the design.
Issue: Missing stabilizer on light or stretch fabrics causing puckering.
Issue: Fabric slack in hoop causing uneven feeding or misalignment.
Issue: Improperly attached hoop causing pattern misalignment.
Issue: Excessive upper thread tension causing fabric puckering.
Issue: Using incorrect needle size causing stitching problems.
Issue: Hoop movement is restricted, affecting embroidery.
Troubleshooting steps for missing stitches during embroidery.
Troubleshooting for false thread break error messages and indicators.
Instructions for preparing fabric with alignment lines for multi-hoop designs.
Steps for setting up multi-hoop designs within the Futura software.
Explanation of the feed dog control lever and its functions.
Instructions on converting the machine to free-arm sewing.
Troubleshooting guide for common stitching issues like skipped stitches.
Troubleshooting guide for common thread issues like breakage or tension.
Details and usage of the satin stitch foot.
Information about the twin needle and its capabilities.
Instructions for threading the twin needle.