00 01 02 03 04 05 06 07 08 09 10 11 12 13 14 15 16 17 18 19
20 21 22 23 24 25 26 27 28 29 30 31 32 33 34 35 36 37 38 39
40 41 42 43 44 45 46 47 48 49 50 51 52 53 54 55 56 57 58 59
60 61 62 63 64 65 66 67 68 69 70 71 72 73 74 75 76 77 78 79
80 81 82 83 84 85 86 87 88 89 90 91 92 93 94 95 96 97 98 99
3
1
5
6
9
87
4
11
10
2
12
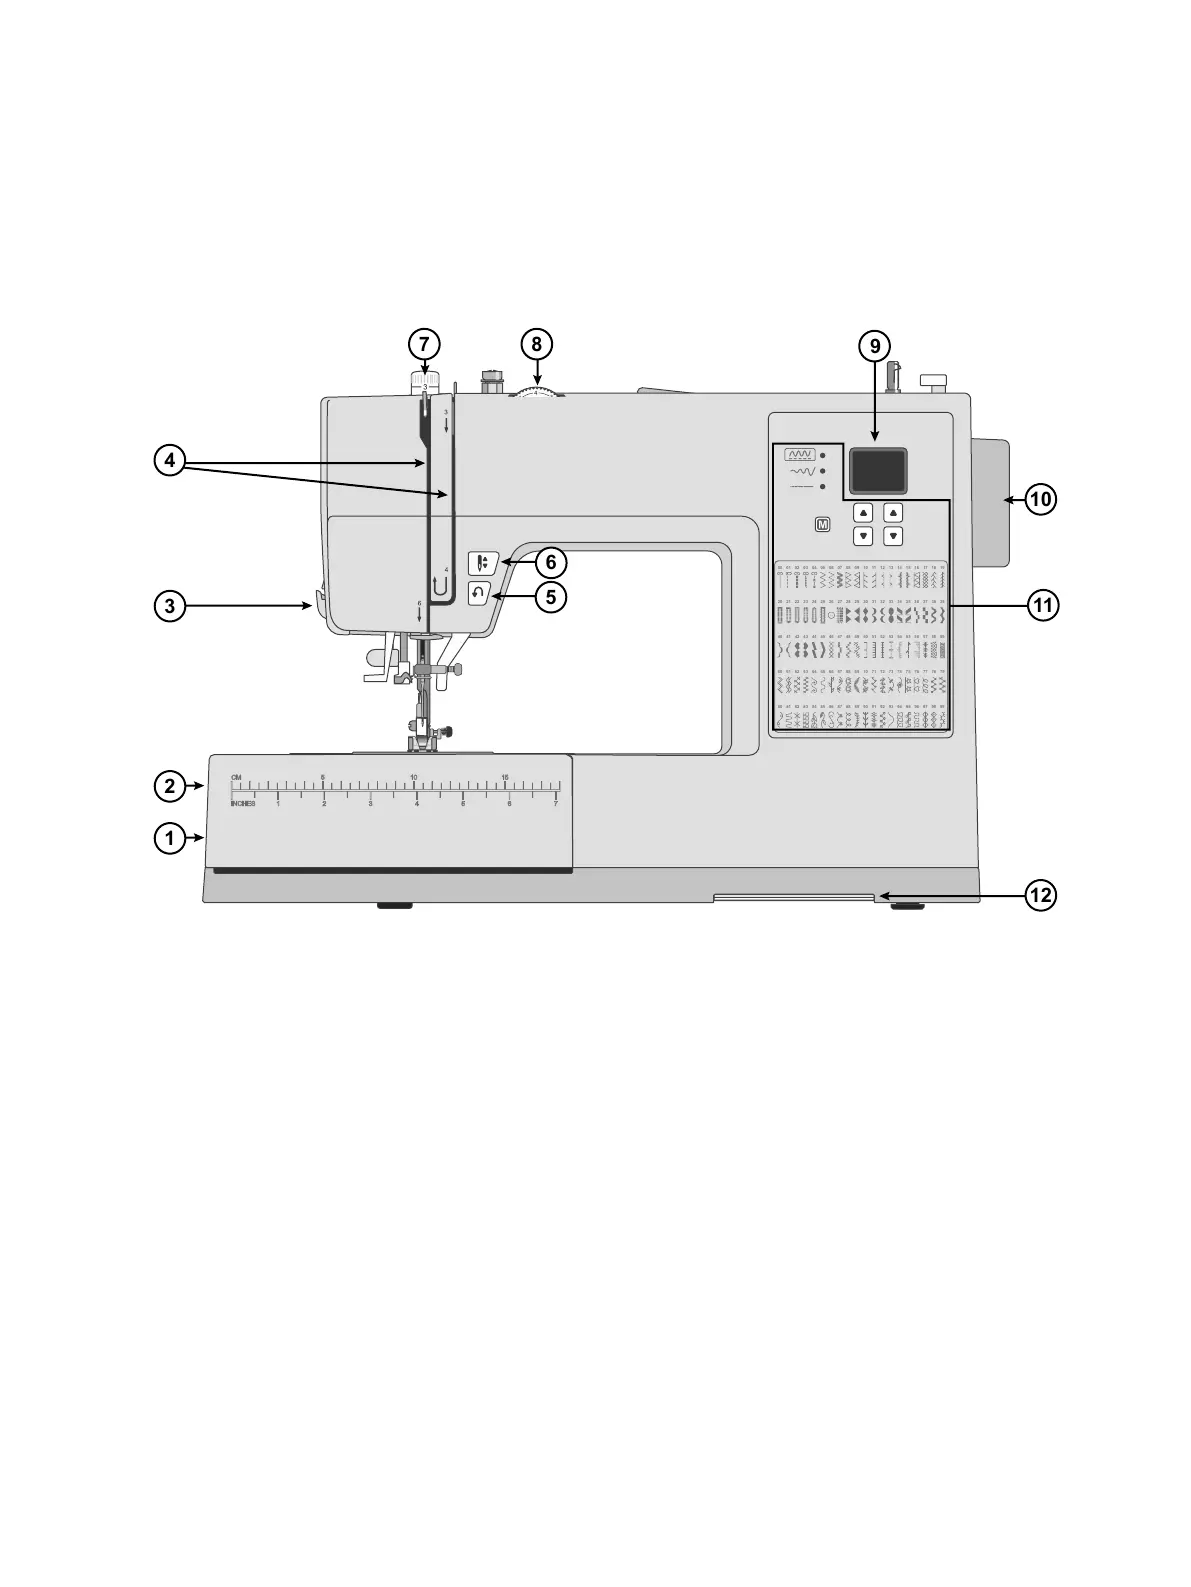
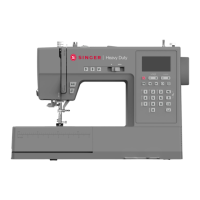
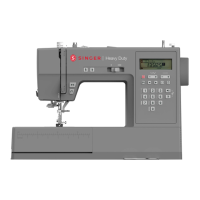
1. Feed Teeth Lever — move from side to side to engage or
disengage the feed teeth. Positioned at the back of the free
arm.
2. Accessory Tray / Free Arm — provides a flat surface
when sewing and allows storage for your accessories.
Remove the accessory tray to use the free arm which
makes it easier to sew, e.g., trouser hems and sleeves.
3. Thread Knife — for trimming thread ends at the end of
sewing.
4. Threading Slots — thread paths with tension discs and
take up lever.
5. Reverse Button — Press and hold to sew in reverse, e.g.,
when securing the beginning or ending of a seam.
6. Needle Up/Down Button — Press to raise and/or lower
the needle.
7. Presser Foot Pressure — controls the pressure the presser
foot exerts onto the fabric.
8. Thread Tension Dial — set the right tension for your
stitch, thread and fabric.
9. Display — Current stitch and settings are displayed.
10. Hand Wheel — used to manually control the movement of
the needle and the thread take-up lever.
11. Stitch Control Panel — Choose menu, select stitch and
adjust your stitch settings with these buttons (see page 16
—page 17).
12. Presser Foot Recommendation —Slide forward to see
what presser foot that is recommended for your selected
stitch.
Introduction – 1
English