19
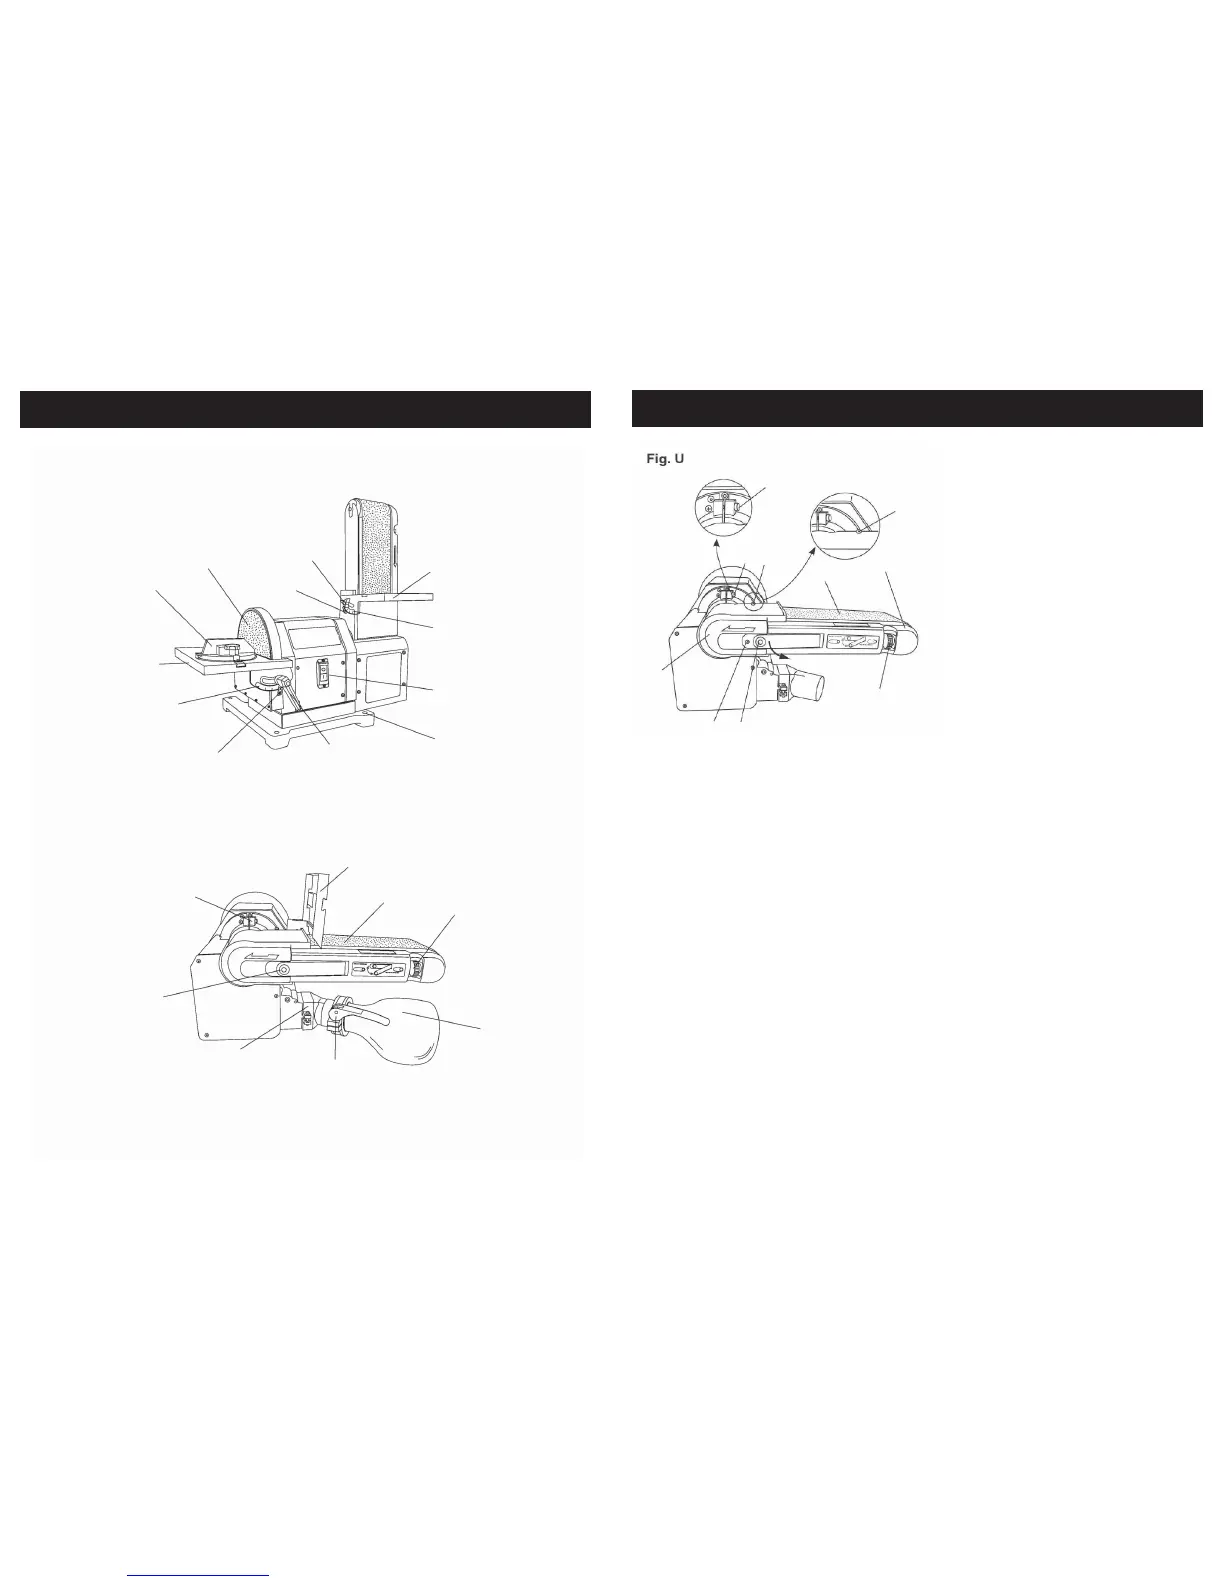
1.Remove the belt worktable.
2.Position the belt work support frame horizontally as shown in Fig. U; Loosen the inner
hex screw (1) using a 5 mm hex wrench, turning it anti-clockwise. Do not remove
the screw.
3.Remove the two screws (2, 3) using a screwdriver, and pull out the tension lever (4)
to release the tension of the sanding belt (5). Remove the belt exhaust cover (6).
4.Remove the sanding belt (5) from both sanding drums (7).
5.Place new sanding belt over the sanding drums. Make sure the belt arrow located
on the inside of the belt is pointed in the right direction.
6.Replace the belt exhaust cover (6) into position. Replace and tighten the two
screws (2, 3) and push the tension lever (4) in to apply belt tension.
7.Track the belt by following the instructions on page 15.
8.Plug in the sander and turn the switch ON and OFF quickly to check if the sanding
belt moves to either side. Re-adjust and fine-tune the tracking knob if necessary.
CARE AND MAINTENANCE….cont
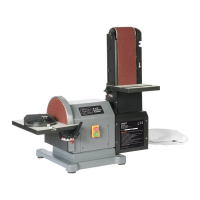
1
1
2
2
3
4
8
6
5
7