16
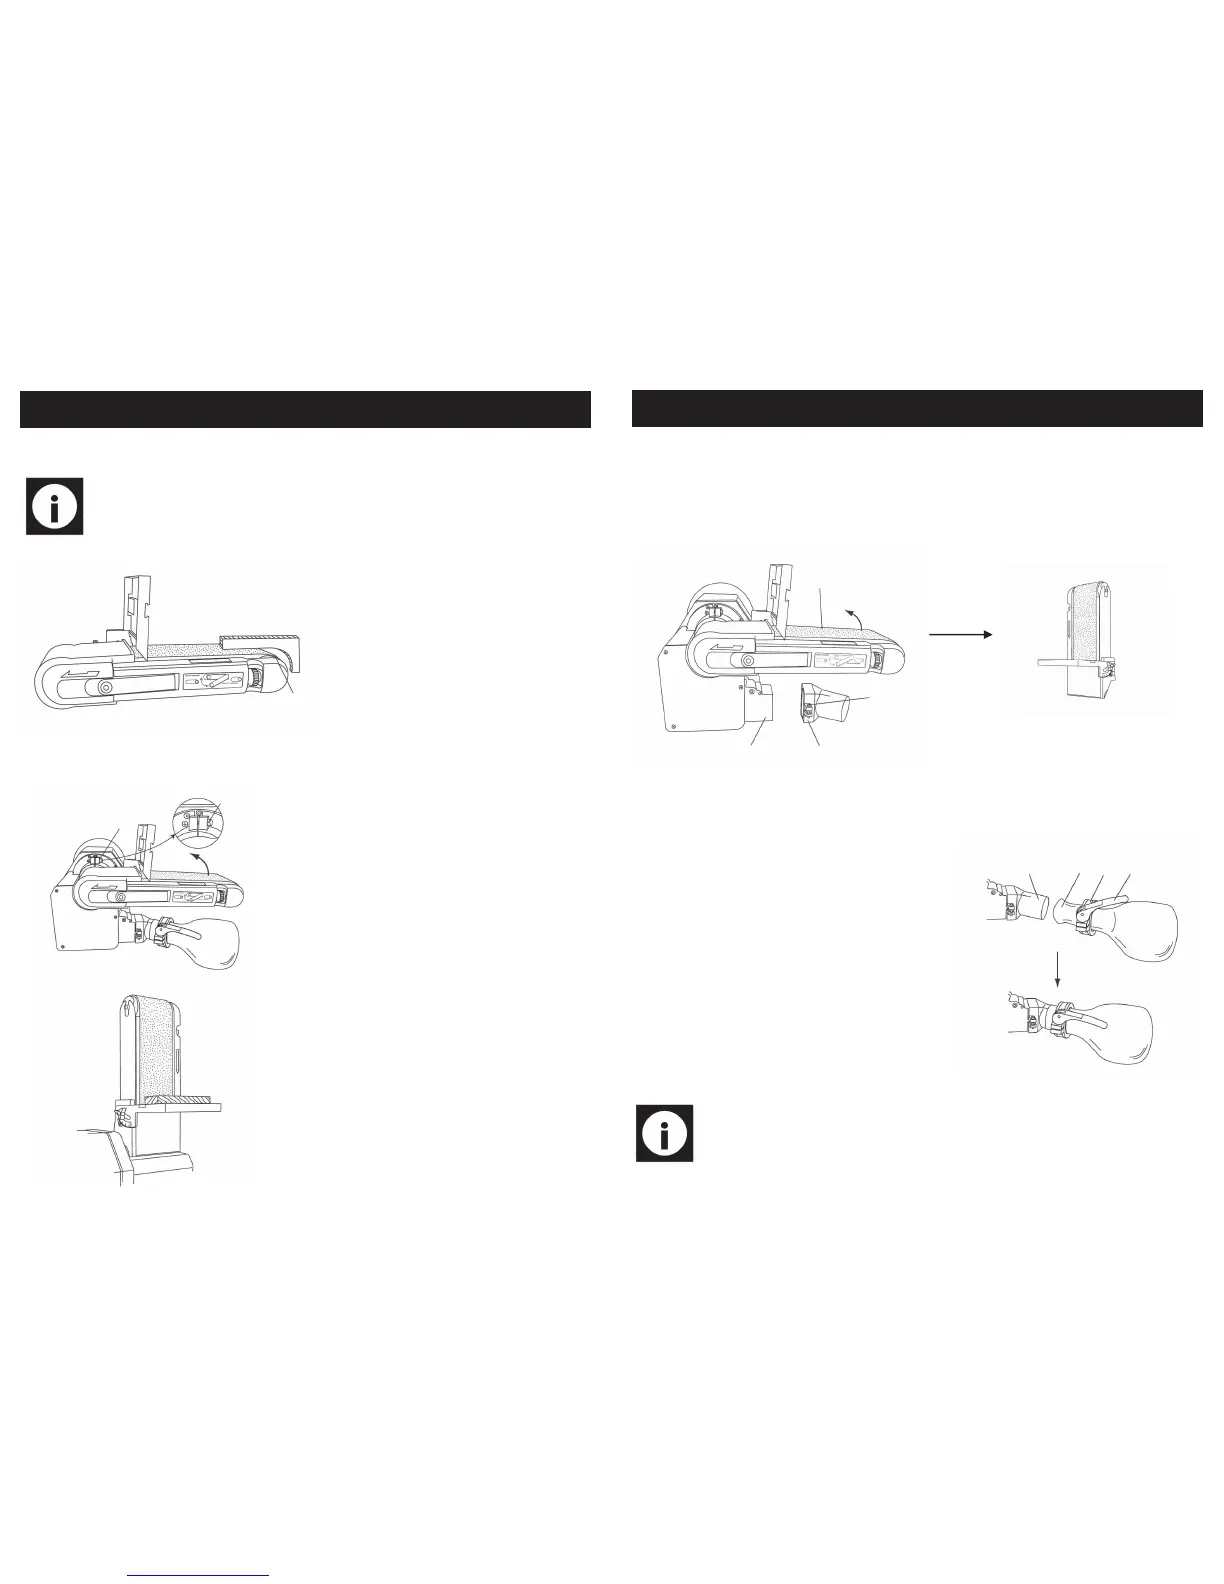
Sanding inside curves.
Note: To avoid injury, do not apply the end of the work piece to the idler
drum (1). This could cause the work piece to fly up or cause kickback.
1
With care, freehand sanding of inside
curves can be accomplished on the
idler drum (1). Never attempt to sand
the ends of a work piece on the idler
drum (1).
Belt vertical sanding.
1
1
The belt / disc sander can sand vertically as well
as horizontally. Depending on operator needs
and the work piece, the worktable can be used
with either the horizontal or vertical position.
1.Locate the 5 mm hex key.
2.Loosen the inner hex screw (1) by turning it anti
-clockwise.
3.Manually move the sanding bed into the verti-
cal or horizontal position, as required.
4.Re-tighten the inner hex screw (1) by turning it
clockwise.
OPERATING INSTRUCTIONS….cont
13
Attaching the extraction port.
1
2
3
4
1.Ensure that the belt bed (1) is in the vertical position (as shown on page12).
2.Loosen the hex screw (2) using a 5mm hex screw, attach the dust extraction port (3)
onto the dust port (4), and re-tighten the hex screw (2).
Note: It is extremely important that the dust bag is connected to the ma-
chine before any sanding operations are carried out, we also recommend
using a mask or respirator even when the dust bag is connected,
3
4
5
6
3.Insert the opening of the dust bag (4) into
bag clamp (5).
4.Attach the dust bag (4) onto the dust port
(3).
5.Tighten the bag clamp handle (7) clockwise
one or two full turns before locking, do not
over tighten.
Attaching the dust bag.
ASSEMBLEY INSTRUCTIONS….cont