14
1
2
3
4
5
6
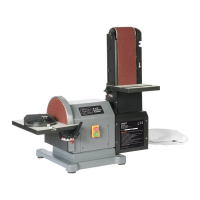
1.Using a combination square (1),
place one side of the square on the
disc worktable (2) with the other side
against the sanding disc (3) to check
to see if the disc worktable is at 90°.
2.If its not at 90°, loosen the lock han-
dles (4).
3.Adjust the table square with the disc
and re-tighten the lock handles (4).
4.Loosen the screw (5) and set the
scale pointer (6) to 0°.
Adjusting the table square with the disc.
Adjusting the table square with the belt.
1.Again, using the combination
square (1), place one side of the
square on to the belt worktable (2),
place the other side against the
sanding belt (3) and check to see if
its at 90°.
2.If its not at 90°, loosen the table lock
knob (4), adjust the table square to
the belt and re-tighten the lock
knob.
3.Loosen the screw (5) and set the
scale pointer (6) to 0°.
1
2
3
4
5
6
ADJUSTMENTS
15
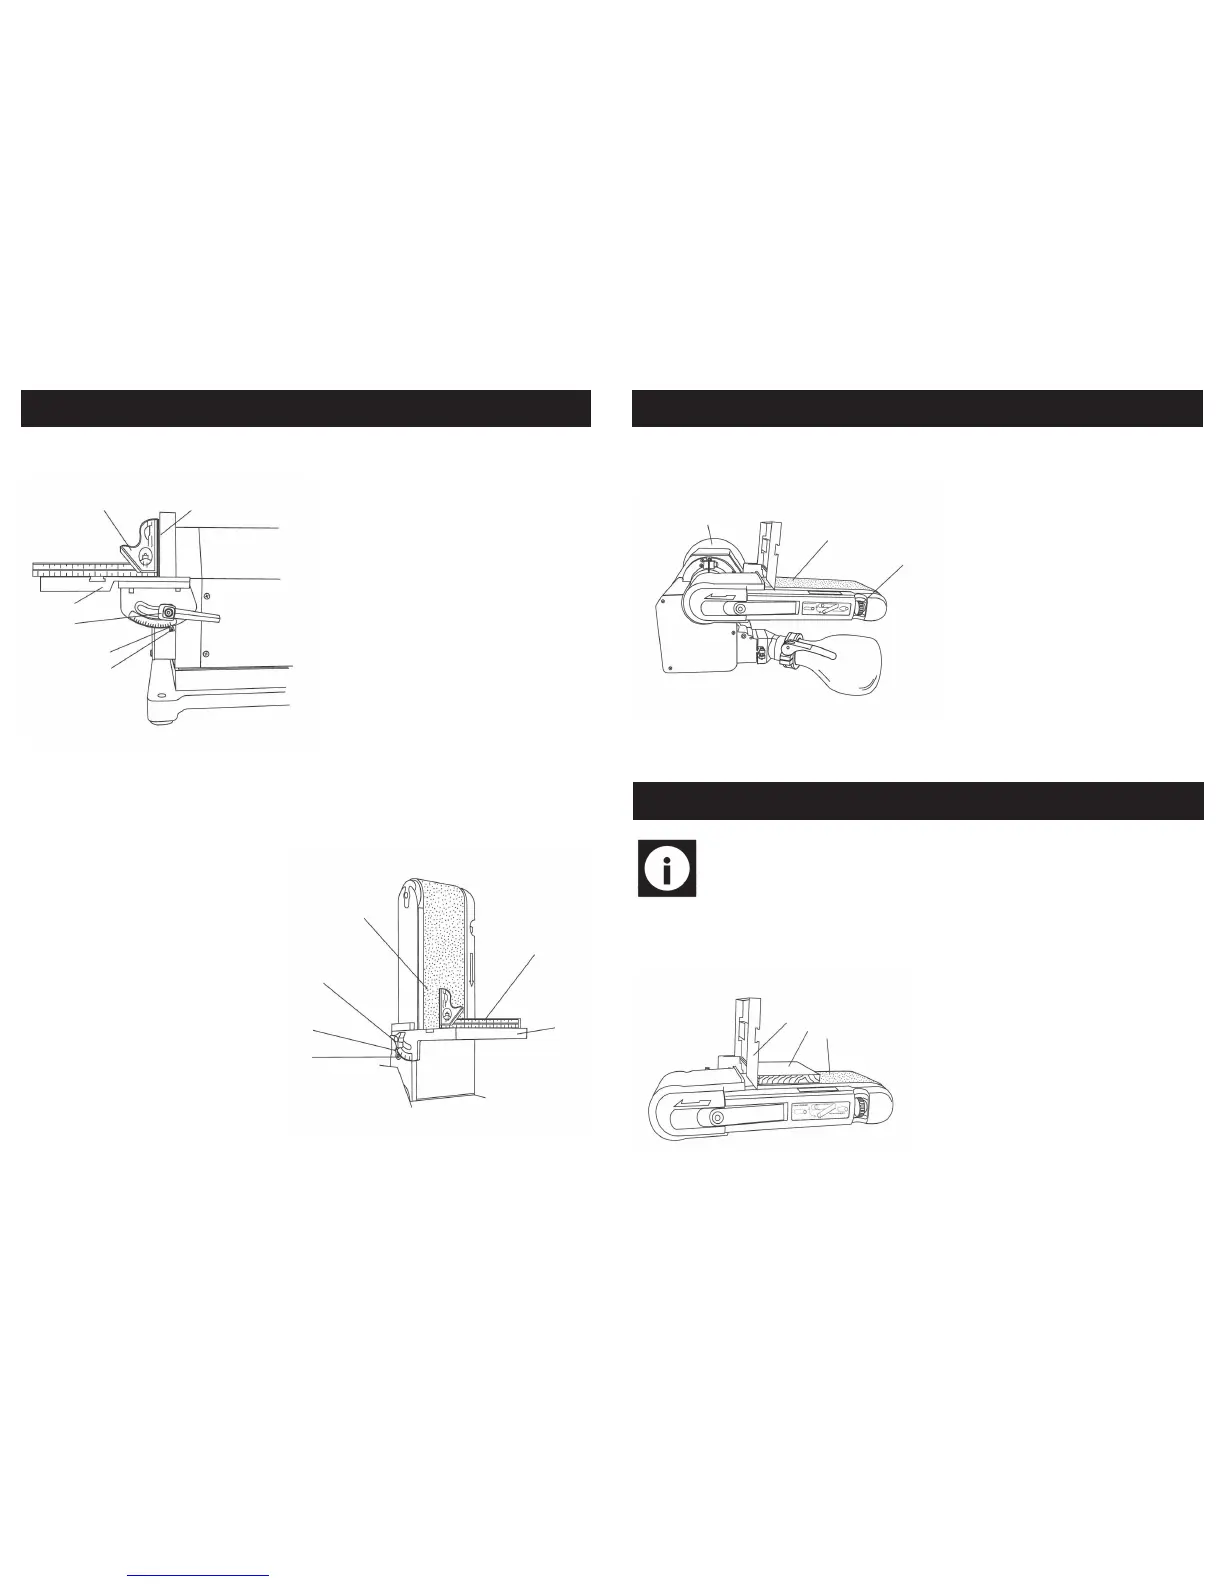
Note: This belt disc sander is designed only for sanding operations involving
wood or wood derived products. It is not suitable for use with any type of
metal - your warranty will be void if the sander is used for this purpose.
Tracking the belt.
1
2
3
1.Turn the sanding belt slowly by
hand, noting if the belt (1) tends to
slide off the bed, and to which side
front or back.
2.If it doesn't slide from side to side
then the belt is tracked correctly.
3.Viewed from the switch end, if the
sanding runs towards the disc (2),
slightly turn the tracking knob (3)
clockwise.
4.Viewed from the switch end, if the
sanding belt runs away from the
disc, slightly turn the tracking knob
(3) anti-clockwise.
5.Readjust tracking knob another 1/4
turn, as necessary.
OPERATING INSTRUCTIONS
Belt horizontal sanding.
1
2
3
When using the sanding belt in the horizon-
tal position, to perform surface or edge
sanding, the belt worktable (1) must always
be used. Always hold the work piece (2)
firmly, keeping your fingers away from the
sanding belt . Always keep the end of the
work piece against the belt worktable (1)
and move the work evenly across the
sanding belt. Apply only enough pressure
to allow the sanding belt to remove mate-
rial. Use extra caution when sanding very
thin pieces.
ADJUSTMENTS….cont
 Loading...