OPERATING INSTRUCTIONS....cont
GETTING TO KNOW YOUR STARTER / CHARGER….cont
2
3
5
6
9
8
11
7
15
10
4
1
12
1
14 13
1617
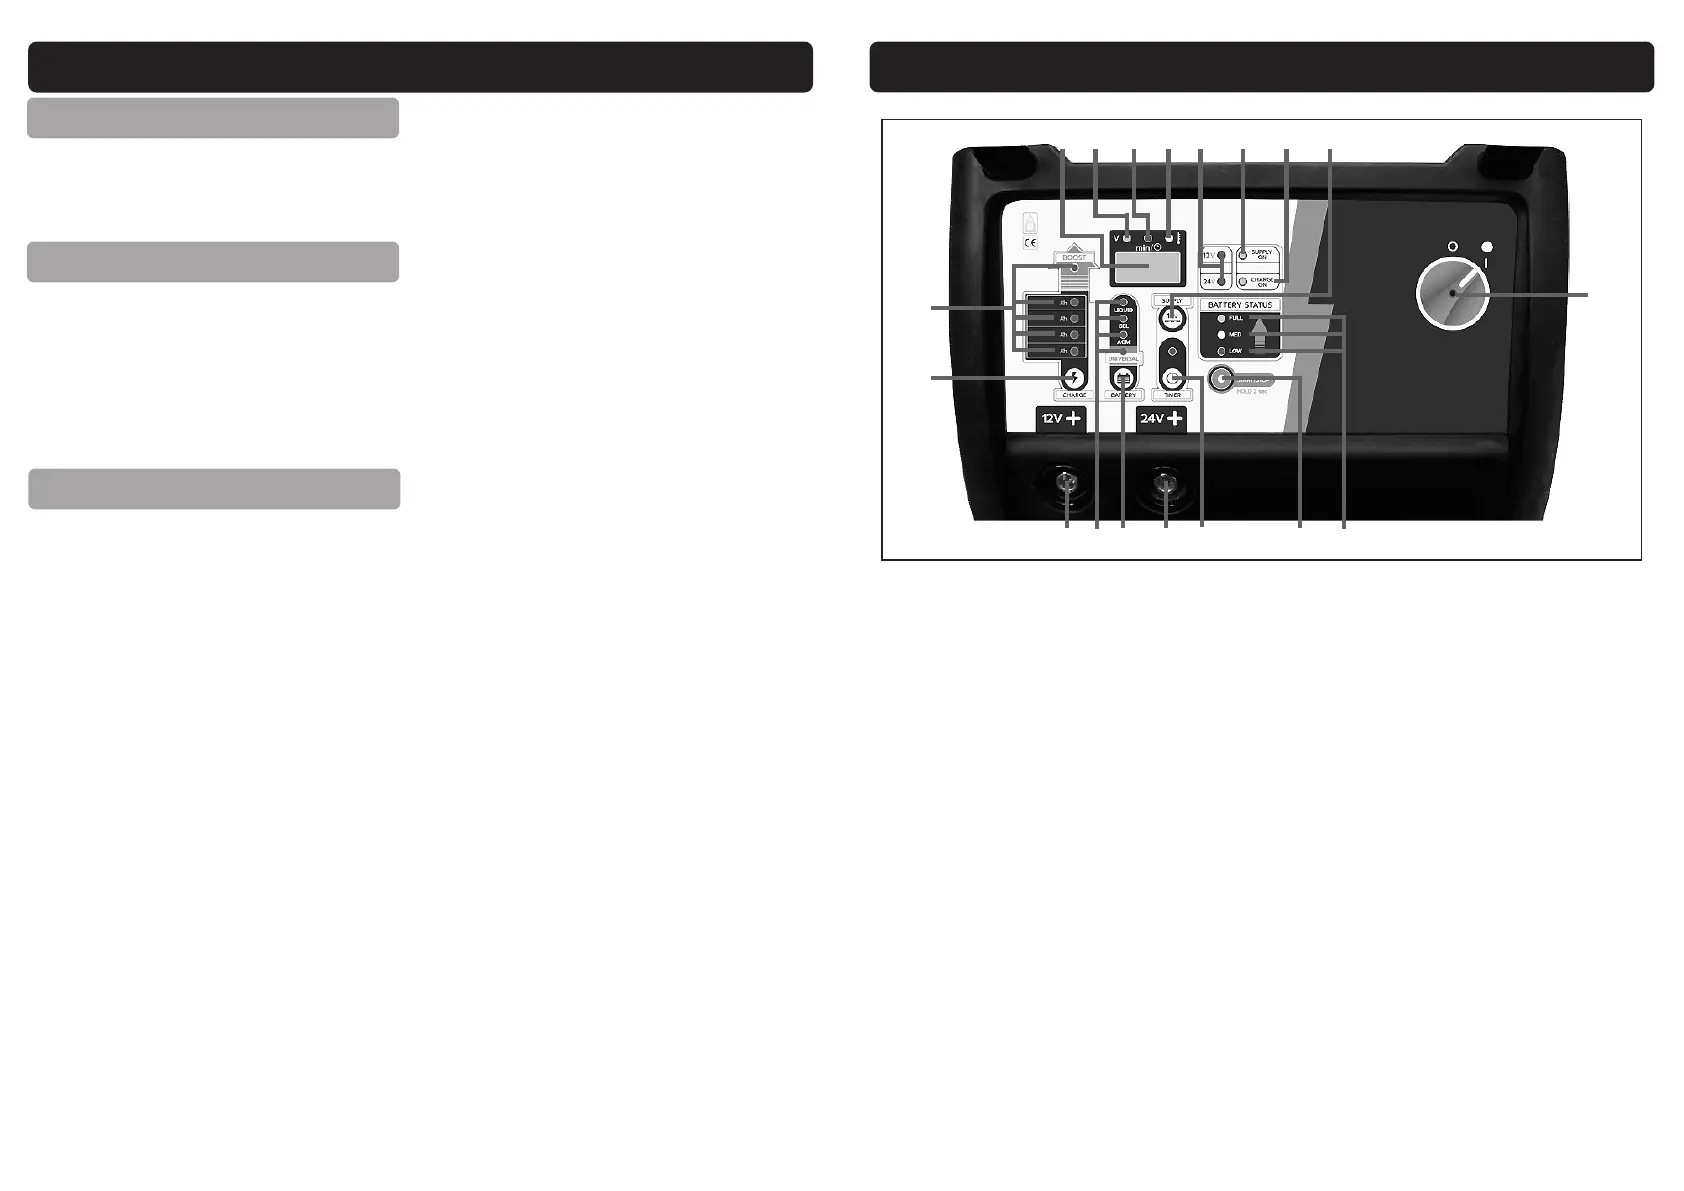
Figure 1 - Control Panel
1. 12V & 24V Positive Sockets
2. ON/OFF Mains Switch
3. Charge / Boost Start Selector Switch
4. Charging Level LED / Boost LED
5. Display:-
Charge: Battery Voltage Display Charge with
Timer: Battery Voltage Display & Charging
Time
Setting: Battery Voltage Display & Charger
Timer
Alarms / Status Display
6. Charge Voltage LEDs - Charge voltage status
of the battery
7. Battery Status LEDs - Charge status of the
battery.
8. Battery Type Selector Key:
Universal
AGM
GEL
Wet Cell
9. Battery Type LEDs - Battery Type selected
10. Timer key to set the charging time
11. Process Start / Stop key
12. Charge function ON LED.
13. Supply function key
14. Supply function LED
15. Battery Voltage LED
16. Charging time LED
17. Over Temperature LED
BATTERY SIZE (Ah)
Using key 3, select the charge step according to the capacity of the battery you
are going to charge (read the value on the battery).
For a rapid charge you may select a step one level higher, but it is recommended
to set also the timer.
BATTERY TYPE
Using key 8, select which kind of battery you want to charge. This battery charger can be used
with normal Lead batteries (sealed or unsealed), AGM or GEL batteries.
When selecting the battery type be sure of which kind of battery you are charging.
In the event that you are not sure of the battery type, select Universal battery.
LED 9 corresponding to the selected battery type will light.
TIMER
If necessary you may set the charge time using key 10.
Press key 10, LED 16 will light.
Press the key again to set the time: one press = 20min (maximum setting is 600min)
To reset the timer hold the timer key 10 until the LED 16 goes out.
NOTE: it is recommended to set a max 80 minutes charge time when performing a rapid
charge.
Check that you have selected the correct parameters.
HOLD KEY 11 FOR 2 SECONDS TO START THE CHARGE CYCLE.
LED 12 will light.
The charger will start to charge the battery at the correct charge current
according to the selected battery capacity.
Battery status can be checked at LEDs 7.
Standard Charge:
The display will show the battery voltage and LED 15 will stay ON; this mode will
perform a full charge (at the set current) until the battery is fully charged.
The charge current will then decrease to a lower fixed current.
The display will show the letters "FLT".
In float mode the charger will continuously check the voltage at the battery
terminals and will automatically adjust the charge current.
To STOP the charge manually hold key 11 for 2 seconds. "Charge on" LED 12 will go out.
 Loading...