ASSEMBLY INSTRUCTIONS
The starter / charger has very little assembly as described below:
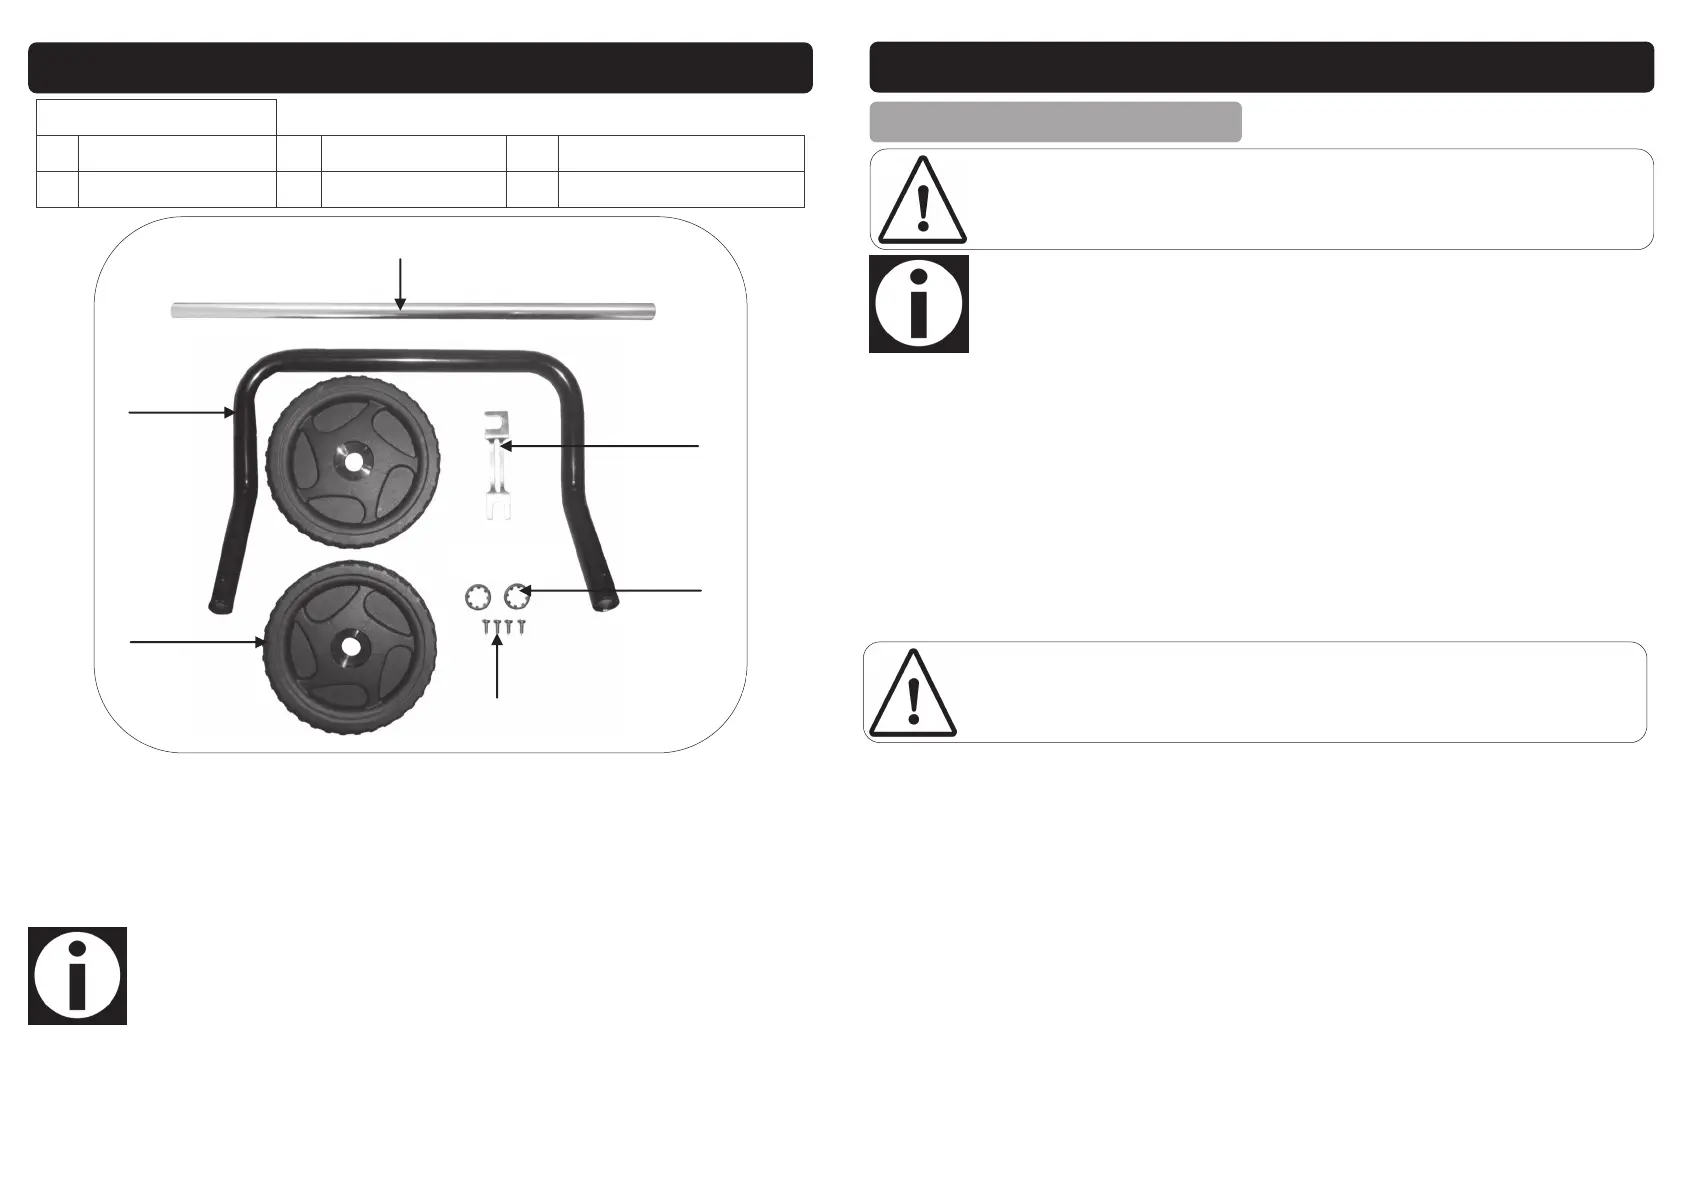
1.Slide the handle down the two holes located on top of the charger.
2.Use the four screws to secure the handle to the charger.
3.Attach one wheel clip to the end of the axle, then slide one wheel down the axle,
against the wheel clip.
4.Locate the two holes at the bottom of the charger casing and slide the axle through
both.
5.Attach the second wheel to the opposite end of the axle and secure in place with
the second wheel clip.
Items supplied.
A. Axle. B. Handle. C. Wheel (x 2).
D. Handle Screws (x 4). E. Wheel Clip (x 2). F. Spare Fuse.
Note: Use a similarly sized socket, or similar to tap the wheel clips in place.
OPERATING INSTRUCTIONS
CHARGING A BATTERY
CAUTION: Check the battery to be charged, ensuring that the case is in good
condition, with no leaks and that the terminals are not oxidized.
CAUTION: Check with the manufacturer of the vehicle that the battery can be
charged whilst still connected to avoid any unwanted damage to the
vehicle.
Note: The charging process will only activate if the battery charger is connected to
a battery and the battery has the following minimum voltage
values: 12V batteries: more than 7.5V, 24V batteries: more than 15V.
a) Remove the battery caps to allow any excess gas to escape and to prevent the case
bursting (where applicable).
b) Check battery liquid and top up if required (where applicable).
c) Connect the positive (+) (red) lead to the correct voltage terminal on the starter /
charger depending on the voltage of the battery to be charged (12V or 24V).
d) Clamp the positive (+) (red) clip of charger to the positive (+) terminal of battery and
negative (-) (black) clip to the negative (-) terminal of the battery and confirm that
connection is correct.
e) After the charger clips are attached, slightly rotate them so as to remove any dirt or
oxidization, this will ensure a better contact.
Connect the battery charger to the mains.
Check that the socket is equipped with protection fuses or circuit breakers. Switch ON the
battery charger using the mains switch 2.
The display 5 will view the battery voltage.
The LED 6 corresponding to the detected charge voltage will light on.
If you have made the wrong connection, the display 5 will view the wording "BAT" and both LEDs
6 will blink.
The LED 7 corresponding to the status of the battery will light.
Before starting the charge you have to set up the charging parameters:
 Loading...