Do you have a question about the Sirona ORTHOPHOS XG 3Dready and is the answer not in the manual?
Guidance on safety precautions and warnings for handling the X-ray unit and performing repair work.
Important information and procedures for performing software updates on ORTHOPHOS XG units.
Explanation of error codes (Ex yy zz) indicating system faults and required actions.
Detailed table of error codes, descriptions, actions required, and corresponding page numbers.
Step-by-step guide for checking the CAN bus connection, including ohmic resistance and jumper positions.
Procedure for checking board status, visual inspection, LED indicators, and voltage measurements.
Procedure for checking and addressing high device leakage current, involving checking cable shields and replacing boards.
Troubleshooting steps for X-RAY control signal path errors, including messages with and without remote control.
Troubleshooting steps for X-RAY control signal path errors in newer hardware versions, with and without remote control.
Important safety and procedural notes before starting system adjustment routines in SIDEXIS XG.
Overview of the DIAPHRAGM/SYSTEM ADJUSTMENT menu, its submenus, and password protection.
Procedures for adjusting the panoramic X-ray unit components like phantom, diaphragm, sensor, and filter.
Procedures for adjusting the cephalometer, including functional tests, phantom usage, and diaphragm/beam alignment.
Steps for adjusting the TSA sensor using SIDEXIS, including image acquisition and saving values.
Guide to navigating the Service menu on the Easypad and Multipad interfaces.
Steps for selecting a service routine and test step, including security access confirmation.
Routines for general X-ray tube assembly service, including fan and temperature tests.
Steps for checking software versions, entering/confirming unit serial numbers, and initializing function activation.
Routines for unit configuration, including hardware version, language, remote control, and system class.
Routines for height adjustment service, including travel limits, sensor checks, and occlusal bite block settings.
Procedures for servicing the digital cephalometer, including center position calibration and shadowing limits.
Essential safety checks including protective ground wire and leakage current tests before and after repair.
Detailed steps for replacing the height adjustment motor/spindle, including moving the slide and removing boards.
Procedure for replacing the motor-driven diaphragm unit.
Detailed steps for replacing the X-ray tube assembly, including loosening screws, detaching cables, and installing the new assembly.
Essential precautions for replacing circuit boards, including ESD measures and software compatibility.
Step-by-step guide for replacing board DX1, including software compatibility and system adjustments.
Post-replacement measures including software updates, system adjustment, and acceptance tests.
Procedure for checking protective ground wire resistance and related components.
Steps for checking unit leakage current using an automatic tester or manual methods.
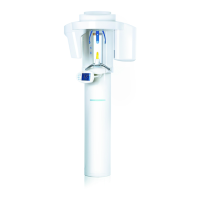
| Model | ORTHOPHOS XG 3Dready |
|---|---|
| Voltage Range | 60 - 90 kV |
| Current Range | 3 - 16 mA |
| Focal Spot Size | 0.5 mm |
| Scan Time | 14 seconds |
| Software | SIDEXIS XG |
| Manufacturer | Sirona |
| Imaging Modality | Cone Beam Computed Tomography (CBCT) |
| Field of View | 8 cm x 8 cm (Cylindrical) |
| Image Receptor | Digital Sensor |
| Detector Type | Flat Panel Detector |
| X-ray Generator | High-frequency generator |
| Dimensions | Varies depending on configuration |
| Power Requirements | 230 V, 50/60 Hz |