10
• Battery protection
The tool is suddenly being switched o or prevented from
being switched on, when
- the load is too high --> remove load and restart
- the battery temperature is not within the allowable
operating temperature range of -20 to +50°C --> 2
levels of the battery level indicator start ashing when
pressing button N
8
c; wait until battery has returned
within the allowable operating temperature range
- the battery is nearly empty (to protect against
deep discharge) --> a low battery level or ashing low
battery level
8
b is shown by the battery level indicator
when pressing button N; charge battery
!
damaged
• Changing direction of rotation
9
- when not properly set in left/right position, switch A
2
cannot be activated
! change direction of rotation only when tool is at a
complete standstill
• Changing bits
q
! do not use bits with a damaged shank
• Torque control (VariTorque)
w
- output torque will increase as clutch ring B is rotated
from 1 to 17
- when turning in a screw, rst try VariTorque position 1
and increase until the desired depth has been reached
- position F will lock up the clutch to permit (non-impact)
drilling or driving heavy-duty work
- position D will lock up the clutch to permit impact
drilling only
! ensure that gear selector B is in position 2 when
function selector C is in impact drilling position
! do not use impact drilling position D for drilling in
wood, metal, ceramic and plastic to prevent the
drill/screw bit from being damaged
• Mechanical gear selection
e
- set selector G to desired speed
! actuate the gear selector while tool is running
slowly
1
- low speed
- high torque
- for screwdriving and drilling large diameters
- for tapping thread
2
- high speed
- lower torque
- for impact drilling
- for drilling small diameters
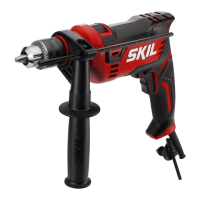
• Holding and guiding the tool
t
! while working, always hold the tool at the grey-
coloured grip area(s)
- keep ventilation slots J
2
uncovered
- do not apply too much pressure on the tool; let the tool
do the work for you
MAINTENANCE / SERVICE
• This tool is not intended for professional use
• Always keep tool clean (especially ventilation slots H
2
)
! remove battery from tool before cleaning
• Secure the workpiece (a workpiece clamped with
clamping devices or in a vice is held more securely than
by hand)
•
or call the local utility company for assistance
(contact with electric lines can lead to re or electrical
shock; damaging a gas line can result in an explosion;
penetrating a water pipe will cause property damage or
an electrical shock)
DURING USE
• In case of electrical or mechanical malfunction,
immediately switch o the tool or unplug charger from
power source
BATTERIES
• The battery supplied is partially charged (to ensure
full capacity of the battery, completely charge the battery
in the battery charger before using your power tool for the
rst time)
• Only use the following batteries and chargers with
this tool
- SKIL battery: BR1*31****
- SKIL charger: CR1*31****
• Do not use the battery when damaged; it should be
replaced
• Do not disassemble the battery
• Do not expose tool/battery to rain
• Permitted ambient temperature (tool/charger/battery):
- when charging 4...40°C
- during operation –20...+50°C
- during storage –20...+50°C
EXPLANATION OF SYMBOLS ON TOOL/BATTERY
3
Read the instruction manual before use
4
Batteries may explode when disposed of in re, so do not
burn battery for any reason
5
Store tool/charger/battery in locations where temperature
will not exceed 50°C
6
Do not dispose of electric tools and batteries together
with household waste material
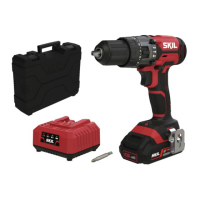
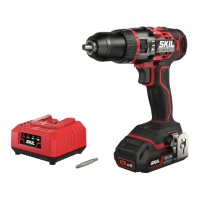
USE
• Combined switch for on/o and speed control A
2
- control the speed steplessly from zero to maximum by
putting less or more pressure on the trigger
• Charging battery
! read the safety warnings and instructions
provided with the charger
• Removing/installing the battery
2
• Attaching belt clip
7
- attach the belt clip L to the drill with the supplied screw.
• Battery level indicator
8
- press the battery level indicator button N to show the
current battery level
8
a
! when the lowest level of the battery indicator
8
b, the
battery is empty
!
after pressing button N
8
c, the battery is not
within the allowable operating temperature range
• LED-light M
r
LED-light M automatically lights on when activating
switch A
!
protection is activated (see below)
 Loading...