4
PART I : INTRODUCTION
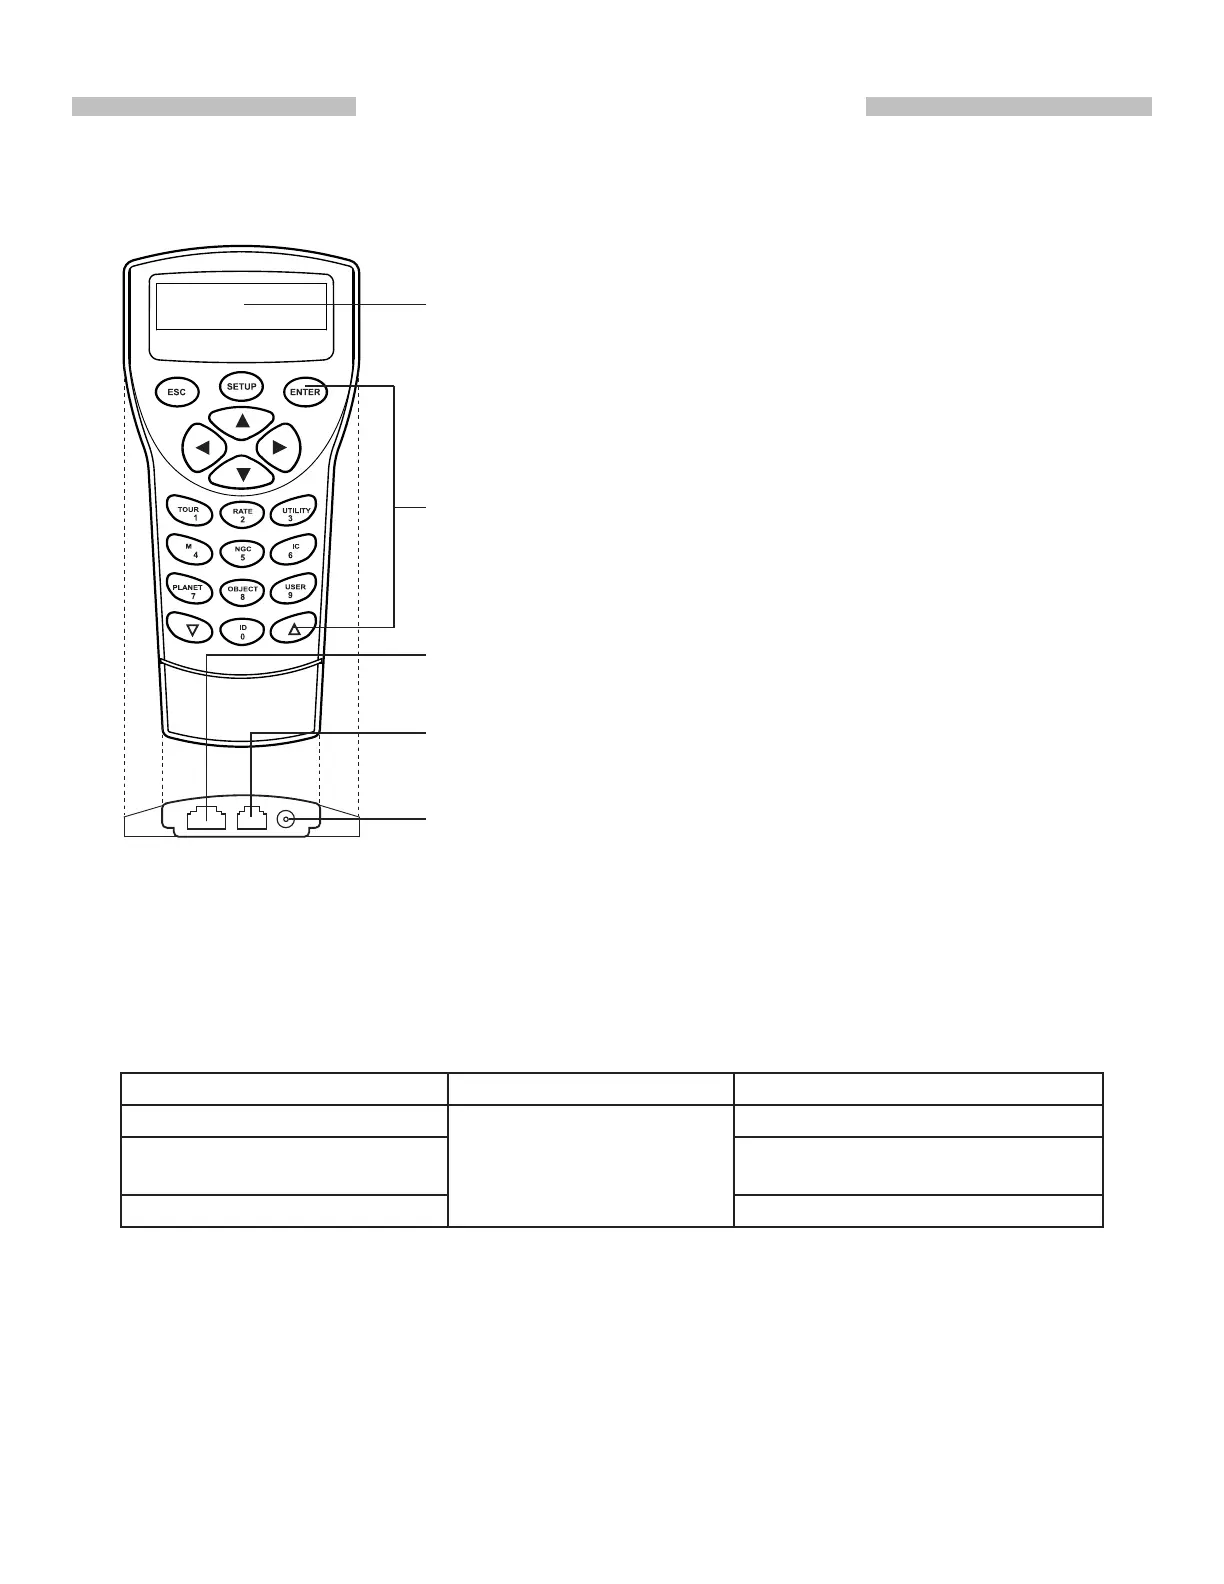
Mount Port: Connects to a Sky-Watcher telescope mount. The hand
controller can get power supply from the mount via this port.
Multi-Purpose Port: Connects to an external device such as a com-
puter, a GPS module, a camera, etc.
LCD Display Screen: It can display two lines of text, 16 characters
per line. The contrast and the brightness of the red backlight are ad-
justable.
Power Port: Connects to a power supply for standalone (not connect-
ed to a telescope mount) use of the hand controller. It accepts a plug
with a 5.5mm O.D. and a 2.0mm I.D.
Buttons: ESC, SETUP, ENTER, directional, number/shortcut keys,
and scroll keys.
A SynScan hand controller and its interfaces are shown in Fig. 1.1
1.1 Outline and Interface
1.2 Connecting to a Telescope Mount
Fig. 1.1
Connect the 8-pin (RJ-45) “Mount” port of the hand controller to the “Hand Control” port on a
Sky-Watcher mount using an appropriate cable. The table below lists the “Hand Control” ports
on different Sky-Watcher mounts.
Mount Model Hand Controller Port “Hand Control” Port on Mount
EQ6 Pro
8-pin RJ-45
D-sub 9 Male
HEQ5 Pro, EQ5 Pro, EQ3 Pro,
AZ-EQ6 GT, EQ8
8-pin RJ-45
All Alt-azimuth mounts 6-pin RJ-12
1.3 Slew the Mount with the Direction Keys
In many situations, users need to slew the mount at different speeds with the directional keys.
Here are the guides for this operation: