- 7 -- 6 -
Safety Precautions
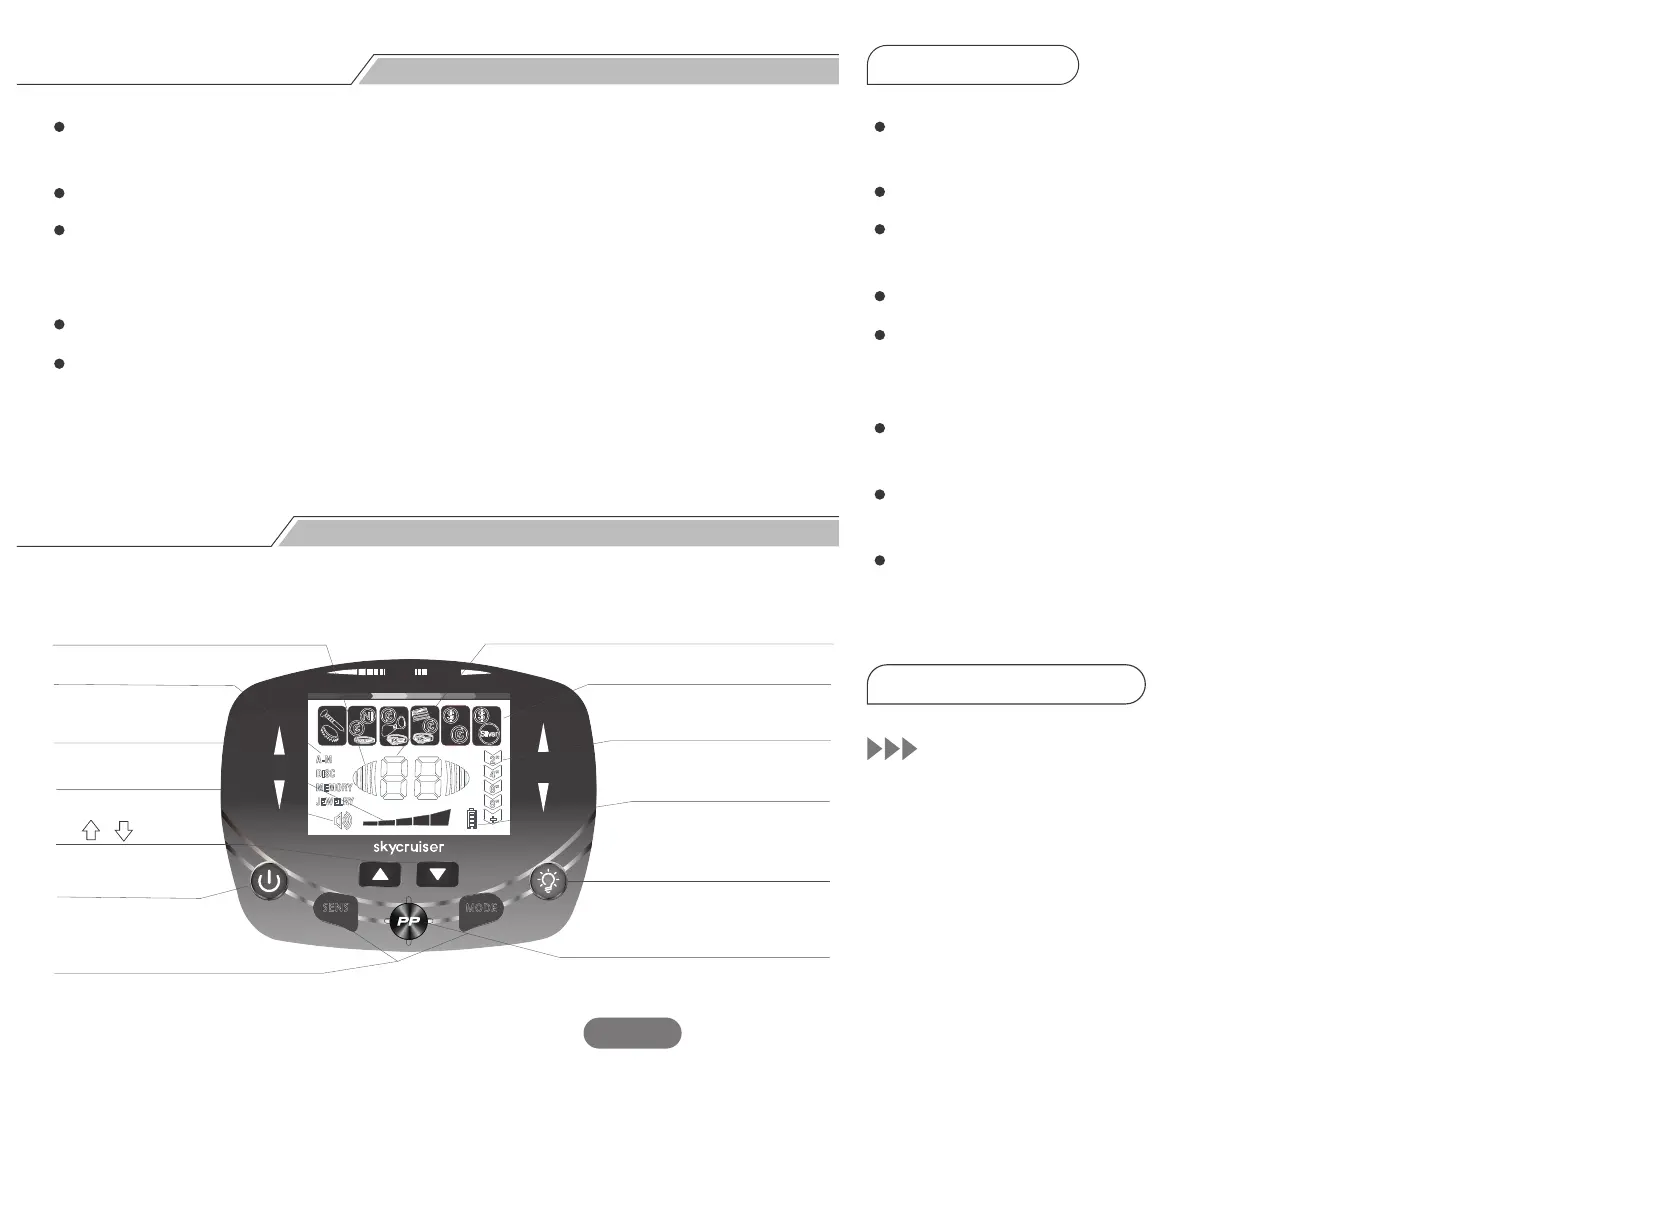
Control Panel
In areas with heavy traffic, do not wear earphones in case of any traffic
accidents.
Always obtain permission before detecting metals at any private sites.
Keep away from the region where there may bury the electrical line, cable
line or pipeline, in particular, the pipes that are full of flammable gases and
liquids.
Do not detect in the military area where there may bury bombs or explosives.
When digging out the target, use the reasonable method, and do not
destroy the vegetation. Leave the land and vegetation as it was, and fill in
the holes after the excavation.
Signal Strength Cursor: Indicates the signal strength when in the
PINPOINT mode.
Mode Icon: Indicates the operation mode; divided into four kinds.
Sens Cursor: Divided into five grades. The sensitivity is of the highest
value when all the indicator lights up.
Vol Cursor: Indicates the volume.
Digital ID Cursor/P-P Cursor: Two digits of 01 to 99 accurately indicate
the metal. It can also display the P-P icon. When it displays the P-P icon, it
means it enters the PINPOINT mode.
Target ID Cursor: Divided into 6 categories; used to indicate the target
metals.
Coin Depth Cursor: Divided into five grades. It indicates the approximate
depth of 25¢ silver coin in the neutral soil.
Battery Power Cursor: Divided into four bars; indicates the battery
power. When the battery power cursor is flashing, it means the battery
should be replaced.
Power Button: Switch the detector on/off.
Fig. 7
COIN
DEPTH
FERROUS
NON - FERROUS
GOLD SI LVER
40 50 60 70 80 90
SEN S
MO D E
MODE
1.Signal Strength Cursor
8. Digital ID Cursor/P-P Cursor
9. Target ID Cursor
10. Coin Depth Cursor
11. Battery Power Cursor
12. Vol(Backlight) Key
13. P-P Key
2. Mode Icon
3. Sens Cursor
4. Vol Cursor
5.( , ) Key
6. ON/OFF
7. Mode-Sens Key
1. LCD Display
2. Button Definition
POWER Button:
1.