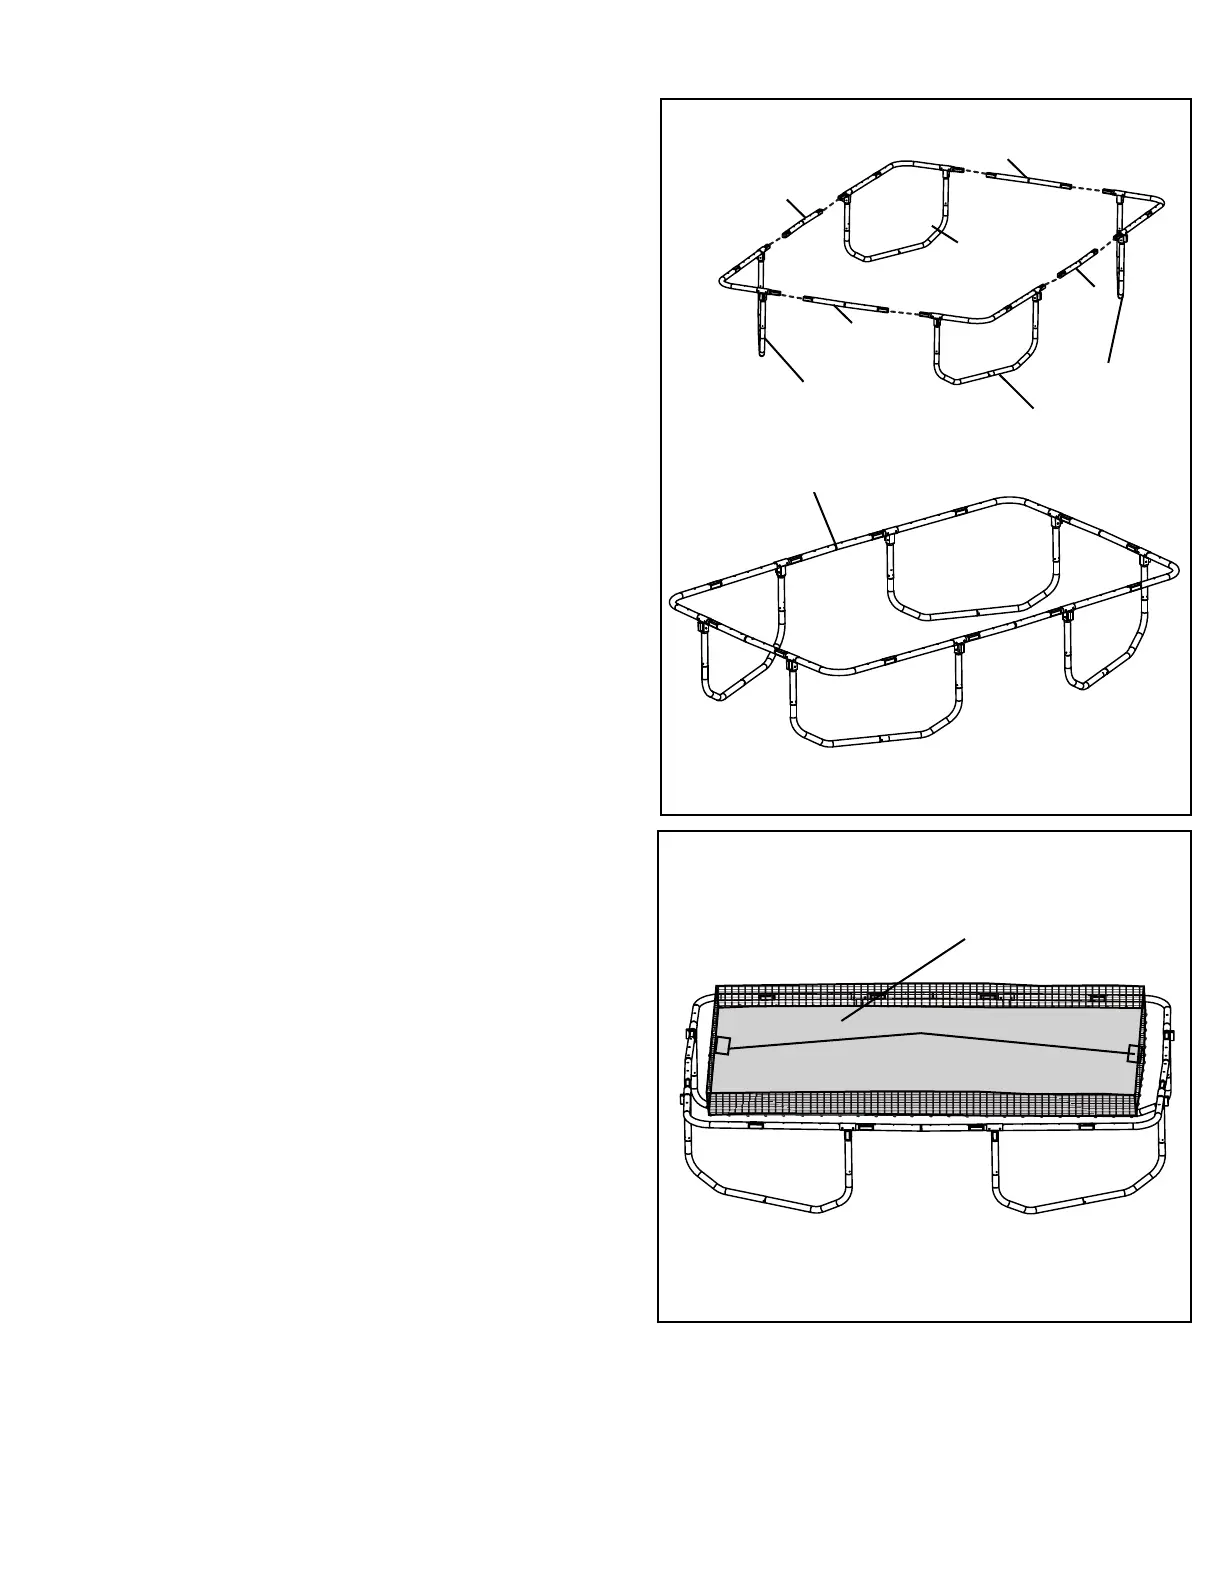
6,
Note:This step requires two persons
.
connect the
four
assembled leg sections with the
middle tube (14) as shown
When this step is completed, the frame will be fully
assembled and freestanding.
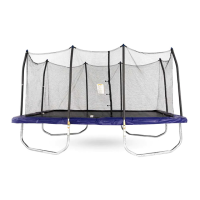
7.
Lay the jump mat (15) on the ground inside the assembled
frame. Make sure that the two warning decals are on
top of the Mat
.
If the enclosure was pre-installed on the Bed (Mat)
at the factory. Inspect the attachments of the enclosure
Netting to the trampoline mat (bed). Make certain each of
the V-rings on the trampoline mat (bed) is threaded
through the corresponding “buttonhole” in the Netting.
Put enclosure mesh
(7) on the jump mat.
Insert one of the V-rings on the jump mat into one of the
"buttonhole" incisions on the bottom edge of the enclosure
mesh. Continue this process to the other V-rings one by one,
until all the V-rings are inserted though the “buttonholes”
of the enclosure mesh. Make certain that each of the V-
rings on the trampoline mat is threaded through the
corresponding 'buttonhole' in the enclosure netting,
14
15
14
Leg section A
Leg section A
Leg section B
Leg section B
6
7
14
14
make sure the bent face out
Flip two of the leg sections over so that the spring holes
are now facing the sky instead of the ground.
15
warning decal