4PE20MAN-REV 01.032018
ALARM
ALARM
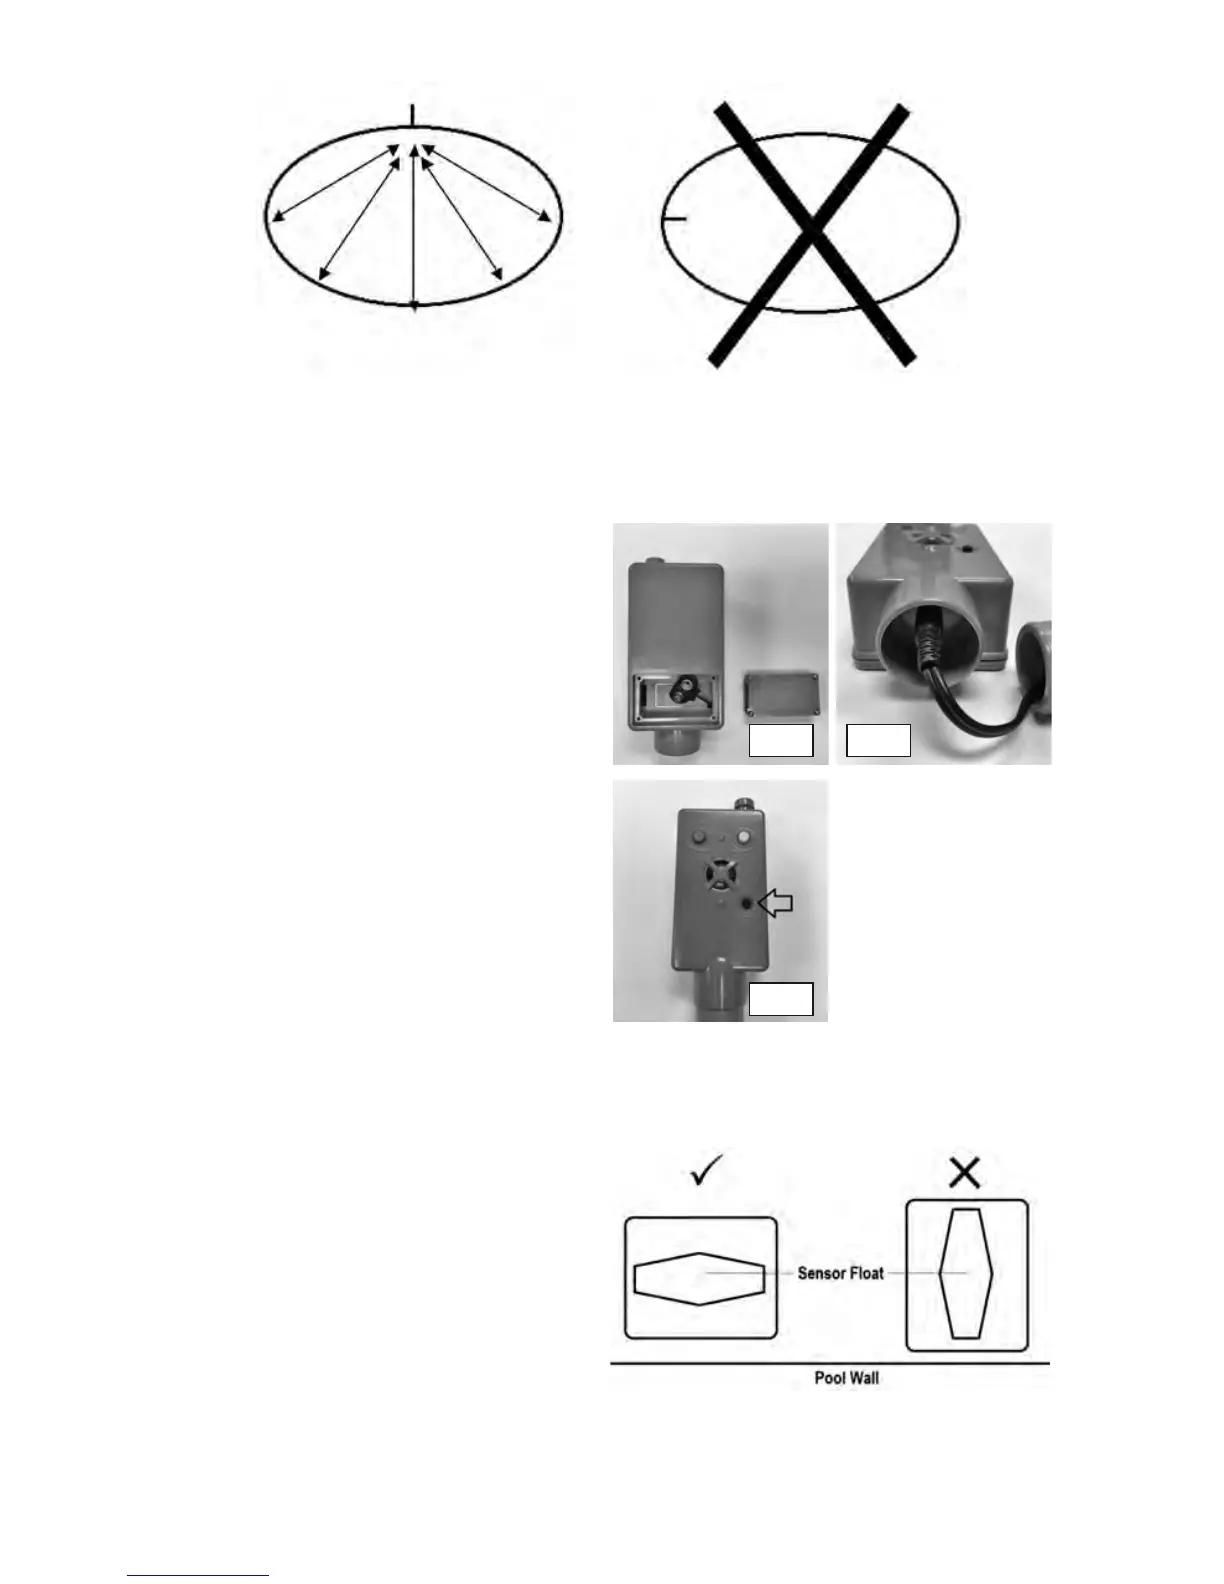
Oval or Rectangle Pools
WARNING: Every pool is different. The alarm must be tested immediately upon installation to ensure the positioning
of the alarm fits its specific environment. Improper positioning of the alarm or return fitting may result in false alarms.
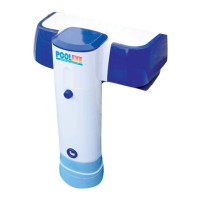
ALARM ASSEMBLY
1. Remove the 4 screws of the battery casing on the
alarm siren (Fig 1).
2. Install a new 9Vdc battery and reinstall battery casing.
3. Plug the Alarm Body into the Alarm Siren by
connecting the cable (Fig 2).
4. Coil the wire inside the Alarm Body and then fit the
Alarm Siren onto the Alarm Body, pressing gently into
place.
5. Press and release the black Test button on the front of
the alarm to ensure the siren is sounding (Fig 3).
WARNING: If siren does not sound, check that the
Alarm Body connection from Step 3 is secure and retest.
If issue persists, please see the warranty section of the
manual for Technical Support contact information.
MOUNTING THE ALARM
IMPORTANT: There are two options for mounting the
alarm to the pool. Choose the best option for the specific
design of the pool to ensure full protection of the pool.
IMPORTANT: The alarm must be installed vertically, so
that the Float is directly aligned with the Alarm
Body/must run parallel with the pool wall.
IMPORTANT: When installing the alarm, ensure the
Sensor Float is parallel with the pool wall prior to
tightening the clamps.
IMPORTANT: Ensure the sensor is at the minimum
depth requirement as indicated on the alarm body prior
to tightening the clamps.
Fig 1
Fig 3
Fig 2