8
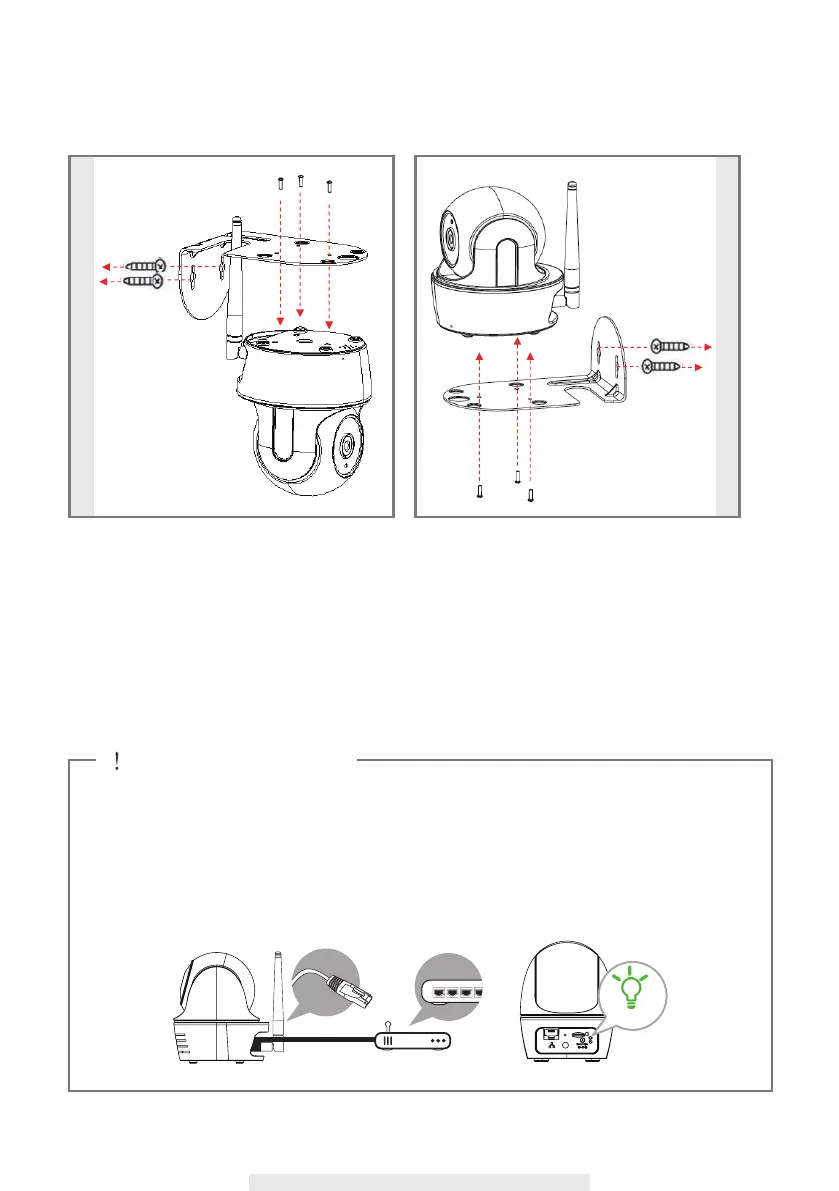
INSTALLATION
1. Place the mounting bracket on the mounting surface as a pattern to mark the holes.
2. Drill the mounting holes and use the wall plug screws to secure the bracket to the wall.
3. Fasten the camera to the bracket using the tapping screws.
4. Hang the camera and plate onto the hanger screws. Arrange cable properly so that it will not
block pan/tile operation.
△
BEFORE YOU START
‧
Before connecting the camera to power source, rst connect the camera to your Wi-Fi router
by using the Ethernet cable provided.
‧
After the camera is connected to the Wi-Fi router, connect the camera to power source and
wait until GREEN LED begin ashing. DO NOT begin the setup process until the GREEN
LED begin ashing that indicated the camera is rea (roughly 45 seconds).
‧
Please follow the steps in the following pages to complete the setup.
Steady ON
Steady ON
 Loading...