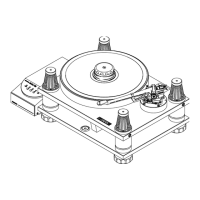
3. Place the Stroboscopic Disc (1087) on the platter. Use the bands appropriate for your
mains AC frequency. Re-check the drive belt for centrality on the motor pulley.
4. Press button 33 once to start turntable platter rotating, the LOCK LED blinks
momentarily until the speed stabilises and then becomes constant indicating that the
selected speed is locked.
5. To adjust speeds depress and hold down the 33 and 45 buttons together for 8 to 10
seconds the 33 LED will flash after this period indicating that the adjustment mode is
engaged; release both buttons. Press and release the 33 button to ‘slow down’ or the 45
button to ‘speed up’. The disc should be viewed in a fluorescent or neon light, The
appropriate band will synchronise and appear stationary when the speed is correct, whilst
clockwise and reverse movement will indicate fast or slow running respectively. This is
best observed if the pick-up arm, with cartridge fitted and in the raised position, is placed
directly over the band being viewed as a reference point. The adjustment method provides
a microfine increment for each press of the button, so a number of depressions will have
to be made to make an appreciable difference to the turntable speed. When the speed
adjustment is completed depress and hold down the 33 and 45 buttons together for 5
seconds, the 33 LED will stop flashing and become constant and your speed setting will
be stored in the system memory for future use.
6. Repeat this process for the 45 and 78 speed ranges if required.
11. OPERATION
1. Place the record spindle washer on the spindle followed by the record and clamp. The
latter should be screwed down clockwise enough to deflect the record flat into firm
contact with the platter. With a fingertip tap the record in three places equally over its
surface and with a little practice it will soon become evident whether or not the record is
touching the platter. If not, some further tightening may be necessary but this is not
always the answer however and sometimes releasing the clamp a little may do more to
effect the desired improvement.
The foregoing clamping instructions assume vinyl records, for shellac 78’s the record
washer should not be used for risk of breaking the record.
2. The turntable is now ready for use. At this point the packing and other items that are no
longer required should be stored in the case so as to be available if needed in the future.
3. The Model 30/2 is not equipped with a lid as it would increase the likelihood of acoustic
feedback but a soft cover is provided to protect the turntable from dust when not in use.
The back of the cover should be fitted first and then brought forward so that the front can
be guided safely past the cartridge and stylus. When removing the cover start at the back
and lift it upwards then forwards away from the front of the tone arm.
12
 Loading...