Do you have a question about the Smeg P864P-9 and is the answer not in the manual?
This document describes a ceramic cooking hob, providing comprehensive instructions for its proper use, safety, installation, and maintenance. The appliance is designed for domestic use, specifically for cooking and heating food. Any other uses are considered improper, and the manufacturer disclaims all responsibility for damage resulting from improper use. It is crucial never to use this appliance for heating rooms.
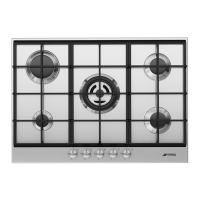
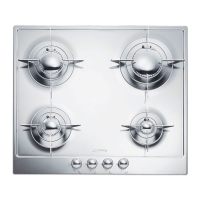
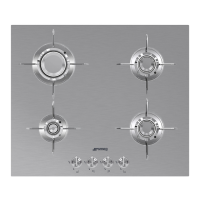
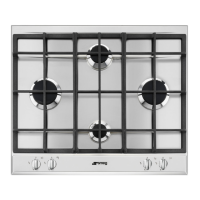
The cooking hob features multiple cooking zones, which can be either single plates, dual plates (oval or circular), or a central plate, depending on the model. These zones are controlled by either knobs or push-buttons, allowing for precise adjustment of heating intensity. The appliance is built to conform to current regulations and is intended for cooking and heating food.
Before first use, the hob must be cleaned. After cleaning, the cooking zones should be switched on one after the other, without pans, for three minutes at the highest cooking setting. This process eliminates any "factory smell" and evaporates moisture from the heating elements, ensuring correct operation of the electronic circuits. All removable labels and protective foils must be removed prior to use.
For models with knobs, each knob corresponds to a specific plate. To heat a single plate, turn the knob to the desired position (1 to 6). Adjustment is continuous, allowing for intermediate values. For dual plates, turning the knob to a position between 1 and 6 heats the inner cooking zone. To heat both the inner and outer cooking zones, turn the knob to the maximum setting (indicated by a specific symbol) and then release it; the knob will return to 9. To adjust heating intensity for both zones, rotate the knob anticlockwise to the desired position. To revert to heating only the inner zone, set the knob back to 0 and then turn it to the desired position (1 to 6). To switch off, return the knob to 0.
For models with push-buttons, all hob components are switched off when not in use. Pressing the symbol of any push-button for a few seconds switches on the hob, illuminating the circular sectors on the buttons. The power level must be set within 30 seconds, or the hob will switch off automatically. To set the power level, use the ▲ or ▼ push-buttons. Pressing ▲ (0 appears) switches on the plate, and pressing ▼ (9 appears) sets it to full power. Repeatedly pressing ▼ regulates power from 9 down to 1, while repeatedly pressing ▲ regulates power from 1 up to 9. To switch off, return the display to 0 using the ▲ or ▼ symbol. A "BEEP" confirms each button press.
For dual plates with push-buttons, two indicator lights illuminate beside the power level number when switched on. To activate dual heating, press the symbol (0 appears for full power), then press it again (9 appears for the small plate at full power). Two options are available: press the symbol once (two markers illuminate) and then press the symbol to set the dual plate power, or after the second press, repeatedly press the symbol to set the small plate power. To switch off, return the display to 0 by repeatedly pressing the ▼ symbol.
The hob includes a plate lock-out function. 20 seconds after the last power adjustment, the plate enters "lock-out" status, preventing further power level adjustments. This is indicated by a dot next to the power level. To eliminate lock-out, press and hold the ▲ or ▼ symbol of any push-button for 2-3 seconds.
Some models are equipped with a cooking timer. To activate it, press and hold the symbol for a few seconds (two displays will flash "30"). Use the ▲ or ▼ symbols to set the desired cooking time. After 5 seconds, the minutes display stops flashing, and the power display flashes "0". The power level must be set within 5 seconds, or the hob will switch off automatically. Timed cooking begins 5 seconds after power adjustment. At the end of the set time, three beeps will sound in sequence, repeated five times at 5-second intervals. To stop the beeps manually, press the ▲ or ▼ symbol. During timed cooking, pressing ▲ or ▼ modifies the plate's power. After 5 seconds, a BEEP sounds, and the time display flashes, allowing adjustment of the cooking time.
A residual heat warning device is present on each plate. After a plate is switched off, a flashing "H" may appear on the display, indicating that the cooking zone is still very hot (above 60°C). The lamps turn off when the temperature drops below approximately 60°C. Cooking can be restarted while "H" is flashing.
The hob also features control circuit board thermal protection. If the internal electronics board overheats, power to the front plates is automatically switched off, and "H" and "t" flash alternately on the power LEDs. If the board does not cool down, power to all plates is switched off, and the power LEDs display "HILE". Cooking can resume once the temperature drops below the safety threshold. An "E" on the power display indicates an operator error when buttons are pressed incorrectly.
The hob switches off automatically when all displays read 0. If plates are hot, "H" appears 5 seconds after switch-off. Some models have a "DEMO" function that deactivates the plates. This can be deactivated by a specific keystroke sequence within 60 seconds of switching on: press the leftmost key once, the third key from the left twice, and the second key from the left three times.
For best results and energy saving, use receptacles with a very thick and perfectly flat bottom. Ensure the receptacle bottom and cooking hob are clean and dry before use. Avoid cast-iron receptacles or those with a rough bottom to prevent scratching. To avoid energy waste, match the receptacle diameter to the circle marked on the cooking hob.
Before any maintenance, disconnect the power supply.
Cleaning the glazed ceramic hob: The cooking hob should be cleaned regularly, ideally after every use, once the residual heat signal lamps have gone off. Smudges from aluminum-bottom pans can be cleaned with a vinegar-dampened cloth. Burnt residues should be removed after cooking, then rinsed with water and wiped dry with a clean cloth. Never use abrasive or corrosive detergents (e.g., cleaning powders, oven sprays, spot-removers, wire sponges).
Cleaning stainless steel: For ordinary daily cleaning, use only specific products that do not contain abrasives or chlorine-based acids. Apply the product to a damp cloth, wipe the surface, rinse thoroughly, and dry with a soft cloth or deerskin. Do not use metallic sponges or sharp scrapers, as they will damage the surface. Use normal non-abrasive products for steel, and a wooden or plastic tool if necessary. Rinse thoroughly and dry with a soft cloth or deerskin. Do not allow sugary food residues (like jam) to set inside the oven, as prolonged exposure can damage the enamel lining.
Never use a steam jet to clean the appliance.
The manual also includes a troubleshooting section for common issues like the hob not working, unsatisfactory cooking results, smoking, plates not coming on during timed cooking, or the front panel lighting up without plates switching on. Solutions range from checking power supply and consulting cooking tips to cleaning the hob, using larger pans, checking timer instructions, or deactivating "DEMO" mode.
| Type | Gas Hob |
|---|---|
| Number of Burners | 4 |
| Width | 60 cm |
| Material | Stainless Steel |
| Control Type | Knobs |
| Control Position | Front |
| Pan Stands | Cast Iron |
| Ignition | Automatic |
| Safety Device | Yes |
| Ignition Type | Automatic Electronic |
| Safety Features | Flame failure device |
| Burner Caps | Enameled |
| Burner Types | Semi-rapid, Auxiliary |
| Total Power | 7.2 kW |