Do you have a question about the Smeg SI2951D and is the answer not in the manual?
Covers general safety, personal injury risks, fire hazards, and appliance damage prevention.
Details the intended use of the appliance and specifies what is considered improper use.
States manufacturer's disclaimers for damages resulting from improper use or tampering.
Explains the location and importance of the appliance's identification plate with technical data.
Highlights the manual's integral role and the necessity of keeping it accessible and reading it.
Provides instructions for proper disposal of the appliance and packaging according to WEEE directive.
Explains the conventions, icons, and structure used within the user manual for clarity.
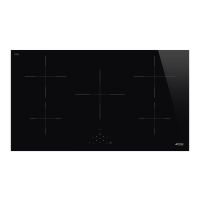
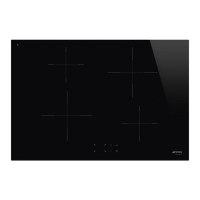
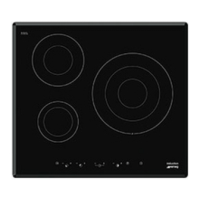
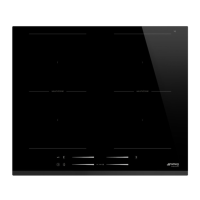
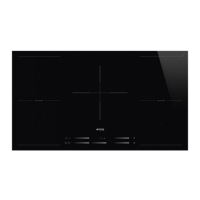
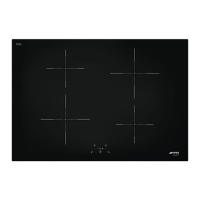
Overview of the hob layout, including zone numbering, power absorption table, and advantages of induction cooking.
Detailed explanation of the control panel's buttons, displays, and the power control module.
Essential safety instructions during appliance use, covering burns, fire, and damage risks.
Steps for preparing the appliance before its first use, including removing protective films and labels.
Guide to operating the hob, including switching on, using controls, understanding displays, and selecting cookware.
Details how to use special functions like Pause and Controls Lock for enhanced operation and safety.
Instructions for using the minute minder timer, timed cooking, and modifying/deactivating timers.
Lists common error codes, their meanings, and basic troubleshooting steps for appliance malfunctions.
Provides crucial instructions and warnings to prevent damage to surfaces during cleaning and maintenance.
Guidelines for regular cleaning of the hob surfaces to maintain their condition and appearance.
Step-by-step guide for performing ordinary weekly cleaning of the hob.
Methods for effectively removing light marks, burnt-on residues, and general dirt from the hob.
Troubleshooting guide for common operational issues such as hob not working or unsatisfactory cooking results.
Details electrical connection requirements, wiring configurations, and safety precautions.
Specific instructions for installers regarding cable management, installation diagrams, and user guidance.
Procedure for installers to access the technical menu and adjust the appliance's power limitation settings.
Safety guidelines related to heat production during operation and proper ventilation during mounting.
Provides dimensions for countertop cut-outs and instructions for applying the hob seal for flush mounting.
Details mounting procedures for flush built-in models and installation over a built-in oven unit.
This document outlines the instructions for an induction cooking hob, covering its functions, usage, and maintenance.
The appliance is an induction cooking hob designed for preparing food in a home environment. It features multiple cooking zones, each equipped with an induction generator that creates an electromagnetic field. This field induces a thermal current directly in the base of the pan, meaning heat is generated within the cookware itself rather than being transmitted from the hob. This method offers energy savings compared to traditional electric cooking, improved safety as energy is only transmitted to the pan, high energy transfer efficiency, and rapid heating. The cooking surface itself heats only under the pan's base, reducing the risk of burns and preventing spilled food from sticking.
The hob is controlled via Touch control sensor buttons located on the front panel. A beep confirms each effective touch. It includes an On/Off button, a Pause button, and dedicated areas for cooking zone and timer settings. Each cooking zone has a display showing the selected power level, and a timer display shows digits for both an independent minute minder and timed cooking. The hob is fitted with a power control module that optimizes and limits consumption. If the overall set power level exceeds the maximum permitted limit, the electronic circuit board automatically manages the power supplied to the hot plates, prioritizing the last zone set in chronological order.
Key functions include:
To ensure safe and effective use, several guidelines are provided:
Regular cleaning and maintenance are crucial for preserving the appliance's aesthetic and functional qualities:
| Hob type | Zone induction hob |
|---|---|
| Frame type | Frameless |
| Product color | Black |
| Hob width size | 90 cm |
| Top surface type | Glass-ceramic |
| Appliance placement | Built-in |
| Cooking zone 2 type | Large |
| Cooking zone 4 type | Simmer |
| Cooking zone 1 power | 1400 W |
| Cooking zone 2 boost | 3000 W |
| Cooking zone 2 shape | Round |
| Cooking zone 3 power | 2300 W |
| Cooking zone 5 boost | 2100 W |
| Cooking zone 1 diameter | 160 mm |
| Cooking zone 1 position | Left front |
| Cooking zone 2 diameter | 230 mm |
| Cooking zone 2 position | Left rear |
| Cooking zone 3 diameter | 250 mm |
| Cooking zone 3 position | Central |
| Cooking zone 4 diameter | 200 mm |
| Cooking zone 4 position | Right rear |
| Cooking zone 5 diameter | 1600 mm |
| Cooking zone 5 position | Right front |
| Cooking zone 4 power source | Electric |
| Number of gas cooking zones | 0 zone(s) |
| Number of electric cooking zones | 5 zone(s) |
| Number of simultaneously used cooking zones | 5 |
| Boost function | Yes |
| Number of boosters | 4 |
| Number of power levels | 9 |
| Current | 32 A |
| AC input voltage | 220 - 240 V |
| AC input frequency | 50 - 60 Hz |
| Connected load (gas) | 0 W |
| Energy efficiency scale | - |
| Connected load (electric) | 7200 W |
| Timer type | Digital |
| Control type | Touch |
| Display type | LED |
| Control position | Front |
| Package depth | 620 mm |
| Package width | 1000 mm |
| Package height | 110 mm |
| Package weight | 18200 g |
| Built-in hood | No |
| Depth | 510 mm |
|---|---|
| Width | 900 mm |
| Height | 53 mm |
| Weight | 16800 g |