Equipment Required:
• Precision calibrated test bar and certified calibration weights.
QUICK CHECK
1. With the VERSATORQ®2 torque analyzer in the TRACK mode,
(refer to page 9). Apply full load to 100% of sensor rated capacity in
the CW (CLOCKWISE) direction 3x.
2. Remove weights and wait 30 seconds then press the ZEROTARE key.
3. Apply 10% load of sensor rating and verify the reading is within
accuracy specifications.
4. Repeat step 3 at the 40%, 60%, 80% and 100% check values and
verify all readings are within accuracy specifications.
5. Repeat steps 1 thru 4 for quick checks in the CCW direction. If any
readings are out of tolerance specification, proceed to Sensor
calibration section below.
Equipment Required:
• Precision calibrated test bar and certified calibration weights.
Install New Batteries. Use only the batteries listed on page 5
Sensor Calibration CW (Clockwise Direction)
1. Attach a sensor to the VERSATORQ2® meter and power on the unit.
Confirm the meter is in the TRACK mode. If not press the SET UP button
2. to change.
3. Install the correct calibration test bar or wheel for the attached
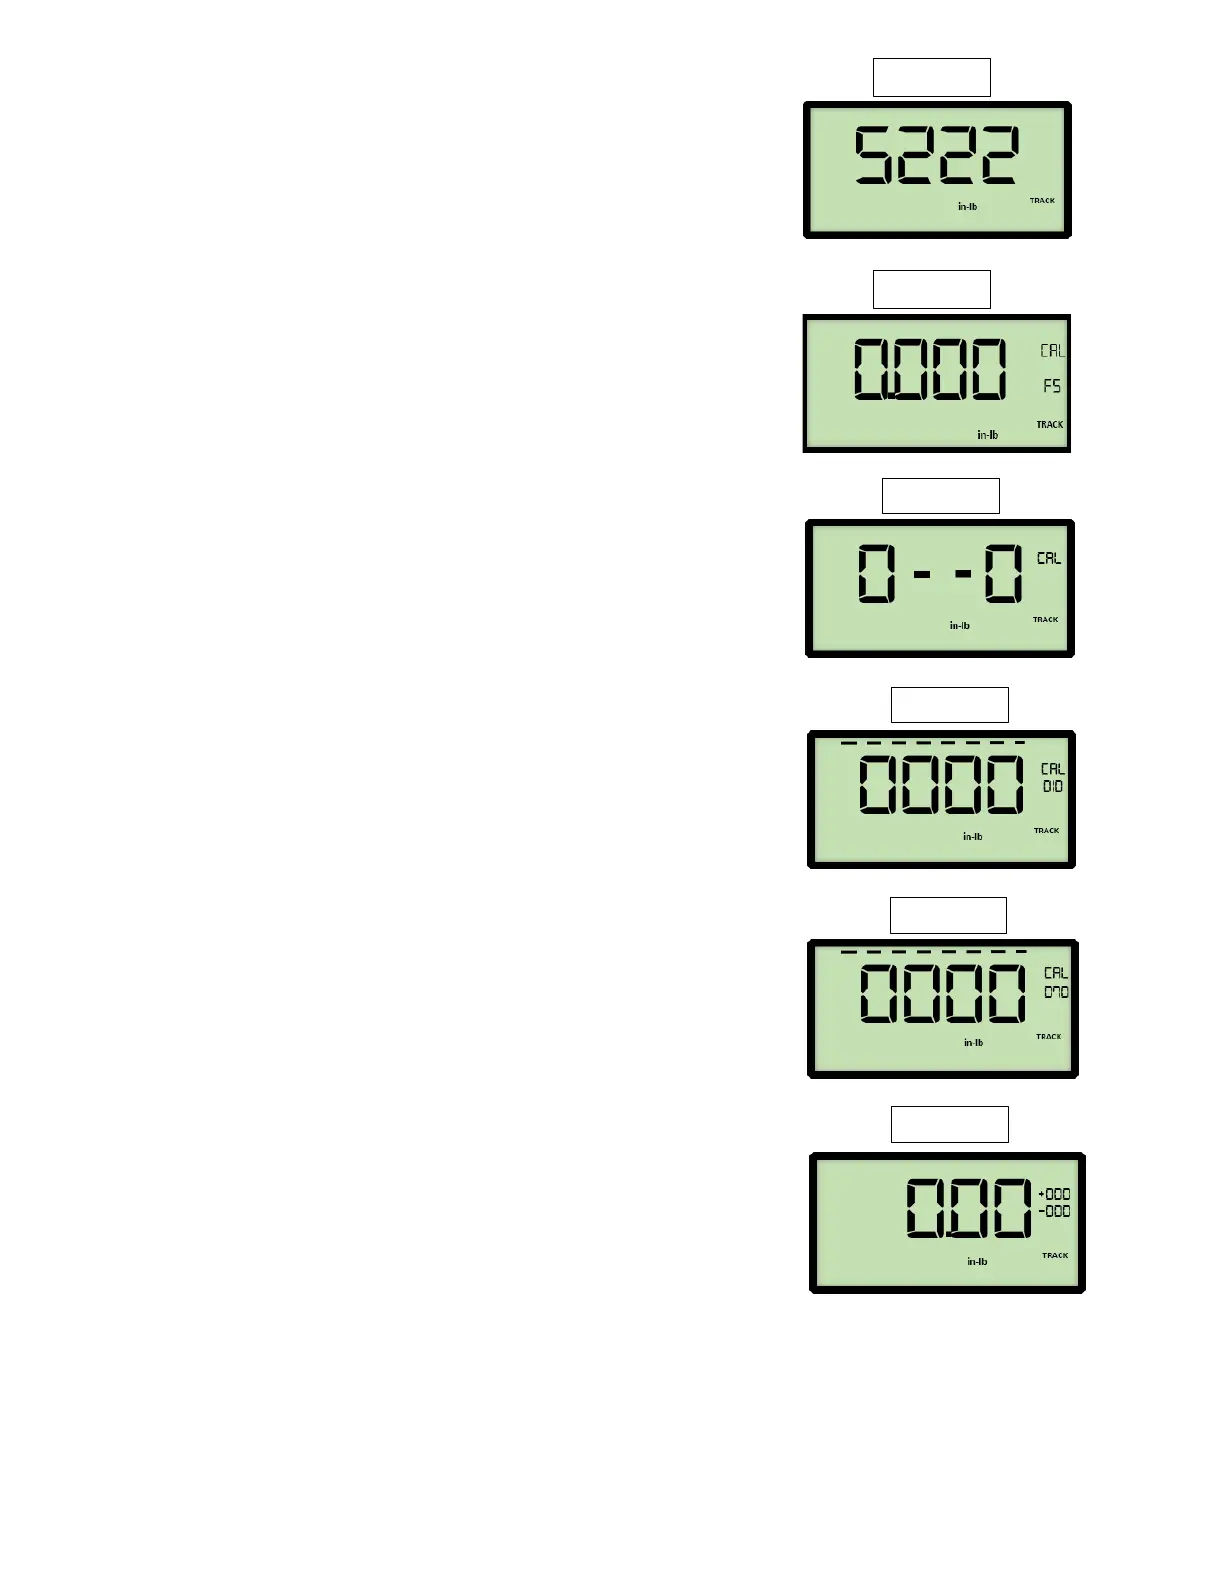
sensor then press the ZERO TARE button.
4. Press and hold the SETUP key enter the code “5222” to begin CW
calibration.
5. The FULL SCALE (FS) transducer size screen will appear with the first digit
blinking.
If the FS does not match the transducer size use the
UP/DOWN/SIDE arrow keys to change the value. If the decimal
point is not in the correct location press the SIDE ARROW button
until far right digit is flashing, then press SIDE ARROW button one
more time then use the UP/DOWN arrow buttons to move decimal
point to the desired location.
Press the UNITS key until the displayed units match the sensor unit
Press the ENTER key
6. Preload the sensor maximum rated capacity three times in the CW
direction. Remove the weight and wait 30 seconds.
Press the ENTER key, and marching zeros “0000” should be visible
on the LCD screen, indicating the ZEROTARE operation. The
calibration screen will appear.
7. Attach the weights to apply a CW torque equal to 10% of the rated
capacity of the sensor size. The screen will show a changing number
which gradually drops to near zero. Wait 30 seconds the press the
ENTER key.
8. Attach the weights to apply a CW torque equal to 70% of the rated
capacity of the sensor size. The screen will show a changing number
which gradually drops to near zero. Wait 30 seconds the press the
ENTER key.
9. Remove all weights and press the ZEROTARE key. The displayed value
should return to zero, and will now be in the main measurement screen.
 Loading...


