The document provided is a Safety Instruction & Operator's Manual for the Snapper Model IRT4 Series 1 Rear Tine Tillers. This manual serves as a comprehensive guide for users to safely operate and maintain their Snapper tiller, ensuring long and satisfactory service. It emphasizes the importance of understanding the machine's controls and adhering to safety protocols to prevent personal injury and ensure trouble-free operation.
Function Description:
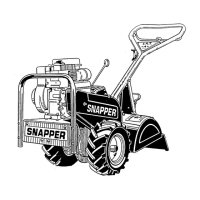
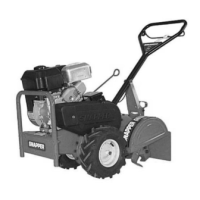
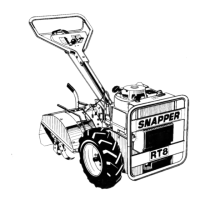
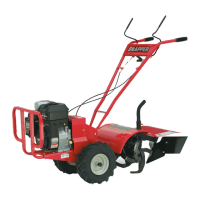
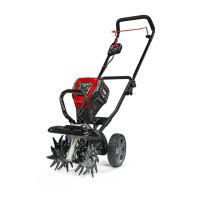
The Snapper IRT4 Series 1 Rear Tine Tiller is a robust gardening tool designed for tilling soil. Its primary function is to break up and aerate soil, preparing garden beds for planting, mixing in compost or other amendments, and controlling weeds. The "rear tine" design indicates that the tines are located behind the wheels, which typically provides better balance and deeper tilling action compared to front-tine tillers, especially in tougher soil conditions. The tiller is equipped with an engine that powers both the tilling tines and the drive wheels, allowing for self-propelled operation. The design includes a handlebar for operator control, a skid arm for depth adjustment, and various controls for throttle, wheel, and tine engagement. The manual specifically notes that the IRT-4 TILLER is set up for reverse tine rotation only, which can be advantageous for breaking new ground and achieving a finer soil tilth.
Usage Features:
The manual outlines several key usage features and operational procedures to ensure effective and safe tilling.
- Controls Familiarization: Before operating, users are instructed to become thoroughly familiar with all controls, including the wheel and tine control, throttle control, handle bar adjustment, and wheel and tine shifter control. This ensures operators can quickly stop tine rotation in emergencies.
- Pre-Start Checklist: A pre-start checklist is provided, covering essential checks such as engine oil level, air cleaner condition, external surface cleanliness, and guard security. This routine helps ensure the tiller is in optimal condition before each use.
- Starting and Stopping: Detailed steps are given for starting the engine, including shifting the transmission to NEUTRAL, ensuring the wheel and tine control is released, using the choke for cold starts, and pulling the rope starter. Stopping the engine involves pulling the throttle control to the rear. The manual highlights the importance of knowing how to stop the tines, wheel drive, and engine in preparation for emergencies.
- Transporting to Site: To prevent damage to lawns or pavement, operators are advised to raise the tines to clear the surface when transporting the tiller. This involves releasing the wheel and tine control, lifting the rear of the tiller, pushing the skid arm into a notch setting, and shifting the tine clutch lever to NEUTRAL. The tiller can then be driven or pushed to the tilling site.
- Handlebar Adjustment: The handlebar can be adjusted "UP" or "DOWN" to suit the operator's height and preference, enhancing comfort and control during operation. This adjustment involves removing and re-installing a retaining screw and nut.
- Skid Arm (Depth Control): The skid arm allows operators to adjust the tilling depth. Setting the skid arm in the highest position achieves the deepest tilling depth, while intermediate notches are used for shallower depths.
- Speed Control: The throttle control allows operators to set the desired tilling speed, enabling adaptation to different soil conditions and tasks.
- Tilling Procedure: To begin tilling, the transmission lever is shifted to the FWD/TILL position. The operator then steps behind the tiller and lifts up on the WHEEL & TINE CONTROL to engage the tines and start tilling.
- Tilling Hints: The manual advises letting the tiller do the work and not trying to hold it back. If forward motion ceases while tilling deep, lifting the handlebar slightly can help resume forward motion.
- Rough Terrain Hint: For very rough or uneven ground, it's recommended to till at a light depth initially to smooth the surface. If the tiller hangs up with spinning wheels, lifting the handlebar and turning the tiller diagonally across the rise can help gain traction.
- Safety Instructions: A prominent "IMPORTANT SAFETY INSTRUCTIONS" section emphasizes critical safety practices, such as familiarization with controls, keeping children and pets away, wearing protective clothing, avoiding operation under the influence of alcohol or drugs, filling the fuel tank only when the engine is stopped and cool, ensuring the clutch is disengaged before starting, keeping hands and feet away from tines, and stopping the engine before making adjustments or leaving the operator's position. It also warns against operating the engine in enclosed areas due to exhaust fumes.
Maintenance Features:
The manual provides essential maintenance guidelines to prolong the life and performance of the Snapper tiller.
- Service Parts & Assistance: Users are encouraged to use genuine Snapper replacement parts to maintain the original quality of their tiller. The manual advises specifying the model and serial number when contacting a Snapper Dealer for parts or service.
- Engine Service: The manual directs users to the separate engine owner's manual for detailed engine service, including oil specifications, air cleaner service, and cooling fin maintenance. It specifically mentions that engine oil is drained by removing the front filler plug and standing the tiller on end.
- Standing Tiller on End: For storage or certain maintenance tasks, the tiller can be stood on end. However, a crucial caution is provided regarding fuel leakage from the carburetor vent hole if the fuel tank is over half full, which can cause fire hazards or engine damage. Steps to prevent fuel leakage are outlined, including draining or transferring fuel outside with a cool engine and away from ignition sources. A warning against standing the tiller on end with the engine running is also given.
- Tiller Lubrication (Chain Case): The grease level in the chain case should be checked at the beginning of each tilling season. This involves removing a plastic plug on the lower left-hand side and ensuring the level is up to the edge of the opening. To add grease, the filler plug on the right-hand side is removed, and Snapper 0 grease is added until it reaches the bottom edge of the check plug opening. The total capacity is about 1 U.S. Standard quart.
- Belt Adjustment-Replacement:
- Belt Tension Adjustment: To check belt tension, the left-hand wheel and drive belt guard are removed. The length of the idler pulley spring is measured at the end of the control cable. When the WHEEL & TINE CONTROL is engaged, the spring should extend 1/4" to 1/2". Adjustment involves loosening and repositioning jam-nuts on the threaded ends of the cable conduits.
- Belt Adjustment Test: After adjustment, the engine is started, and the WHEEL & TINE CONTROL is pulled to the handlebar then released. The tines and wheel drive should stop. If they continue to move, the clutch spring extension is too great, requiring readjustment.
- Belt Replacement: Steps for replacing the belt include removing the left-hand wheel, two screws and nuts from the guard, and the guard itself. The new belt must be installed over the top of the idler and within the belt guide.
- Tiller Tines Service: Tines should be checked periodically for loose or missing fasteners. Worn or damaged tine assemblies (R.H. and L.H. tines) should be replaced using specific Snapper shear bolts and locknuts. The manual emphasizes not to over-tighten shear bolts to prevent failure and provides a torque specification.
- Off-Season Storage: For long-term storage, the tiller should be thoroughly cleaned externally, and the tines should be free of debris. The manual advises draining gasoline from the fuel system and engine crankcase oil. After standing the tiller on end, the chain case plugs should be checked for leakage. Before the next season, engine crankcase oil and gasoline should be replenished. Before starting after storage, the engine control should be moved to STOP, and the rope starter pulled slowly several times. If excessive resistance is felt, the spark plug should be removed, and the rope starter pulled rapidly to clear oil from the cylinder before cleaning and reinstalling the spark plug.
The manual concludes with information on accessories, a 2-year limited warranty, and contact details for Snapper Power Equipment, reinforcing the manufacturer's commitment to product quality and customer support.