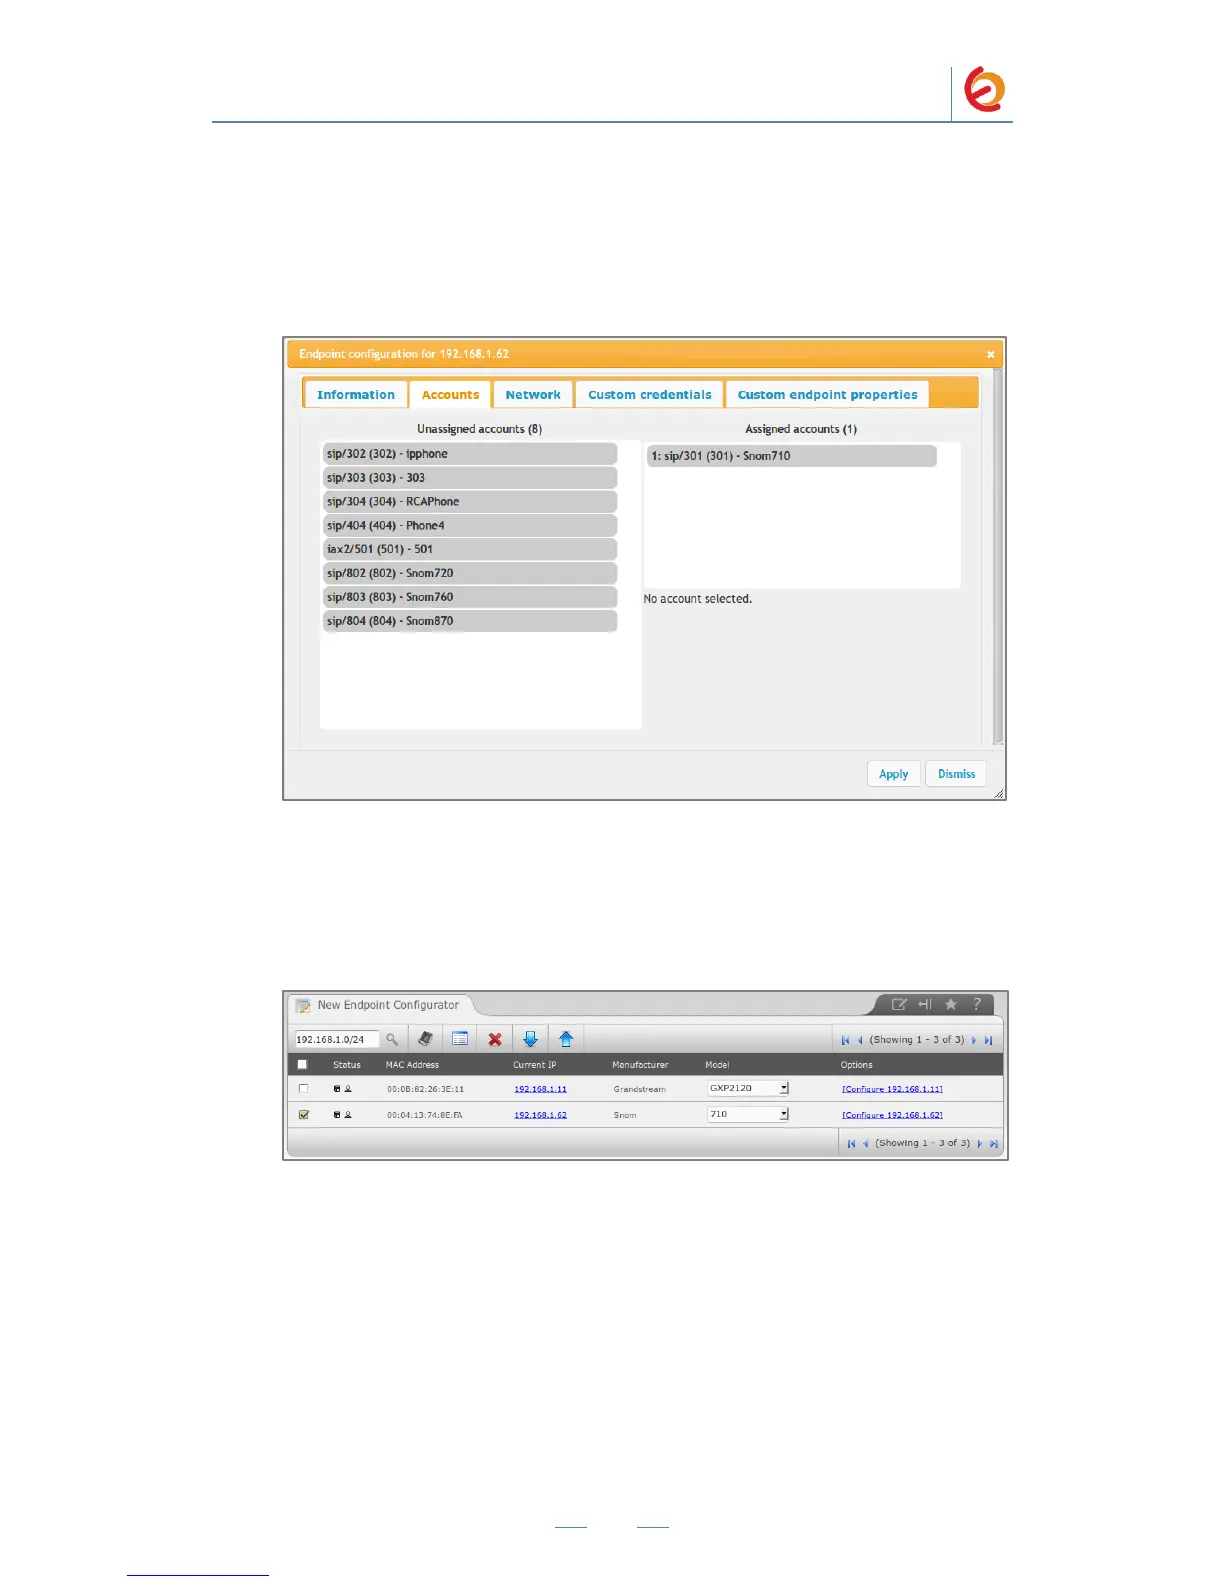
5. After clicking in the configuration link, you will see a window with many tabs
according to what you want to configure. In this case we will configure a SIP
account. Go to the tab “Accounts” and drag the accounts you want to assign from
left to right. Then click on Apply button. See figure 4-12.
Figure 4-12. Accounts configuration
6. After configuring you will see that the status field of the phone has changed. See
figure 4-13
Figure 4-13. List of endpoints
7. Now with the phones selected, click on the button “Apply Configuration” located
next to the magnifying glass button. A message will be shown saying the operation
was successful. See figure 4-14.


 To Next Page