MANUAL CONFIGURATION
1. Log in to the Snom 710 WebUI by pointing your browser to the Snom Phone‟s IP
address.
For the initial configuration, refer to the Snom 710 User Manual found at:
http://wiki.snom.com/Snom710/Documentation
Factory default settings
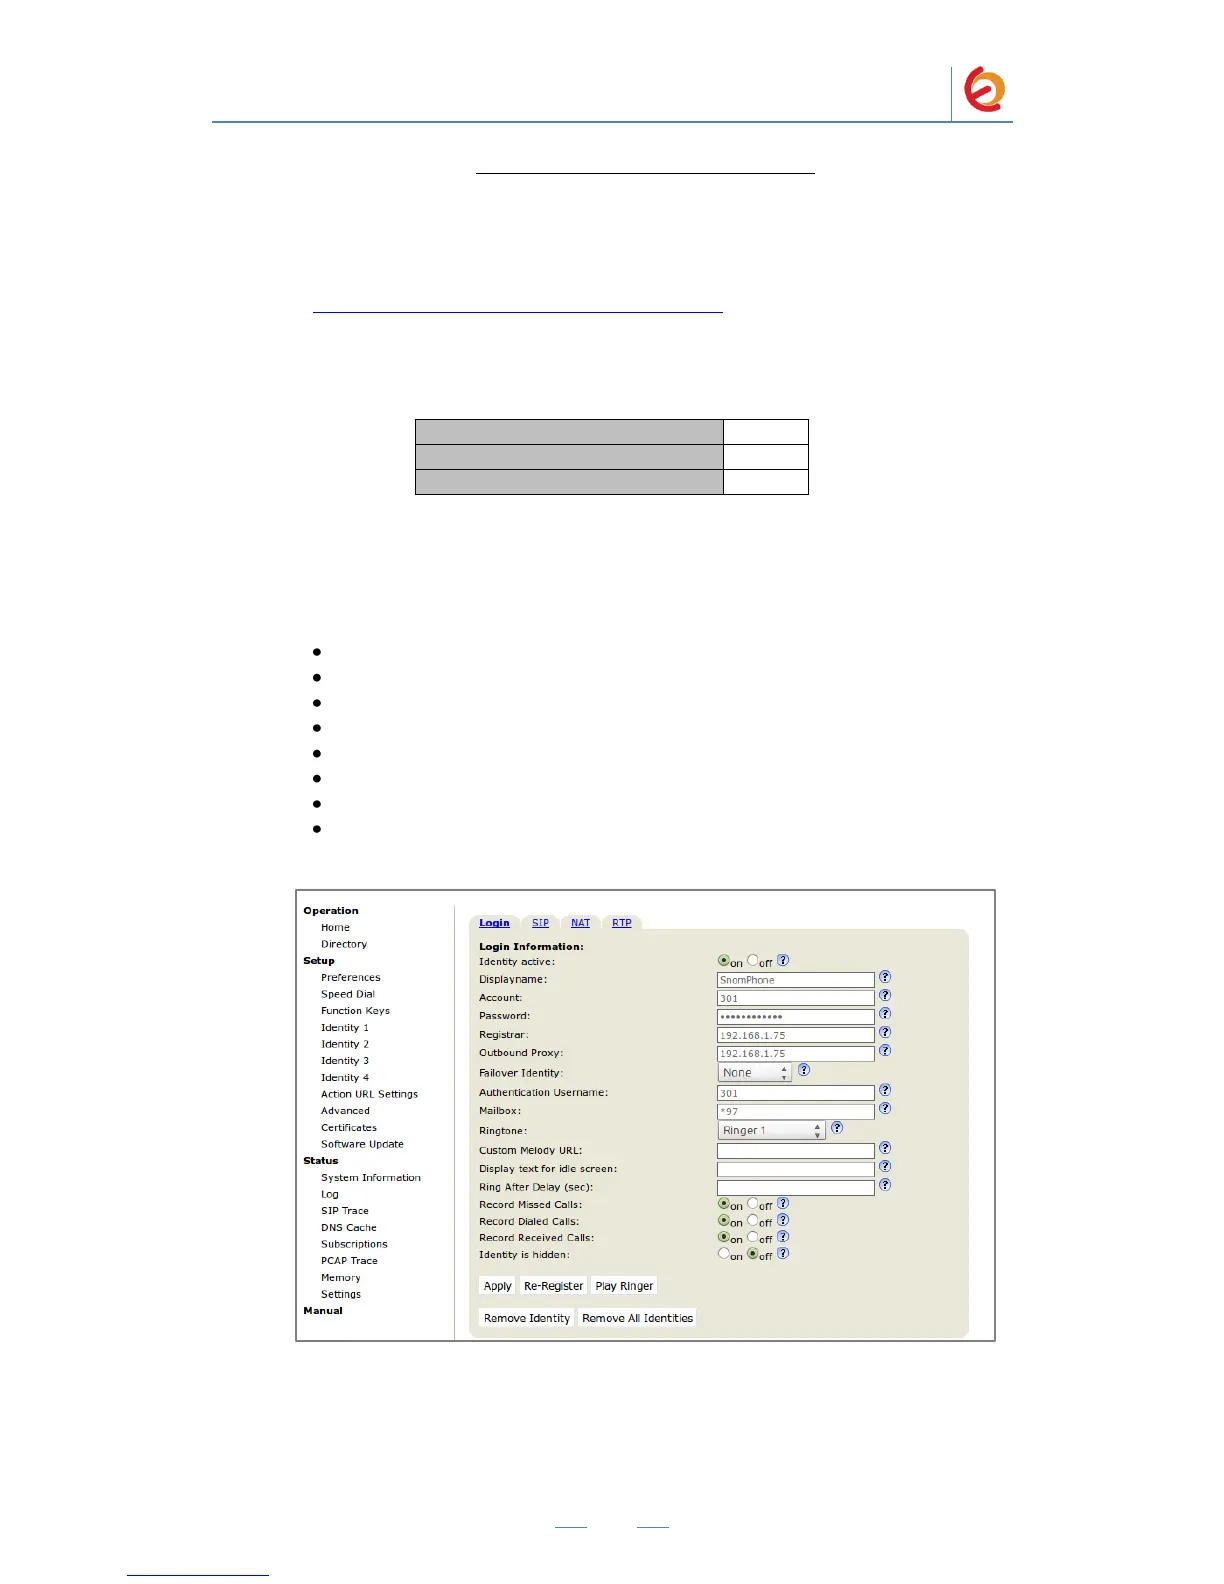
11. When the WebUI is loaded, use the information from the Add SIP Extension page
(Figure 4-4) to enter the following necessary information on “Setup => Identity 1
=> Login” section of the Snom Phone WebUI (Figure 4-7):
Identity active: ON
Displayname: (SnomPhone in this example)
Account: (301 in this example)
Password: (“h7Dka3Rf9si0t” in this example)
Registrar: Elastix Server‟s IP Address (192.168.1.75 in this example)
Outbound Proxy: Elastix Server‟s IP Address (192.168.1.75 in this example)
Authentication Username: (301 in this example)
Mailbox: *97
Figure 4-7. Account Configuration
12. Once you have entered the required information, click on „Save‟ button. Now, go to
“Setup => Identity 1 => RTP”. The “RTP Encryption” option should be set to “off”.
Apply and save changes. (Figure 4-8).



 To Next Page