8
WSE2013
ENGLISH
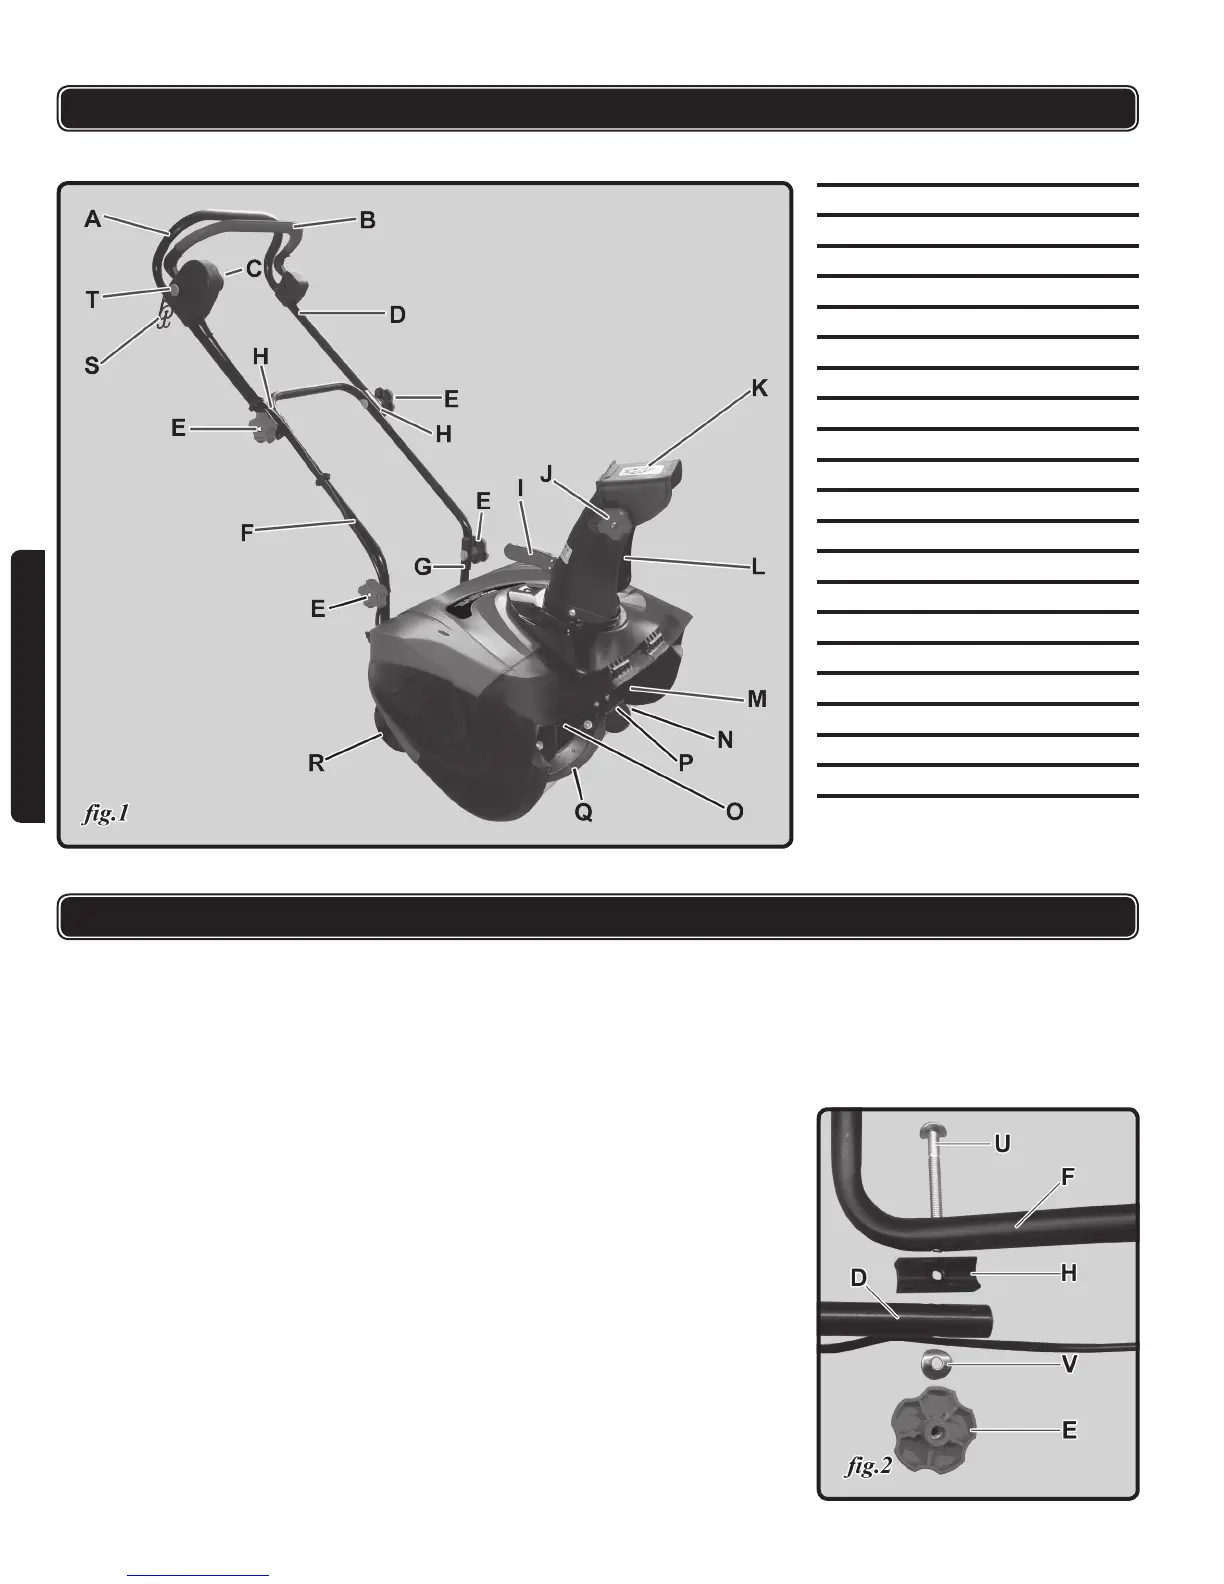
FUNCTIONAL DESCRIPTION
KNOW YOUR SNOWTHROWER
ASSEMBLY INSTRUCTIONS
UNPACKING
1. Remove the snow thrower and all other items from box.
2. Check all items for shipping damage. If you nd any damage or any parts are
missing, promptly inform the dealer where you bought the snow thrower.
3. Upper chute and lower chute are packed together.
4. The snow thrower must be fully assembled before the operation. To assemble
the snow thrower, follow the instructions below.
HANDLE ASSEMBLY
1. Loosen and remove the four sets of joint-xing T-bolts (U, g.2), washers (V,
g.2), knobs (E, g.2), and 2 connectors (H, g.2) to separate the upper handle
(D, g.2) from the middle handle (F, g.2).
2. Hold the upper handle so that the screw holes align with the holes on the
middle handle.
A Hand grip
B Safety cut-out bar
C Switch housing socket
D Handle upper section
E Handle knobs
F Handle mid section
G Handle lower section
H Handle connector
I Chute directional control
J Chute deector knob
K Chute deector
L Chute
M Auger assembly
N Scraper
O Auger shaft
P Paddle auger rubber
Q Spiral auger rubber
R Wheel
S Cord attachment hanger
T Start switch