Do you have a question about the SNOWJOE iON15SB-LT and is the answer not in the manual?
Operators must read all instructions before using the cordless snow blower.
Always disengage the switch lever and remove the battery before performing adjustments or servicing.
Strictly observe manual instructions when replacing parts. Pay special care to rubber parts.
Stop machine immediately if it runs improperly or makes abnormal sounds. Contact service.
Stop, remove battery, inspect for damage, and repair before restarting.
Always unplug the charger before cleaning/maintenance. Use GFCI.
Charge only in designated chargers. Avoid dangerous environments and misuse.
Step-by-step instructions for connecting the upper and lower handles to the middle frame.
Explains the LED indicators for checking the battery's charge level.
Guidance on when to charge the battery pack using the indicator lights and usage patterns.
Step-by-step instructions on how to safely start the cordless snow blower.
Information about the factory lubrication for the motor and auger; no user lubrication needed.
Tips for checking bolts, cleaning after use, and general upkeep of the machine.
Instructions for cleaning, handling, and maintaining the battery and charger.
Location and importance of model and serial numbers for service and reordering.
Encourages product registration for better service and warranty claims.
Details on who can seek warranty coverage and the terms of the warranty.
Specifies what the warranty covers, including replacement parts or products.
Lists exclusions from warranty, such as cosmetic changes and wear parts.
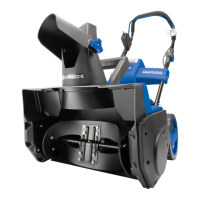
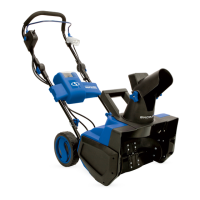
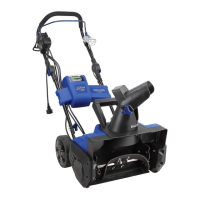
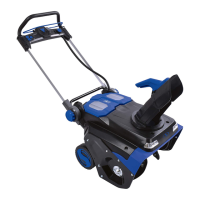
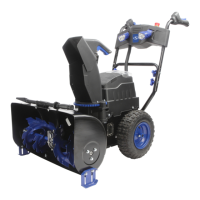
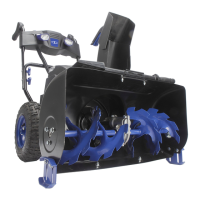
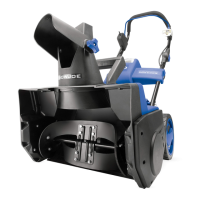
The device described in the manual is a 40-volt 15-inch cordless snow blower, designed for residential and personal household use on paved surfaces. Its primary function is to clear snow, offering a convenient and portable solution for snow removal without the constraints of a power cord.
The snow blower operates by means of a brushless motor powered by a lithium-ion battery pack. It features a 2-blade, cold and abrasion-resistant plastic rotor (auger) that collects and discharges snow through a chute. The discharge chute can be adjusted 180 degrees using a chute crank, allowing the user to control the snow throw direction. Additionally, a chute deflector on top of the discharge chute controls the height of the snow stream, which can be adjusted by loosening and tightening knobs. The unit is designed for walk-behind operation, requiring the user to push it to clear snow.
The snow blower emphasizes user safety and ease of operation. Before use, operators are instructed to read all instructions and follow basic safety precautions, including keeping the work area clean, well-lit, and clear of bystanders and pets. Proper attire, such as protective rubber gloves, non-slip footwear, safety glasses, and hearing/head protection, is recommended. The machine should only be used for its intended purpose and not be forced, allowing it to operate at its designed rate for optimal performance. Users are advised to stay alert, avoid operating while tired or under the influence, and maintain proper footing and balance.
To start the snow blower, the battery compartment cover is opened, and the battery is slid into position until it clicks. The machine is then started by first pressing a safety switch button located alongside the switch housing, and while depressing it, pulling the ON/OFF switch lever towards the user. Releasing the ON/OFF switch lever powers off the machine.
When clearing snow, users should ensure the area is free of foreign objects like rocks, broken glass, nails, wire, or string, which could be picked up and thrown by the rotor blades, causing damage or injury. If an object is struck, the snow blower must be stopped, the battery removed, the obstruction cleared, and the unit inspected for damage before restarting. The manual advises starting the clearing path outward, throwing snow in a back-and-forth motion, and overlapping paths. Users should also consider wind direction to avoid throwing snow against the wind or back into their face. The snow blower should be pushed gently and evenly, without applying excessive force to the motor, to prevent damage. For unpaved surfaces with pebbles or gravel, the handle should be pushed down to raise the scraper bar, preventing loose material from being thrown with the snow.
The battery pack includes a push button for checking the charge level via LED indicators. Three lit LEDs indicate a high charge, two indicate decreasing charge (stop work soon), and one indicates a flat battery (stop work immediately and charge). The battery is a lithium-ion type, which does not develop a "memory" and can be charged after partial discharge. Charging involves pulling the push lock button to remove the battery from the equipment, inserting the charger's plug into an electrical wall outlet, and then placing the battery pack into the charger. The bottom red light on the charger indicates charging, and a green light indicates a full charge.
Maintenance is crucial for the longevity and safe operation of the snow blower. Before any adjustments, inspection, servicing, accessory changes, or cleaning, the switch lever must be disengaged, and the battery pack removed, ensuring all revolving parts have stopped completely. The snow blower is factory-lubricated for lifetime use, so additional lubrication is not necessary and could cause damage.
General maintenance tips include checking bolts and screws frequently for proper tightness. After each snow removal session, the snow blower should be run for a few minutes to prevent the collector/impeller from freezing. The motor should then be shut off, and residual ice and snow wiped from the unit. Rotating the chute deflector several times with the control crank helps remove excess snow.
For battery and charger care, the charger should always be unplugged, and the battery pack removed before any maintenance. Neither the battery pack nor the charger should be disassembled or immersed in liquid. Dust and debris should be cleaned from charger vents and electrical contacts using compressed air. A mild soap on a damp cloth can be used to clean the battery pack and charger, avoiding electrical contacts and harsh cleaning agents or solvents.
The manual also provides instructions for replacing specific parts, such as the plastic auger and the belt. When replacing the auger, users are advised to pay close attention to the types and positions of bolts and nuts to ensure proper and secure installation. The process involves opening side covers, removing screws, detaching the belt from the drive wheel, removing the drive wheel, and then removing the auger axle and old auger before installing the new one in reverse order. For belt replacement, the side plate is opened, the old belt is removed by turning the auger pulley counterclockwise while pulling the belt upwards, and the new belt is installed by placing it on the drive pulley first, then the auger pulley, and adjusting its ribs to match the pulley grooves.
For off-season storage, the battery pack and charger should be kept in a cool, dry place, away from moisture, and recharged every 6 months to 50% capacity to maintain optimal performance. Discharged battery packs should be handled carefully, with terminals covered by electrical tape to prevent shorting, and disposed of according to federal, state, and local regulations.
| Power Source | Battery |
|---|---|
| Battery Voltage | 40V |
| Clearing Width | 15 inches |
| Clearing Depth | 8 inches |
| Throw Distance | 20 feet |
| Run Time | Up to 30 minutes |
| Auger Material | Plastic |
| Chute Rotation | 180 degrees |
| Motor | Brushless |