EasyManua.ls Logo

SNOWJOE SJM988 - User Manual

SNOWJOE SJM988
16 pages
Print Icon
To Next Page IconTo Next Page
Loading...
© 2018 by Snow Joe
®
, LLC
All rights reserved. Original instructions.
SAVE THESE INSTRUCTIONS
A Division of Snow Joe
®
, LLC Model SJM988 Form No. SJ-SJM988-880E-MR6
OPERATOR’S MANUAL
ELECTRIC SNOW THROWER
18-INCH | 13.5-AMP | 20 W HALOGEN LIGHT
R
IMPORTANT!
Safety Instructions
All Operators Must Read These
Instructions Before Use
Any electrical appliance can be dangerous if used incorrectly.
Some of the safety precautions given in this manual apply
generally to many appliances. Other warnings are specic
to the use of this snow thrower. Keep this manual for future
reference.
General Safety WARNINGS!
You and any other operator of this snow thrower must read,
understand and follow these instructions in their entirety, and
should reread them at the start of each snow season. Failure
to follow these instructions may result in ELECTRIC SHOCK,
FIRE and/or serious PERSONAL INJURY.
Notice the personal safety alert symbol
m used in this
manual to draw your attention to a WARNING given along
with the particular operating instruction. This means that
the operation requires special ATTENTION, CAUTION and
AWARENESS.
Work area safety
1. Keep work area clean and well lit. Cluttered, dark areas
invite accidents.
2. Do not operate the snow thrower in an explosive
atmosphere, such as in the presence of ammable
liquids, gases or dust. Electrical appliances create sparks
that may ignite the dust or fumes.
3. Keep children, pets and bystanders away from the
work area. Be aware that the normal noise of the
machine when turned on may make it dicult for you to
hear approaching people. Spectators should wear safety
glasses and be kept a safe distance away from the work
area. Do not let spectators touch the snow thrower or the
extension cord.
Electrical Safety
1. Electrical plugs must match the outlet. Never modify
the plug in any way. Do not use any adapter plugs with
grounded appliances. Unmodied plugs and matching
outlets will reduce the risk of electric shock.
2. Avoid body contact with earthed or grounded surfaces
(i.e. upper and lower water pipes, radiators, ranges,
refrigerators, microwave ovens and outer frames of
heating equipment). Take necessary precautions to avoid
electric shock. There is an increased risk of electric shock
if your body is earthed or grounded.
3. Do not abuse the cord. Keep cord away from heat,
oil, sharp edges or moving parts. Never carry the snow
thrower by its cord or yank the cord to disconnect it from
the electrical outlet. Damaged or entangled cords increase
the risk of electric shock.
4. Replace or properly repair damaged cords. If the cord
becomes damaged in any manner while plugged into the
wall receptacle, immediately pull the extension cord plug
from the receptacle.
5. Contact with water while operating the snow thrower
can result in electric shock and serious bodily injury.
Do not use the snow thrower in damp or wet locations or
expose to rain. Do not handle the plug or the appliance
with wet hands or while standing in water.
6.
mWARNING – Only use a UL-rated extension cord for
OUTDOOR, all-weather use. To prevent the extension
cord from disconnecting during operation, refer to Fig. 12
(p. 8).
7. Turnothepowerswitchanddisconnectthepower
cable before making any adjustments to the unit and
before inspecting, servicing, changing accessories
or cleaning the snow thrower. Follow the same
procedure if any other dangerous conditions present
during operation. Any adjustments to the unit should be
performed after revolving parts inside the snow thrower
stop completely. Such preventative safety measures
reduce the risk of starting the power tool accidentally.
8. Ifyoundthemainpowercableortheextensioncable
damaged, please pull out the plug from the socket and
disconnect the power immediately. Repair the cable or
replace it if necessary.
9. When replacing any parts, you must strictly observe
the instructions and procedures described in this
operator's manual. Special care should be paid to any
rubber parts, since these parts may increase the engine
load and decrease its mechanical power if damaged.
10. Do not move or transport the snow thrower when the
plug is connected to the power socket and the switch
is turned on.
1
Question and Answer IconNeed help?

Do you have a question about the SNOWJOE SJM988 and is the answer not in the manual?

Summary

Safety Instructions

General Safety Warnings

General safety warnings and precautions for operating the snow thrower safely.

Work Area Safety

Guidelines for maintaining a safe and clear work area during operation.

Electrical Safety

Critical safety measures related to electrical connections and usage.

Personal Safety

Object Impact and Damage Inspection

Procedure for striking an object and inspecting for damage.

Walk-Behind Snow Thrower Safety Guidelines

Assembly

Operation

Securing the Extension Cord

Guidance on safely connecting and securing the extension cord.

Powering On and Off

Instructions for starting and stopping the snow thrower.

Moving and Plowing Snow

Techniques for moving the machine and clearing snow effectively.

Changing Throw Direction and Height

Adjusting Discharge Chute Direction

How to rotate the chute crank to change the snow discharge direction.

Adjusting Discharge Chute Height

Using the deflector knob to control the height of the snow stream.

Maintenance

Part Replacement

Replacing the Belt and Pulley

Detailed steps for replacing the drive belt and pulley.

Service and Support

Overview

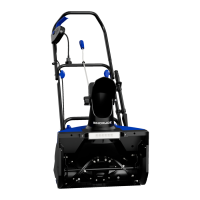
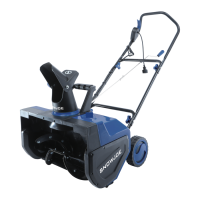
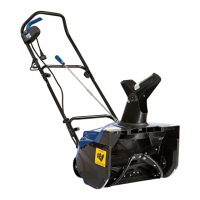
This document is the operator's manual for the Snow Joe SJM988 Electric Snow Thrower. It provides comprehensive instructions for assembly, operation, maintenance, and safety.

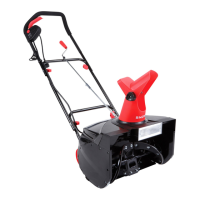
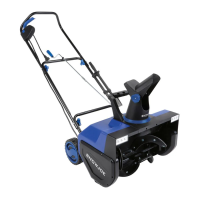
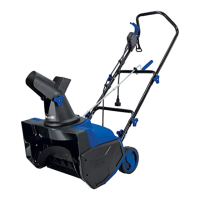
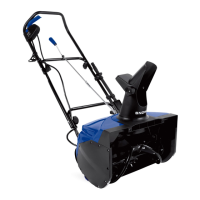
The Snow Joe SJM988 is an 18-inch, 13.5-amp electric snow thrower equipped with a 20 W halogen light. Its primary function is to clear snow from paved surfaces.

Important Technical Specifications:

  • Rated Voltage: 120 V ~ 60 Hz
  • Power: 13.5 A
  • Light: 20 W halogen
  • No Load Speed: 2450 rpm
  • Clearing Width: 18 in. (46 cm)
  • Clearing Depth: 10 in. (25.4 cm)
  • Throw Distance Max: 20 ft (6 m)
  • Plowing Capacity Max: 19.5 tons/hr (17.7 metric tons/hr)
  • Directional Control: 180° adjustable chute
  • Rotor: 4 rubber-tipped steel blades
  • Weight: 32.9 lbs (14.9 kg)

Usage Features:

The snow thrower is designed for residential and personal household use on paved surfaces. It features a safety switch button and an ON/OFF switch lever for operation. The 20 W halogen light can be turned on to illuminate the path in the dark, but only when the snow thrower is running.

For moving the machine and plowing snow, users are instructed to use the wheels as a pivot point and slightly tilt the snow thrower to move it forward or backward. Clearing paths should overlap, and users should consider wind direction to avoid throwing snow back onto cleared areas or into their face. The machine should be pushed gently and evenly, without excessive force, and additional man-made load should not be applied to the engine.

The discharge chute can be adjusted 180 degrees by rotating the chute crank. Clockwise rotation moves the chute to the left, and counterclockwise moves it to the right. The chute deflector on top of the discharge chute controls the height of the snow stream; it can be raised or lowered by loosening and tightening a knob. Users are warned never to direct the discharge chute at the operator, bystanders, vehicles, or windows, and to always orient it in the opposite direction.

The SJM988 includes an automatic reset function. If a major obstruction halts auger movement, the user should unplug the unit, clear the obstruction, wait 60 seconds, and then resume use.

Safety Instructions:

The manual emphasizes reading all instructions before use to prevent electric shock, fire, and serious personal injury. Key safety warnings include:

  • Work Area Safety: Keep the work area clean, well-lit, and free of children, pets, and bystanders. Do not operate in explosive atmospheres.
  • Electrical Safety: Ensure electrical plugs match the outlet and are not modified. Avoid body contact with earthed surfaces. Do not abuse the cord; keep it away from heat, oil, sharp edges, or moving parts. Replace or repair damaged cords immediately. Do not use in damp or wet locations or expose to rain. Only use a UL-rated extension cord for outdoor, all-weather use, and ensure it is properly secured to prevent disconnection. Turn off the power switch and disconnect the power cable before any adjustments, servicing, or cleaning. Do not move or transport the snow thrower when plugged in and switched on.
  • Personal Safety: Stay alert, use common sense, and do not operate when tired, ill, or under the influence. Wear proper clothing, including rubber boots, protective headgear, and safety glasses. Keep face, hair, clothing, hands, and feet away from moving parts. Ensure all guards and safety attachments are properly installed. This snow thrower is intended for use on paved surfaces; if used on gravel or unpaved surfaces, it must be adjusted according to the manual. Avoid accidental starting by ensuring the switch is in the off position before plugging in. Maintain proper footing and balance, and inspect the unit for damage after any fall or collision. If the snow thrower strikes an object, stop it immediately, inspect for damage, and repair before restarting.
  • Walk-Behind Snow Thrower Specifics: Read the manual carefully to understand applications, limitations, and hazards. Inspect the unit thoroughly before each use, ensuring all parts are secure and correctly installed. Clear the area of all objects (rocks, glass, nails, wire, string) that could be thrown or entangled. Do not force the snow thrower; maintain constant pressure. Do not use if the switch malfunctions. If the snow thrower runs unstably or makes abnormal sounds, stop, disconnect power, and contact an authorized service center. Respect local noise control regulations. Disconnect from power when not in use, changing accessories, or performing maintenance. Store safely indoors in a dry, locked area, out of reach of children and unauthorized users.

Maintenance Features:

  • General Maintenance: Do not attempt repairs without proper tools and instructions. Check bolts and screws frequently for tightness. After each snow removal session, run the snow thrower for a few minutes to prevent freezing, then shut off, wait for parts to stop, and wipe off residual ice and snow. Rotate the chute crank several times to remove excess snow.
  • Lubrication: The motor and auger are lubricated for lifetime use at the factory; additional lubrication is not necessary and may cause damage.
  • Replacing Rubber Plates: When replacing worn rubber plates, ensure the coarse side is placed inside and the smooth side outside. This involves detaching the worn rubber plate assembly from the auger assembly by removing nuts and bolts, then loosening the middle two sets of nuts and bolts to detach the plate from the metal frame. New plates are attached by reversing this process.
  • Replacing Scraper Bar: The scraper bar, located beneath the rotor housing, is replaced by removing two screws, detaching the worn bar, and fastening the new one with the same screws.
  • Replacing Belt + Pulley: This involves removing the left panel of the snow thrower. The worn belt is rolled off the big pulley after lifting the belt tension pulley. To replace the big pulley, a screw and washer are removed, and the outer nut is turned clockwise (left-handed thread) with a 7/8-inch socket. The new pulley is installed by reversing these steps. The new belt is installed by lifting the belt tension and rolling it onto the little pulley at an angle, then onto the top of the big pulley by rotating the big pulley counterclockwise. Heavy wet snow can put a load on belts, requiring more frequent replacement.
  • Storage: Allow the engine to cool completely before cleaning, storing, or transporting. Disconnect and inspect the extension cord for wear or damage. Store the unit and disconnected extension cord in a locked, dry place, out of reach of children. Covering with a tarp or a Snow Joe protective cover (SJCVR-21) is recommended.

Accessories:

The manual lists compatible accessories, including:

  • Snow Joe + Sun Joe SJTW-A 14-gauge 50-foot extension cord with lighted end (PJEXT50-B)
  • Universal snow thrower chute clean-out tool (SJCOT)
  • Universal 21-inch snow thrower protective cover (SJCVR-21) Users are warned to only use authorized replacement parts and accessories to prevent injury or mechanical damage.

SNOWJOE SJM988 Specifications

General IconGeneral
BrandSNOWJOE
ModelSJM988
CategorySnow Blower
LanguageEnglish

Related product manuals