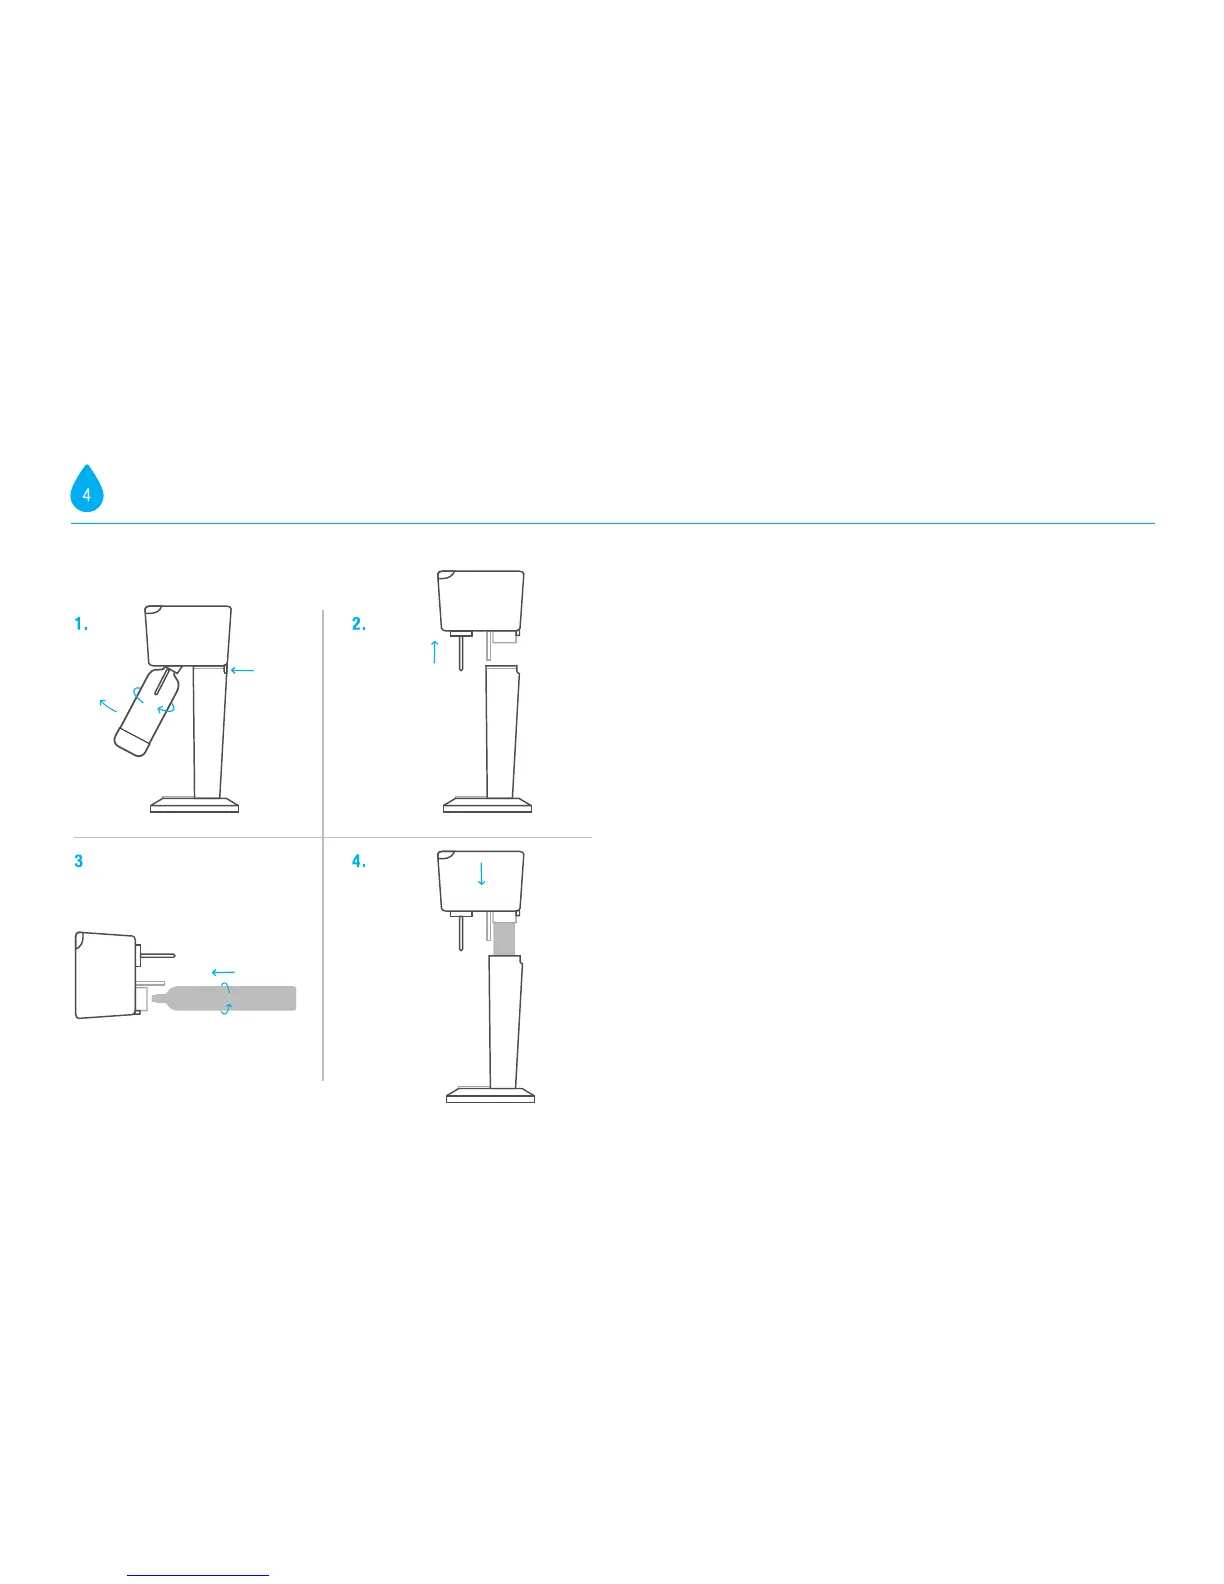
1. Place the GENESIS
™
Sparkling Water Maker on a flat sturdy surface in an upright
position. Remove the carbonating bottle if it is installed in the Sparkling Water
Maker. Never insert or replace the cylinder while a carbonation bottle is installed
in the Sparkling Water Maker. Press the button located at the rear to release the
Sparkling Water Maker's head from the body.
2. Pull the Sparkling Water Maker's head upwards and remove it. Set it to one side.
3. Remove seal and cap from the SodaStream CO
2
cylinder. Insert the cylinder into the
cylinder holder in the Sparkling Water Maker's head and screw to the right while
applying gentle pressure until it is firmly held in place. Hand-tighten only; DO NOT
use tools.
4. Place the Sparkling Water Maker’s head onto the Sparkling Water Maker. Push
down until you hear a click. Now you are ready to create the bubbles.
INSTALLING THE CO
2
CYLINDER INSTALLING THE CO
2
CYLINDER