Operation manual of solar water controller SR530C8/SR530C8Q
---------------------------------------------------------------------------------------------------------------------------------------------------
- 5 -
“-” Parameter adjust button
“+” Parameter adjust button
“ESC”, exit program setup
“Holiday” button(SR530C8 have no such function)
“Heating”- manual heating button
2.Installation
Controller can only be installed indoors, far away from dangerous place and away from
the electromagnetic field. Controller should be equipped with an additional plug, which
should have minimum 3mm distance between the pole of the plug or effective
compliance with the provisions of the installation. For example, switch or fuse, please
note that it should be separated between the wires, and use AC power.
2.1 Installing the controller
Note: the controller can only be installed in an area having an adequate level of
protection.
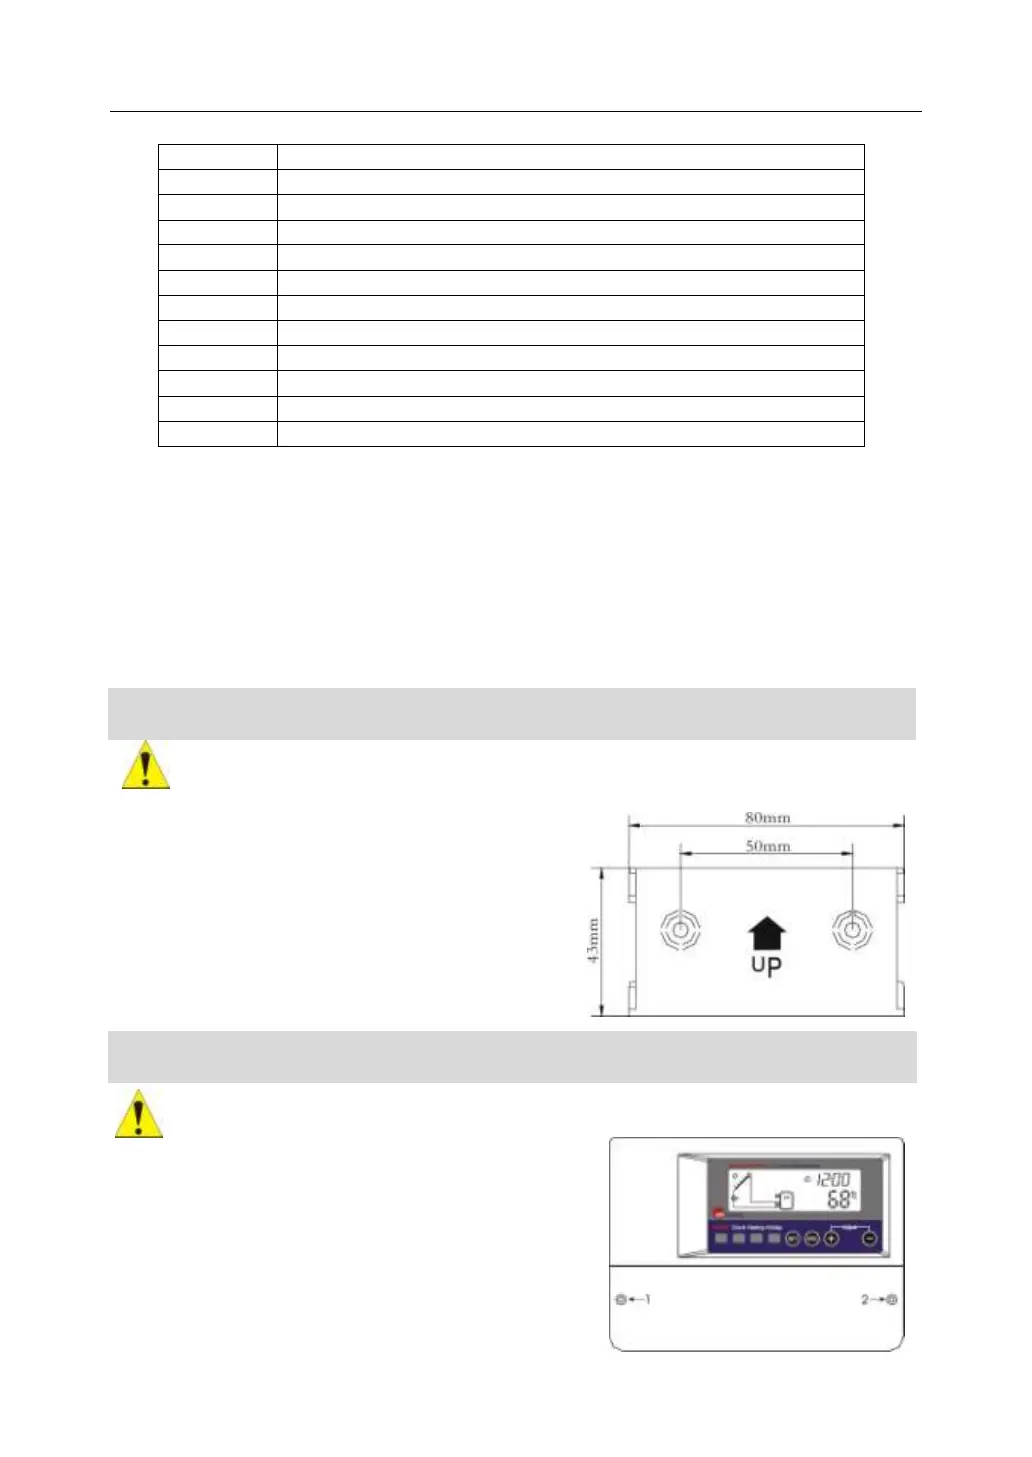
Fixing the hang-panel of controller
►Choose a suitable site
►Mark the position of hole
►Drill the fixing hole, insert the expansion screw
►Fix the hanging plate by using screw
►Press the control unit on the hanging plate
2.2 Preparing before wire connection
Please switch-off the power net before opening the controller cover, and note
the regulation of local electricity supply.
Open/ close the cover of terminal
►Loosen the screw ①②, move cover upwards and
take away the cover
►Close the cover: downwards close cover