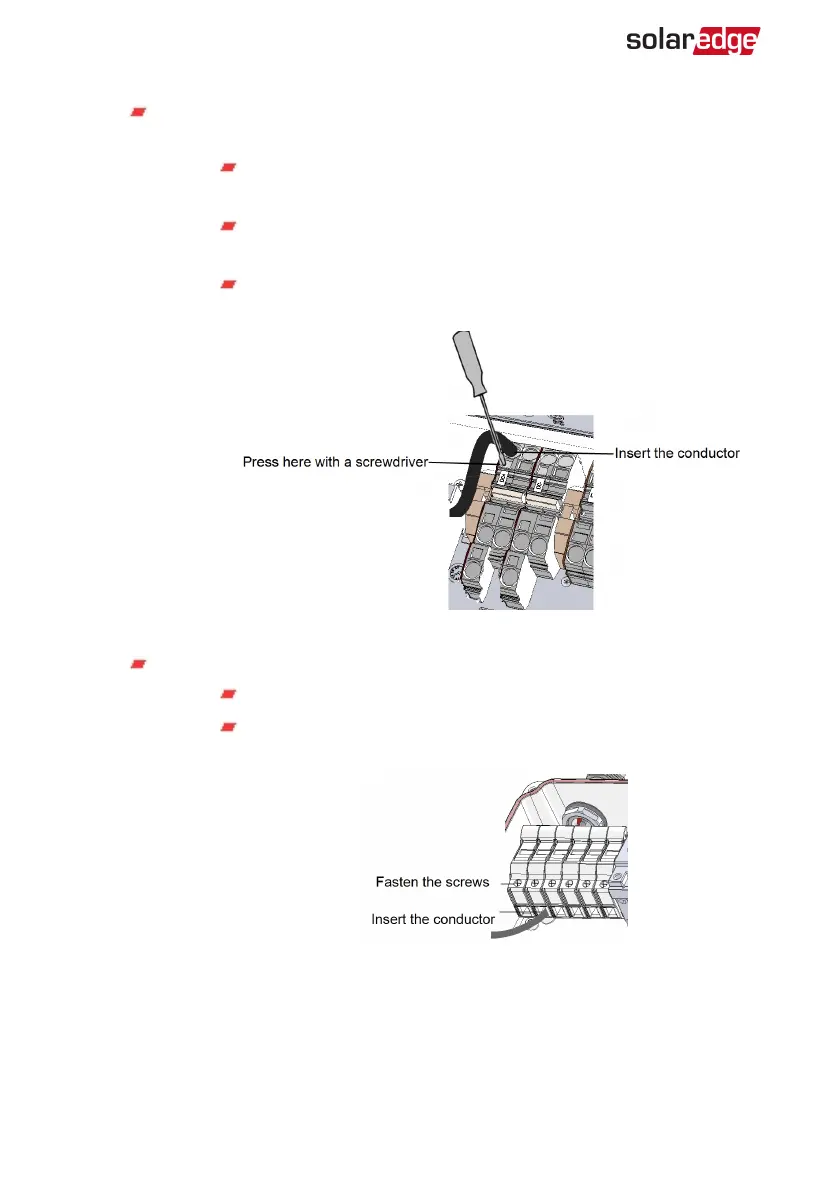
For DC terminals
without fuses
: Use a standard flat-blade screwdriver to
connect the wires to the spring-clamp terminals.
The screwdriver blade should fit freely in the terminal opening.
Too large a blade can crack the plastic housing.
Insert the screwdriver and press the release mechanism and open
the clamp.
Insert the conductor into the round opening and remove the
screwdriver – the wire is automatically clamped.
Figure 35: Spring-clamp terminals
For DC terminals
with fuses
:
Insert the wires into the side openings.
Fasten the screws at the top of the fuses. Apply torque of 3.4
N*M / 30 lb*in.
Figure 36: DC connection with fuses
4. Verify that there are no unconnected wires.
5. Close the DC Safety Unit cover: Attach the cover and secure it by tightening the four
screws with a torque of 1.2 N*m / 0.9 ft.*lb.
-Three Phase System Installation Guide MAN-01-00057-4.1
88 Connecting the Strings to the DC Safety Unit