Safety accessories
Safety instructions
ATTENTION!
Before working on the gate or the operator always disconnect
the control unit from the power supply and lock to prevent
reactivation.
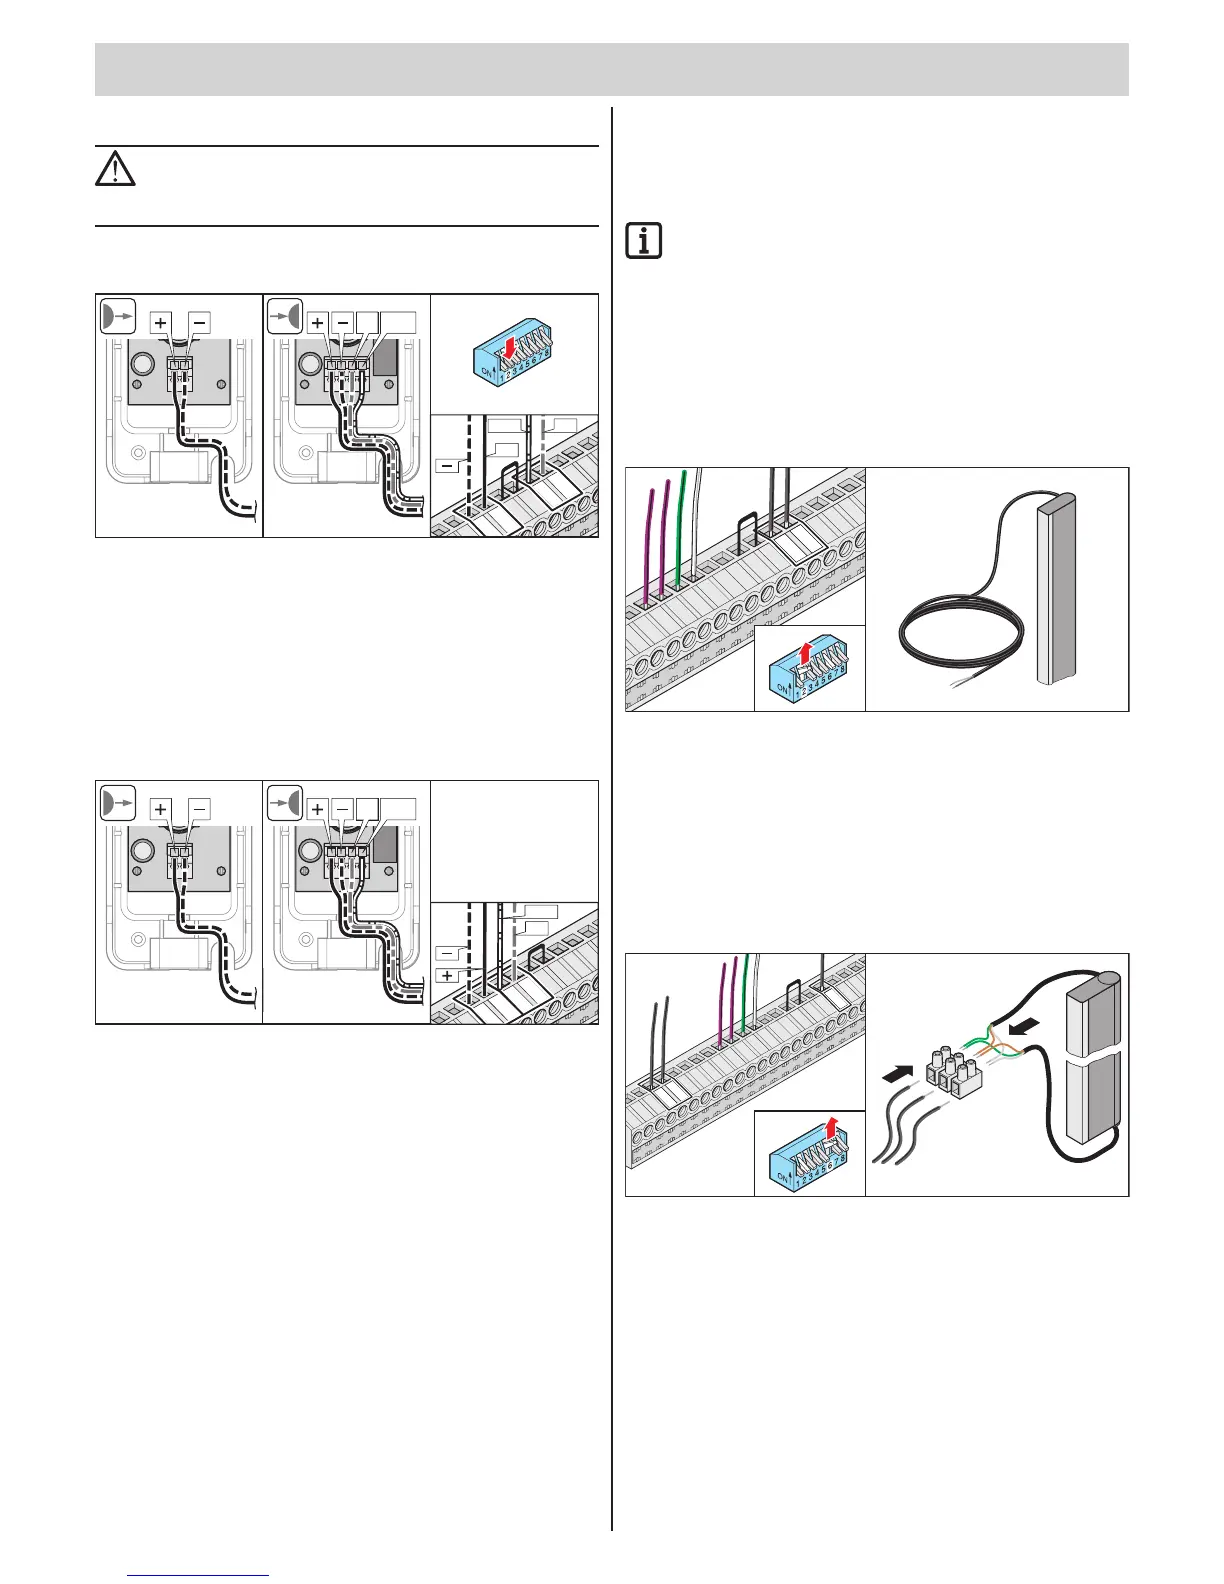
Connecting photo cells
NO
TX RX
COM
+
NO
COM
ON
7 865
4321
Safety input terminal 1 (Safety-1)
Terminals 6 + 7: Tested connection for oating contacts,
only if DIP switch 2 OFF.
Voltage supply
Terminal 10: Regulated DC 24 V, max. 0.1 A
Terminal 11: Earth
NO
TX RX
COM
NO
COM
Safety input terminal 2 (Safety-2)
Terminals 8 + 9: Tested connection for oating contacts,
reacts only with gate CLOSED
Voltage supply
Terminal 10: Regulated DC 24 V, max. 0.1 A
Terminal 11: Earth
STArter+:
Connect active safety contact strip
(optional with STArter)
IMPORTANT INFORMATION!
For the STArter+ (optional for STArter) either an 8.2 kohm
safety contact strip or an optoelectronic system can be
connected, but not both at the same time.
Electrical safety contact strip
(8.2 kohm)
Analysis 8.2 kohm. Connection without special analytical device,
the controller does the evaluation.
11
ON
7 865
4321
Terminal 6 + 7 Tested connection for an 8.2 kohm strip
DIP switch 2 ON
Optoelectronic safety contact strip
One strip can be connected without special analytical device, the controller
does the evaluation. Connection of two strips with special analytical device
only.
23
22
21
20
19 18
17
16
15
14
13
12
10
9
8
7
6
5
4
11
6
20
21
ON
7 865
4321
Terminal 6 Green cable from Fraba System
Terminal 20 Brown cable from Fraba system
Terminal 21 White cable from Fraba system
DIP switch 6
DIP switch 2
ON
OFF