Installation
Installing the console
1. Check the scope of supply.
2. Measure and mark drill holes in foundation.
3. Make drill holes.
4. Insert anchor ttings.
5. Screw down console.
Console
IMPORTANT INFORMATION!
Always note the dimensions and angles,
see "Installation location".
m
in
. 2
45
60,5
90°
6. Note the dimensions of the console and cable ducts for the mains
connection and accessories (e.g. photo cell) during excavation,
see "Foundation".
7. Check the dimensions and the horizontal position of the console.
Screw down or concrete in cable ducts and console.
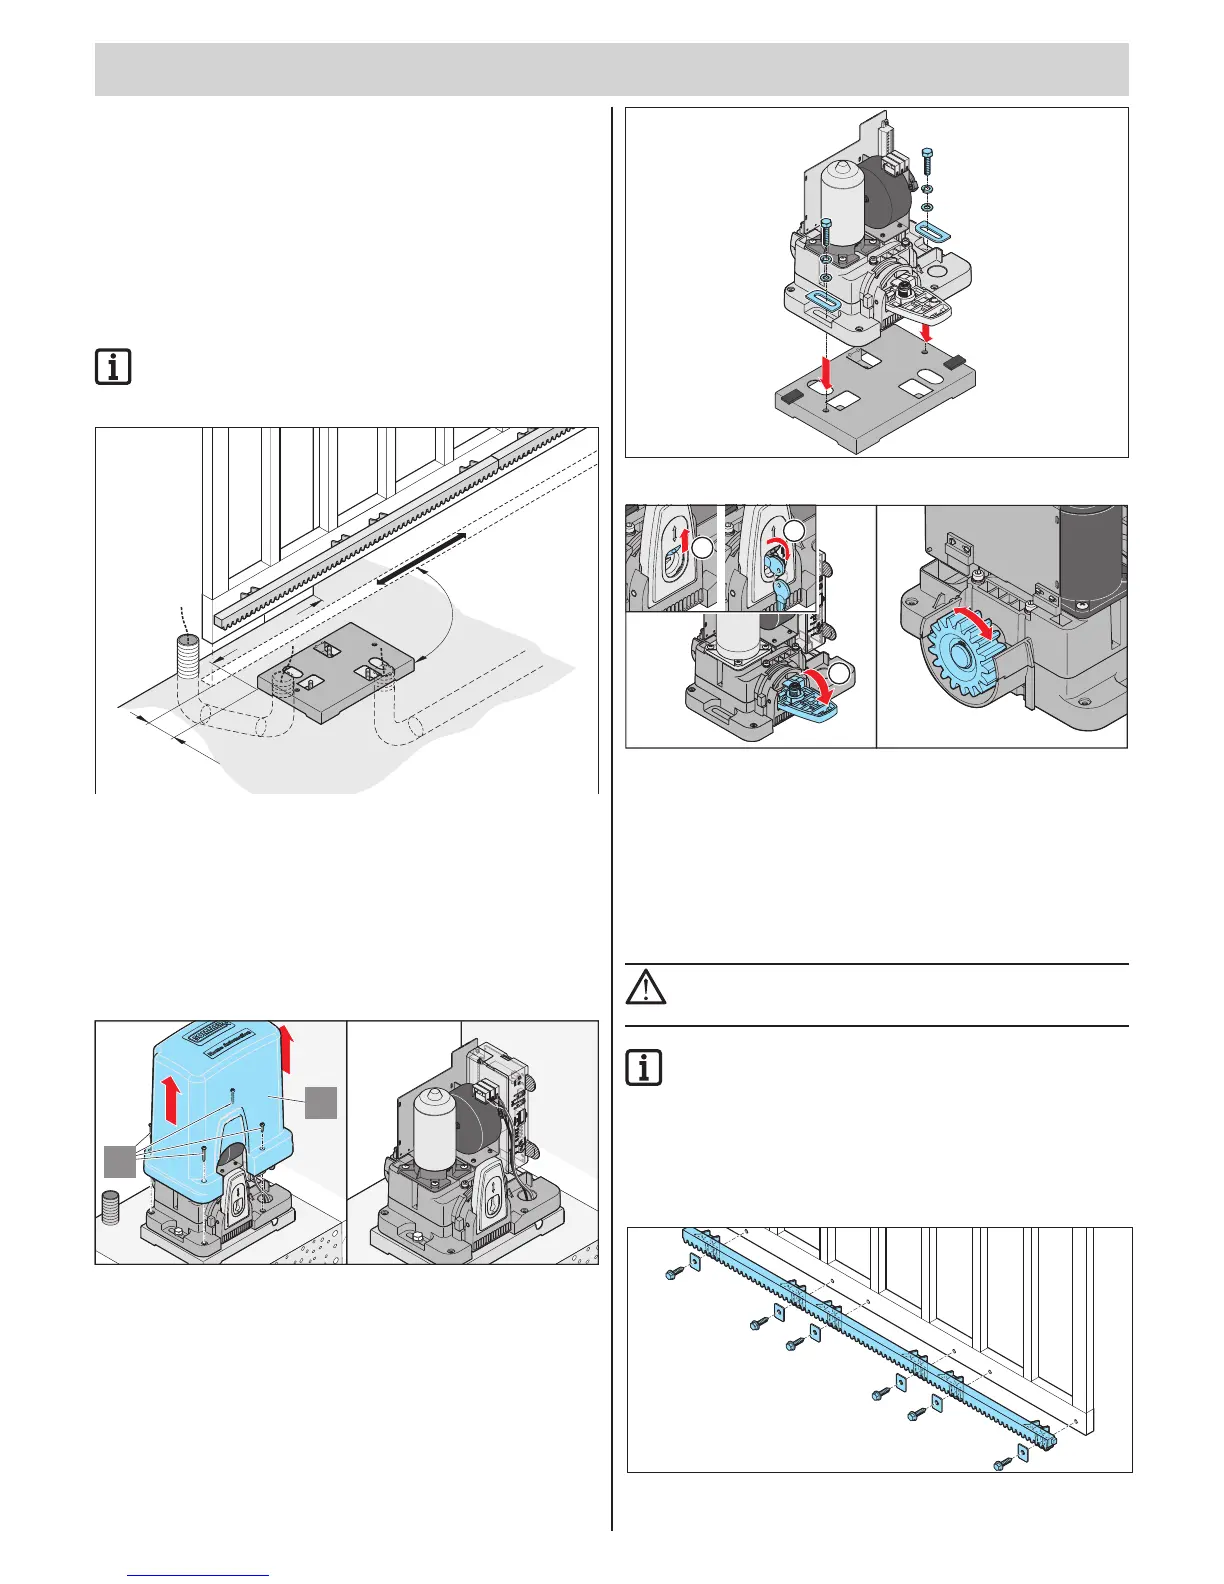
Installing operator on console
2
1
8. Unscrew the four screws (1) and remove cover (2).
9. Remove controller (3).
10. Screw operator to console. Use the mounting plates (30 x 20 x 1.5 mm)
to set a distance of 1.5 mm in between operator and console. This allows
optimum adjustment of the gear play.
Releasing the operator
2
1
3
11. Lift protective cover (1).
12. Insert key and turn.
13. Lift cover to the outside.
14. Operator is released and the gate can be moved manually.
Installing the racks
ATTENTION!
Steel racks must have a minimum width of 12 mm.
Narrower steel racks may damage the drive
IMPORTANT INFORMATION!
The complete kit contains four racks each 1 m long.
Contact your dealer if you require more racks.
• The toothed rack must not exert any pressure on the pinion in any
position of the gate, otherwise the gearing will get damaged.
• Always start installing the rack on the passage side of the gate.
• The holes must always be marked near the pinion.