Installation
12
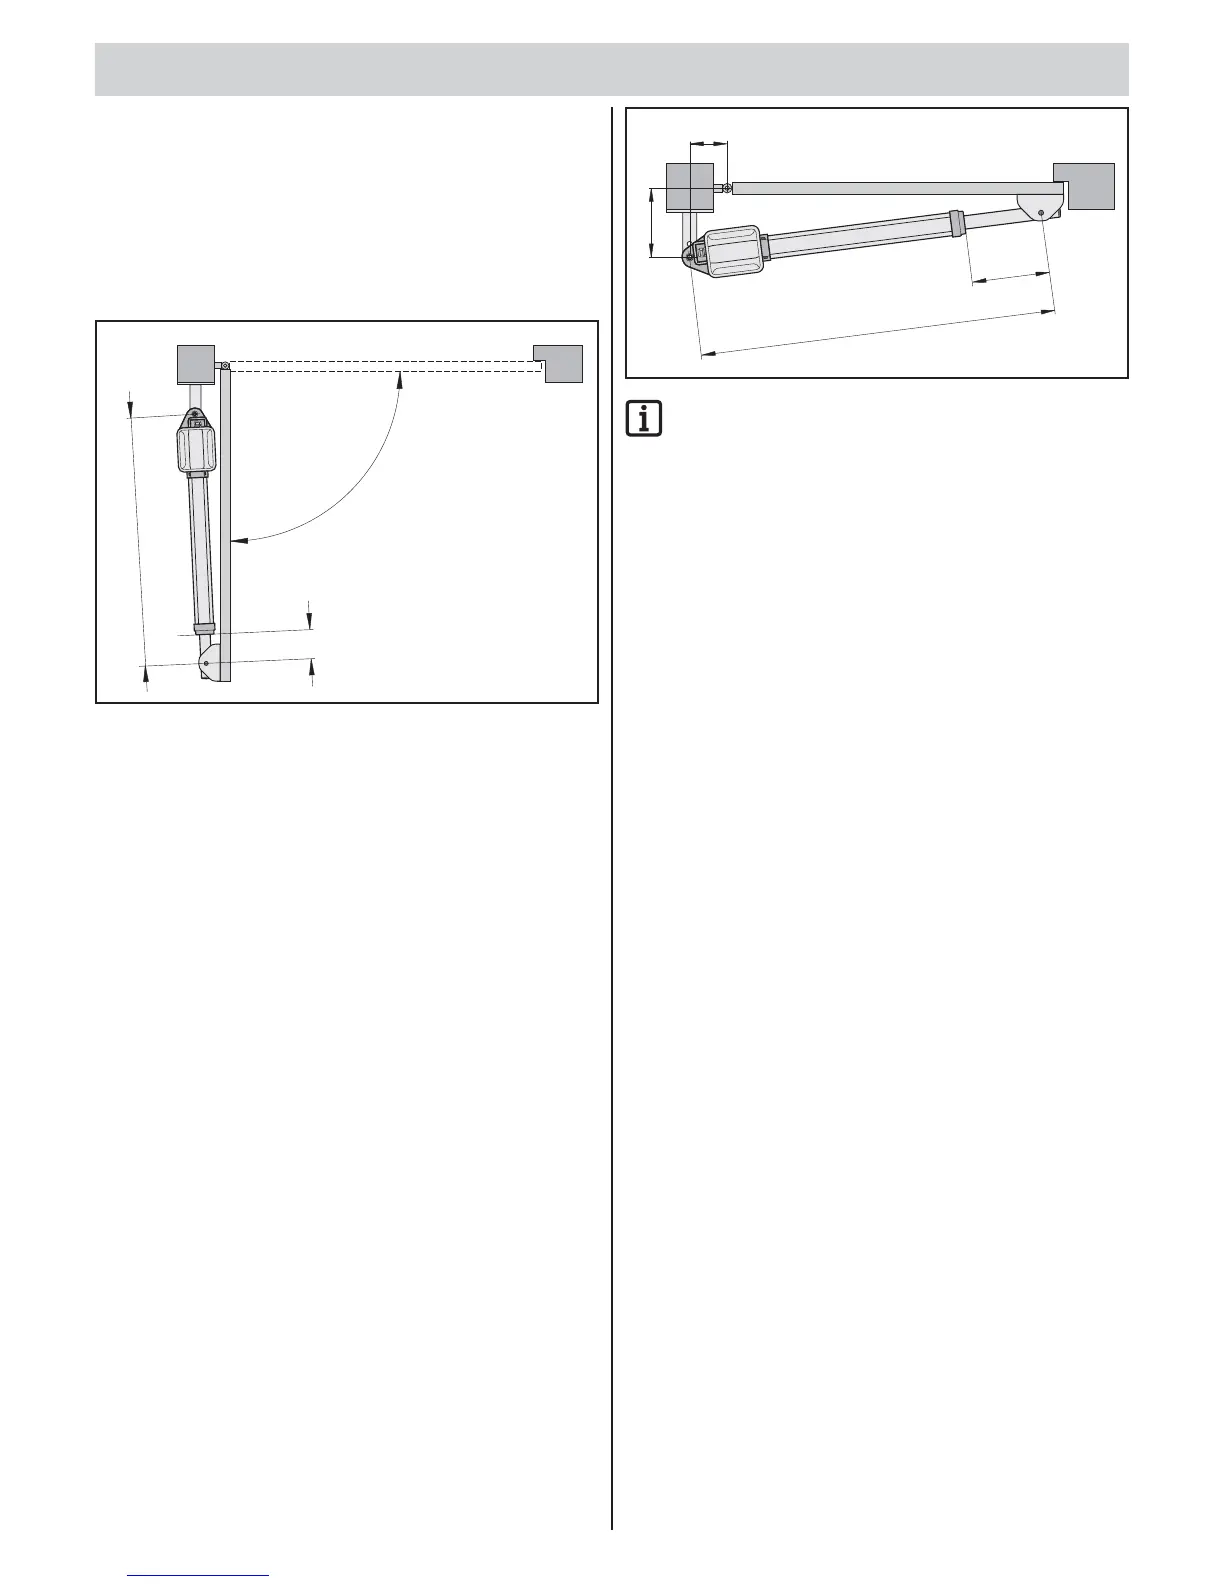
Installing fi ttings
1. Close the gate by hand.
2. Compare the A/B dimensions with the A/B dimension table.
3. Fasten the post/pillar fi tting temporarily (e.g. with a clamp).
4. Check installation situation and dimensions.
Uphold distance to the fl oor: at least 50 mm.
5. Fasten post/pillar fi tting.
C1 = 40 mm
D
min
C = 670 mm
min
6. Manually move the gate to the “Gate OPEN” position.
Note the maximum possible opening angle D from
the A/B dimension table.
7. Hang the operator in the post fi tting and secure it with a screw.
The operator push rod is at maximum retraction as delivered.
8. Unscrew push rod, at least to C1
min
.
9. Fix the gate leaf fi tting to the push rod.
10. Insert the screw from above.
11. Fasten the gate leaf fi tting temporarily to the gate (e.g. with a clamp).
12. Unlock the operator, see chapter “Locking and unlocking the operator”.
13. Close the gate by hand.
C = 1060 mm
C1 =
A
B
max
430 mm
max
IMPORTANT INFORMATION!
The smaller the C1 dimension, the higher the stability.
14. Measure C1 dimensions and set between C1
min
and C1
max
.
Do not exceed C1
max
.
15. Check that the operator is horizontal in the positions:
▫ “Gate OPEN”
▫ “Gate CLOSE”
▫ Opened 45°
16. Check the position of the gate leaf fi ttings.
17. Fix gate leaf fi ttings.
18. Screw in the nuts of the connecting screws (operator to fi tting) only tight
enough that the gate with the operator can still be turned easily.
 Loading...