FIGURE 6: EXPOSED STUDS AFTER DRYWALL IS REMOVED
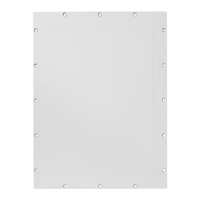
FIGURE 4: MARKING THE SPEAKER LOCATION
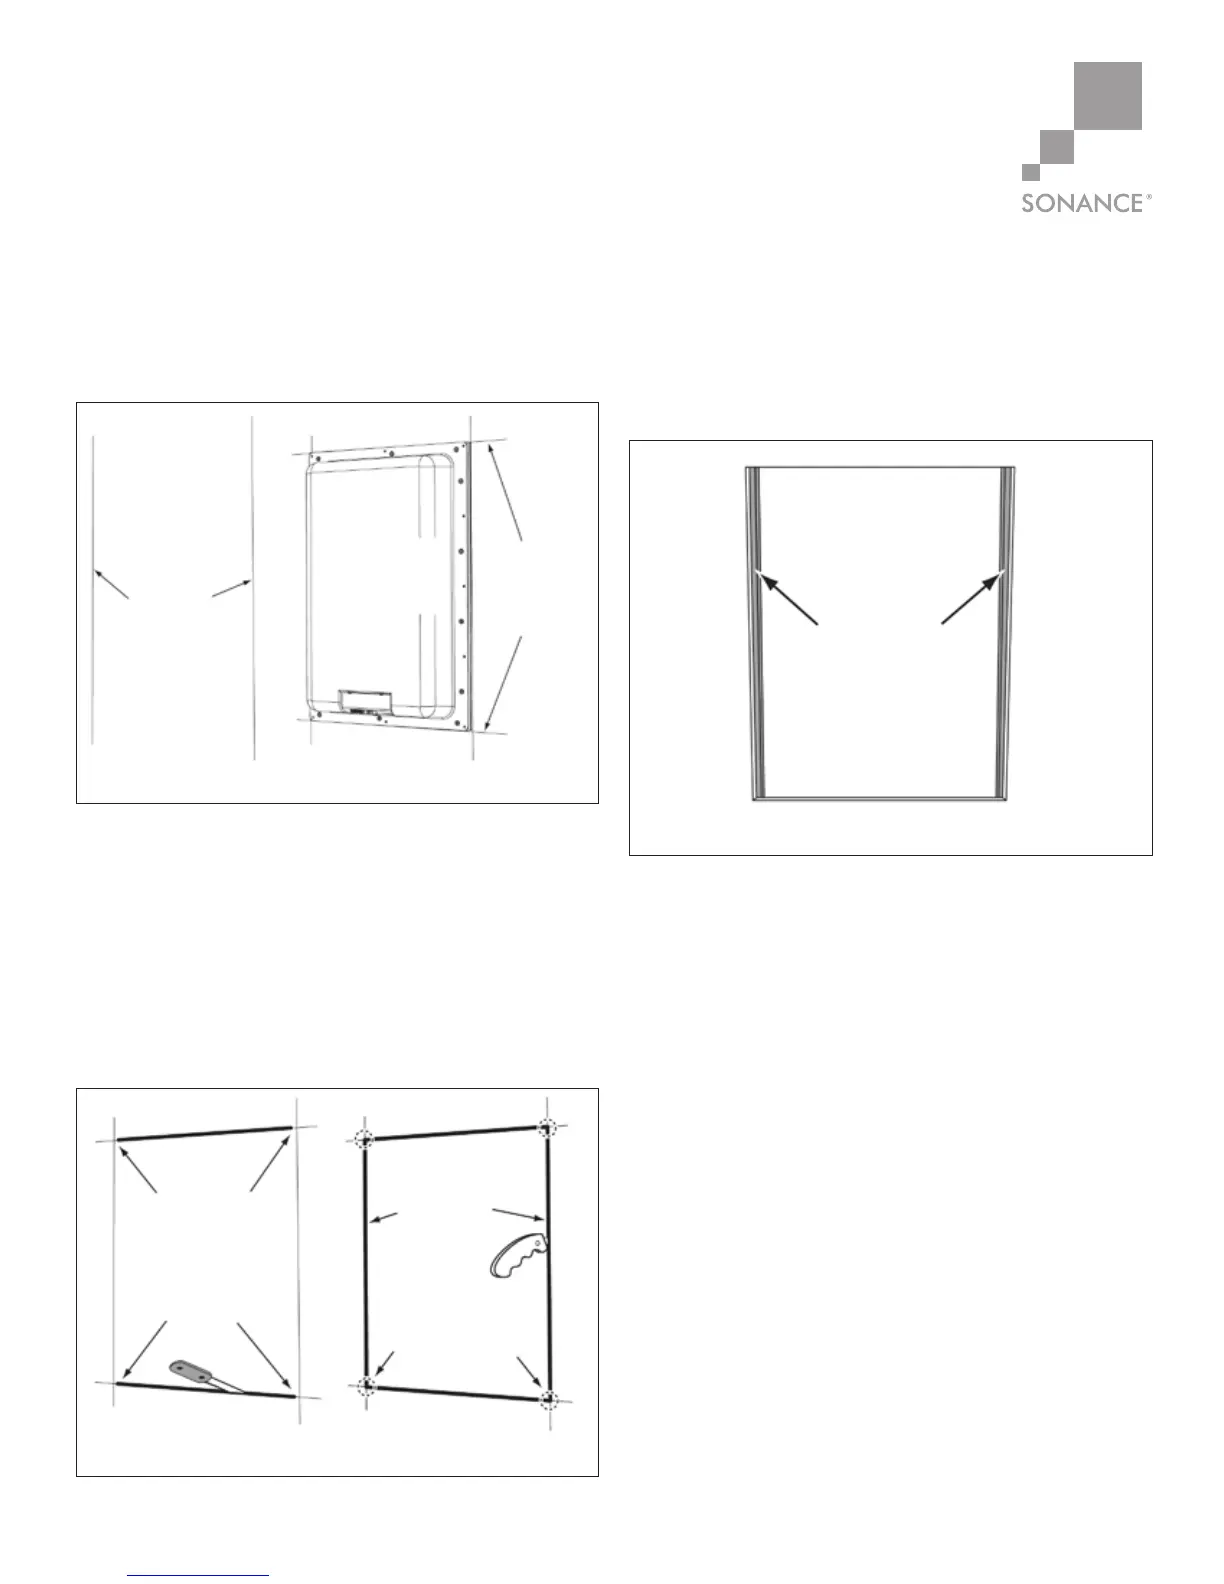
FIGURE 5: CUTTING THE MOUNTING HOLE
Half (¾”) of
Each Stud/Joist
Should Be
Exposed
3. Use Utility Knife
to Complete
Horizontal Cuts
9
EXISITNG CONSTRUCTION
1. Determine the location for the speaker.
2. Using a stud finder, locate the first studs/joists to
the right and left of the speaker position.
3. Mark the centers of the studs/joists.
(See Figure 4, below.)
4. Using the speaker as a template, determine the desired
speaker location on the wall. Mark the speaker’s top
and bottom edges on the drywall. (See Figure 4, above.)
5. Before proceeding, perform an obstruction survey
to be certain that there are no studs, conduit, pipes,
heating ducts, pocket doors, or air returns in the wall
cavity that will interfere with the speaker.
6. Using a drywall saw, cut the drywall along the top
and bottom horizontal marks UP TO THE INSIDE
EDGES OF THE LEFT AND RIGHT STUDS/JOISTS.
(See Figure 5 below.)
7. Using a utility knife, cut the drywall along the vertical
marks at the centers of the studs/ joists. Use the
utility knife to complete the horizontal cuts at each
stud/joist. (See Figure 5, below.) Remove the drywall
from the opening.
•Thisshouldexposeonly¾”(19mm)ofeachstud/
joist or half of the stud/joist surface. (See Figure 6.)
8. Test-fit the speaker into the opening, verifying that
all of the speaker’s edges are even with the drywall
edges. If necessary, trim the edges of the drywall to
properly accommodate the speaker.
1. Mark Stud
Centerlines
on Wall
2. Hold Speaker
Against Wall
at Mounting
Location
3. Mark Top
and Bottom
Edges on
Wall
1. Use Drywall Saw
to Cut Along Top
and Bottom Lines
Up to Inside Edges
of Studs
2. Use Utility Knife
to Cut Along Stud
Centerlines
 Loading...