Do you have a question about the Sony BVM-D24E1WU, BVM-D24E1WE, BVM-D24E1WA and is the answer not in the manual?
Ensures the monitor operates within specified temperature limits when installed in a rack assembly to prevent damage.
Addresses maintaining adequate airflow for safe operation when the monitor is installed in a rack.
Highlights the importance of proper mounting to avoid hazardous conditions due to uneven mechanical loading.
Emphasizes considering circuit load effects and appropriate equipment nameplate ratings.
Stresses the necessity of maintaining reliable earthing for rack-mounted equipment.
Specifies maintaining a 44 mm gap above and below rack-mounted equipment for proper ventilation.
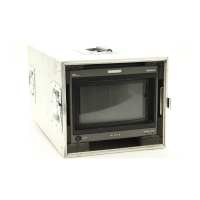
Covers essential safety, installation, cleaning, and operational guidelines for the monitor and its components.
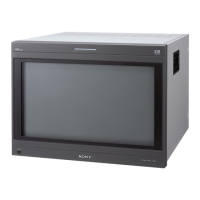
Provides a general description of the Trinitron Color Video Monitors, their features, and suitability.
Lists optional accessories available for external control, setup, and installation.
Explains how to assemble the input/output connector panel using optional adaptors.
Details the procedure for safely installing decoder or input expansion adaptors into the monitor.
Identifies and describes the function of front and rear panel controls and connectors.
Explains the location and function of parts and controls for the optional BKM-10R Monitor Control Unit.
Provides instructions for replacing the 16:9 mask with the supplied 4:3 mask on specific models.
Details how to operate the monitor menus using the control unit buttons and knobs.
Illustrates the hierarchical structure of the monitor's menus, from Main Menu to Level 5.
Explains how to set preset values for contrast, brightness, chroma, and phase using manual or auto adjustment.
Guides on adjusting color temperature using manual, probe, or data copy methods.
Covers setting input signal formats, channel assignments, and connector configurations.
Details how to set up serial and parallel remote control functions and assign pins.
Explains how to set, change, and apply passwords to menu items for security.
Covers settings for channel entry, power-up conditions, degauss delay, and other system configurations.
Allows selection of displayed information like caption vision, signal format, and channel name.
Provides procedures for adjusting picture position, size, geometry, and convergence.
Guides on correcting beam landing shifts and adjusting CRT color uniformity.
Covers loading factory data, memory card operations, monitor restart, and maintenance functions.
Explains how to share settings between monitors via serial remote ports.
Allows viewing general monitor status, current channel, and installed board information.
Provides detailed technical specifications including CRT, input/output, power, and performance data.
Presents detailed physical dimensions and mounting information for various monitor models.
| Category | Professional Broadcast Monitor |
|---|---|
| Aspect Ratio | 4:3, 16:9 |
| Screen Size | 24 inch |
| Technology | CRT (Trinitron) |
| Input Connectors | BNC (RGB/Component), Composite |
| Supported Standards | NTSC, PAL, SECAM, HDTV |