Do you have a question about the Sony BVM-D14H5E and is the answer not in the manual?
Explains the meaning of warning symbols used in the manual and on the product.
General advice on safe operation and important precautions to prevent accidents.
Details on periodic inspection requirements and what to do in case of malfunction.
Describes the monitor's main features, including multi-format support and high-resolution picture tube.
Lists optional accessories and components for installation, such as mounting brackets.
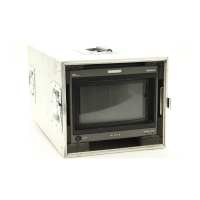
Details the front and rear panels of the BVM-D9H/D14H series monitors.
Explains how to operate the monitor's menu system using buttons and knobs.
Details the menu hierarchy, how to display lists, and the ADDRESS menu.
Guides on adjusting chroma, phase, contrast, and brightness using preset values.
Instructions for adjusting color temperature using knobs or automatic probe methods.
Details on setting up input channels, slots, and signal types for the monitor.
Explains settings for serial and parallel remote control functions and pin assignments.
Configures power-up state, input channel, and display settings.
Provides data on current channel, monitor status, and installed options.
Adjusts the position, size, and geometry of the picture displayed on the monitor.
Selects monitors or groups for serial remote control operations.
Instructions on not opening the unit, avoiding water/foreign objects, and handling the power cord.
Guidance on avoiding adverse environments and proper installation practices.
Warnings about using AC adapters with other equipment and using dedicated breakers.
Advises against touching plugs with wet hands and emphasizes powering off during connections.
Ensures correct cables are used, battery packs are secure, and unit is placed stably.
Covers avoiding direct sunlight, proper handling of heavy units, and airflow.
Prohibits climbing on the monitor and outlines cleaning/moving procedures.
Details safety measures for installing circuit boards and ensuring proper power off.
Instructions for smoke, fluid leakage, and potential explosion hazards with batteries.
Highlights severe risks like rupture, fire, and injury from improper battery handling.
Advises on avoiding magnetic fields and proper rack storage for optimal performance.
Notes on CRT care, cleaning procedures, and specific usage for 4:3 signals.
Specific guidelines for battery operation on certain monitor models.
Highlights multi-format support, high-resolution CRT, and separate control unit design.
Covers remote control, auto adjustments, 4:3 markers, and expandable input options.
Details stable color temperature, blue-only mode for noise monitoring.
Describes on-screen menus, remote control connectors, and audio features.
Lists optional accessories like control units, probes, and rack mount kits.
Explains the role of input adapters and provides a crucial caution for their use.
Identifies and describes the function of each control and indicator on the front panel.
Describes the function of tally, standby, and power lamps.
Details the functions of DEGAUSS, POWER, Ent, and numeric keypad buttons.
Explains MANUAL adjustment knobs, OPTION connector, and VOLUME control.
Explains manual adjustment knobs and the SHIFT button for function selection.
Details the function buttons, menu operation buttons, and stand.
Describes the function of Underscan, H/V Delay, and MONO buttons.
Explains APT, COMB, ADDRESS, F1, and F2 button functions.
Details the 16:9 aspect ratio and SYNC signal control buttons.
Describes BLUE ONLY, R/G/B beam control, and MARKER button functions.
Mentions F3/F4 buttons reserved for future expansion.
Identifies rear panel connectors including PARALLEL REMOTE, DC IN, SERIAL REMOTE, and option slots.
Details pin assignments for PARALLEL REMOTE and SERIAL REMOTE connectors.
Explains DC 12V input, EJECT button, AC adaptor/battery place, and option slots.
Describes analog input/output connectors and audio input/output jacks.
Illustrates daisy chain connections for monitors and control units.
Details input option slots, analog connectors, and audio I/O jacks.
Provides steps for attaching and removing the AC adapter or battery.
Guides on connecting the AC power cord securely to the monitor.
Identifies controls and indicators on the front panel of the BVM-D14H1J/D14H5J.
Describes the functions of the Tally lamp, POWER switch, and DEGAUSS button.
Explains MANUAL adjustment knobs, numeric keypad, and associated cautions.
Details the menu operation buttons, POWER and STANDBY lamps, and OVER LOAD lamp.
Explains the SHIFT button for function selection and the function buttons.
Covers the OPTION connector and OVER LOAD lamp indicator.
Describes the function of Underscan, H/V Delay, and MONO buttons.
Explains APT, COMB, ADDRESS, F1, and F2 button functionalities.
Details the 16:9 aspect ratio and SYNC signal control buttons.
Describes BLUE ONLY, R/G/B beam control, and MARKER button functions.
Mentions F3/F4 buttons reserved for future expansion.
Identifies input slots, analog connectors, power switch, and AC input on the rear panel.
Explains PARALLEL REMOTE connector pin assignments and SERIAL REMOTE connector functionality.
Details input option slots and connection methods for daisy-chaining monitors.
Describes analog input/output connectors and the AC IN connector.
Explains the MAIN POWER switch and connection for the CONTROL UNIT.
Step-by-step instructions for installing the 4:3 mask on BVM-D14H series monitors.
Step-by-step instructions for installing the 4:3 mask on BVM-D9 series monitors.
Procedure for removing the 4:3 mask and reinstalling the 16:9 mask.
Details the functions of UP, DOWN, MENU, ENTER, PHASE knob, and numeric keypad.
Guides on displaying the menu list and navigating through menu levels.
Explains the purpose and format of menu numbers used for descriptive purposes.
Details the process of selecting menus, adjusting values, and confirming settings.
Explains how to select settings in setting mode and from a setting list.
Methods for entering numerical values using keypad, UP/DOWN buttons, or PHASE knob.
Guides on entering channel names and correcting characters using the Del button.
Explains the purpose of the ADDRESS menu for controlling multiple monitors.
Details the process of entering characters and correcting them using menu controls.
Outlines the main menu categories and their corresponding functions.
Guides on preliminary adjustments for chroma, phase, contrast, brightness using presets.
Details manual adjustment via knobs and automatic adjustment using probes.
Explains menu reading, control panel layout, and manual adjustment steps.
Guides for automatic adjustment using color bar signals and selecting bar types.
Provides crucial cautions for performing automatic adjustments in the AUTO menu.
Explains adjusting color temperature using STD, COL1, COL2 data.
Lists compatible color temperature probes and connection requirements.
Illustrates the hierarchical structure of the COLOR TEMP ADJ menu.
Details manual adjustment using knobs for RED, GREEN, BLUE, and LUMINANCE.
Guides on using probes for automatic adjustment and copying color temperature data.
Explains F2 shortcut key and provides notes on using the COPY menu.
Explains setting up to nine input channels and configuring input signals.
Details assigning slots, connectors, and signal types based on installed adapters.
Illustrates the hierarchical structure of the INPUT CONFIG menu.
Guides on setting channel data including format, slot, input number, and name.
Details settings for scanning lines, H phase, markers, NTSC setup, and VCR mode.
Explains signal format selection and channel name assignment procedures.
Explains remote control functions and priority order among control methods.
Details assigning monitor addresses and group numbers for serial remote control.
Illustrates the REMOTE menu structure and provides important notes on address numbering.
Guides on selecting SERIAL REMOTE or PARALLEL REMOTE control types.
Details settings for serial remote (address/group) and parallel remote (pin assignments).
Explains the functions assignable to specific pins of the PARALLEL REMOTE connector.
Covers power-up conditions, input channels, degauss delay, and contrast/brightness settings.
Details display modes for signal format, channel number, channel name, and caption.
Provides notes on remote control operation, including LED indicators and shift modes.
Details settings for STANDBY MODE, DEFAULT CH, DEGAUSS DELAY, and more.
Covers settings for FORMAT DISPLAY, POSITION, CH NO, CH NAME, and CAPTION.
Guides on how to access and configure settings within the SYSTEM CONFIG menus.
Explains the purpose of the STATUS menu and its hierarchical structure.
Details the information displayed in the STATUS menu, including channel and model data.
Shows information about optional boards installed in the slot 1 to 3.
Explains the purpose of the ALIGNMENT menu and its hierarchical structure.
Details the settings for V SIZE, V CENTER, H SIZE, H PHASE, H PIN, and H KEY.
Explains the ADDRESS menu's purpose for selecting monitors and how to display it.
Provides notes on remote control operation, including LED indicators and shift modes.
Procedure to cancel the active remote control mode.
Instructions on how to exit the ADDRESS menu.
Explains using short-cut functions to select monitors in SINGLE, GROUP, or ALL modes.
Details system, CRT, dimensions, power requirements, and connector types.
Covers video signal, picture performance, convergence, luminescence, and resolution.
Specifies operating, storage, and transport conditions for the monitor.
Lists supplied accessories and acquired safety regulations.
Provides pin assignments and diagrams for the GRASEBY SLS 9400 probe connection cable.
Provides pin assignments and diagrams for the MINOLTA CA-100 probe connection cable.
Details pin assignments for the PHILIPS PM 5639 probe connection cable.
Details pin assignments for the THOMA TF6 probe connection cable.
Illustrates the hierarchical structure of the main menu and its sub-menus.
| Screen Size | 14 inches |
|---|---|
| Resolution | 800 x 600 |
| Panel Type | CRT |
| Aspect Ratio | 4:3 |
| Brightness | 100 cd/m² |
| Contrast Ratio | 1000:1 |
| Resolution (TVL) | 800 TVL |
| Display Type | CRT |
| Display Technology | CRT |
| Input Connectors | BNC |