EasyManua.ls Logo

Sony CD Mavica MVC-CD500 User Manual

Sony CD Mavica MVC-CD500
132 pages
To Next Page IconTo Next Page
Page #1 background imageLoading...
Page #1 background image
3-081-837-14(1)
Digital Still Camera
Operating Instructions
Before operating the unit, please read this manual thoroughly, and
retain it for future reference.
Owner’s Record
The model and serial numbers are located on the bottom. Record the
serial number in the space provided below. Refer to these numbers
whenever you call upon your Sony dealer regarding this product.
Model No. MVC-CD500
Serial No.
MVC-CD500
© 2003 Sony Corporation
Getting started_______________________
_
Shooting still images_________________
_
Viewing still images__________________
_
Deleting still images _________________
_
Before advanced operations____________
_
Advanced still image shooting __________
_
Advanced still image viewing ___________
_
Still image editing _____________________
_
Enjoying movies ______________________
_
Enjoying images on your computer
_
_____
_
Troubleshooting ______________________
_
Additional information__________________
_
Index ____________________________
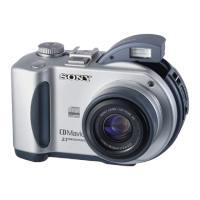
Table of Contents

Other manuals for Sony CD Mavica MVC-CD500

Questions and Answers:

Sony CD Mavica MVC-CD500 Specifications

General IconGeneral
Image ratio w:h4:3
Effective pixels5.0 MP
Sensor typeCCD
Optical zoom3x
Focal length (equiv.)39 - 117 mm
Screen size2.5"
Screen dots123, 000
Max shutter speed1/1000 sec
BatteryNP-FM50
Sensor size1/2.7"
ISO100, 200, 400
Aperture maxf2.8-5.6
Storage typesCD-R

Summary

Getting started

Charging the battery pack

Instructions for charging the camera's battery pack using the AC adapter.

Using an external power source

Connecting the camera to an external power source via AC adapter.

Turning on/off your camera

How to power the camera on and off, including auto power-off function.

How to use the control button

Using the control buttons for menu navigation and setting changes.

Setting the date and time

Procedure for setting the camera's date and time.

Shooting still images

Inserting and removing a disc

Steps for inserting and removing discs for image storage.

Initializing a disc

Process required to prepare a new disc for recording images.

Setting the still image size

Selecting the desired resolution for still images before shooting.

Basic still image shooting — Auto adjustment mode

How to shoot images using the camera's automatic settings.

Using the zoom feature

How to use the camera's optical and smart zoom functions.

Shooting close-ups — Macro

Using the macro mode for close-up photography of small subjects.

Selecting a flash mode

Choosing different flash modes for various shooting conditions.

Recording images with the hologram AF

Using hologram AF for improved focus in low-light conditions.

Inserting the date and time on a still image

Option to superimpose date and time information onto captured images.

Viewing still images

Viewing images on the LCD screen of your camera

Methods for viewing images directly on the camera's LCD screen.

Viewing an index screen (nine-image or triple-image)

Navigating through images using index display modes.

Viewing images on a TV screen

Connecting the camera to a TV for image viewing.

Deleting still images

Deleting images

How to delete individual images from the camera.

Deleting images in index (nine-image) mode

Deleting multiple images using the nine-image index view.

Formatting a CD-RW

Process to erase all data and prepare a CD-RW for reuse.

Before advanced operations

How to setup and operate your camera

Overview of camera setup and operation using menus.

How to use the jog dial

Using the jog dial for adjusting settings and navigating menus.

Creating or selecting a folder

Managing image folders on the disc for organization.

Advanced still image shooting

Shooting with manual adjustments

Using S/A/M modes for manual control over shooting settings.

Shutter speed priority mode

Setting shutter speed to freeze or blur motion.

Aperture priority mode

Controlling depth of field by adjusting aperture.

Choosing an auto focus method

Selecting AF range finder frame and AF mode for focus.

Adjusting the exposure — EV adjustment

Manually adjusting exposure compensation from +2.0EV to -2.0EV.

Selecting the metering mode

Choosing between Multi-pattern, Center-weighted, and Spot metering.

Adjusting color tones — White Balance

Setting white balance for accurate color reproduction under different lighting.

Shooting according to scene conditions — Scene Selection

Using scene modes like Twilight, Landscape, or Portrait.

Advanced still image viewing

Enlarging a portion of a still image

Magnifying parts of an image for closer inspection.

Rotating still images — Rotate

Changing the orientation of images (portrait to landscape).

Playing back images shot in Multi Burst mode

Viewing Multi Burst sequences continuously or frame by frame.

Still image editing

Protecting images — Protect

Preventing accidental deletion of important images.

Changing image size — Resize

Adjusting the resolution of recorded images and saving as a new file.

Choosing images to print — Print (DPOF) mark

Marking images for printing at a photo shop or compatible printer.

Enjoying movies

Shooting movies

Recording movies with sound using the camera.

Viewing movies on the LCD screen

Playing back recorded movies with sound on the camera's LCD.

Deleting movies — Delete

Removing unwanted movie files from the disc.

Enjoying images on your computer

Viewing images on your computer — Introduction

Overview of methods for viewing images on a computer.

Viewing images using CD-ROM drive

Accessing images on discs via a CD-ROM drive.

Copying images into your computer through a USB connection

Transferring images from the camera to a computer via USB.

Troubleshooting

Battery pack and power

Solutions for common problems related to battery and power.

Shooting still images/movies

Troubleshooting issues encountered during image and movie shooting.

Warnings and messages

Interpreting and responding to on-screen warnings and messages.

Self-diagnosis display

Understanding and resolving error codes displayed by the camera.

Additional information

Number of images that can be saved or shooting time

Tables showing image capacity and recording time for different modes.

Menu items

Overview of camera menu options and their settings.

SET UP items

Details of settings available in the camera's SET UP menu.

Precautions

Important safety and handling precautions for camera use.

The LCD screen

Explanation of indicators and elements displayed on the camera's LCD screen.

Index

Related product manuals