— 17 —
CPD-E200
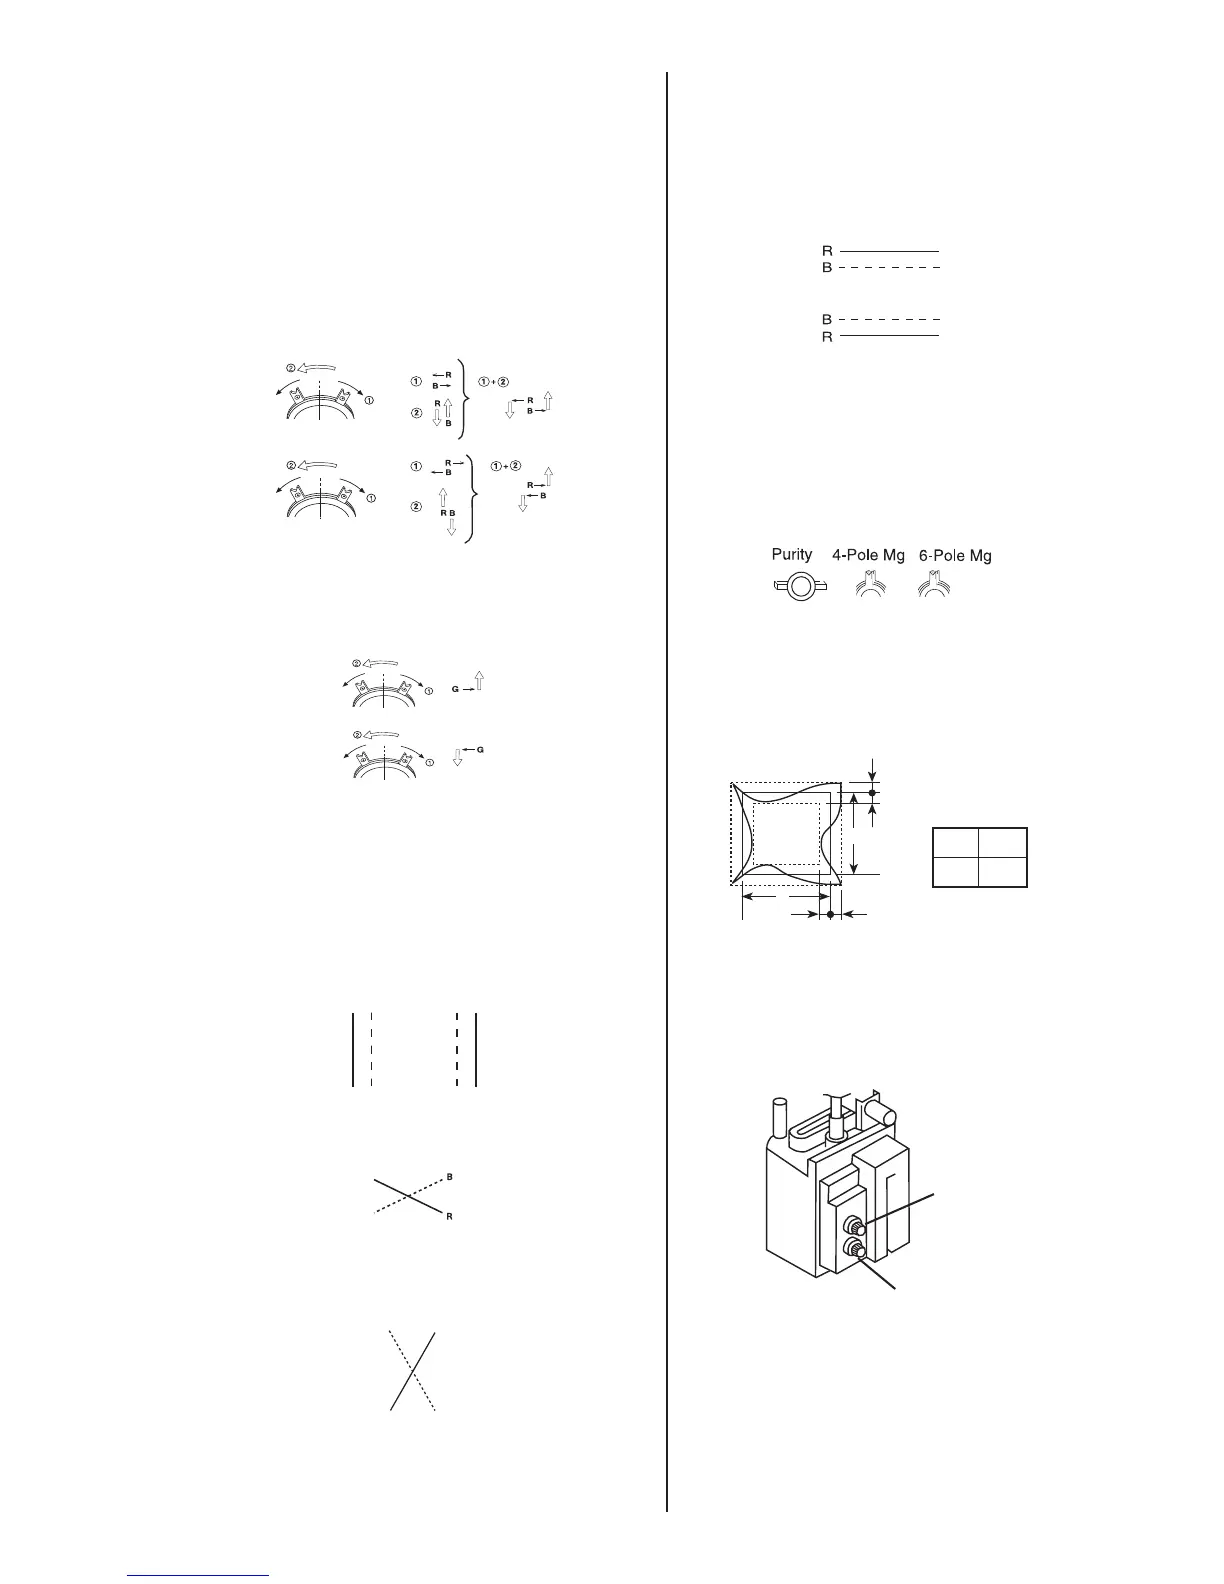
4-5. Vertical and Horizontal Position and
Size Specification
a < 3.0 mm
b < 3.0 mm
A B
234 312
4-6. Focus adjustment
Adjust focus (V) and focus (H) for optimum focus.
Focus (V)
Focus (H)
FBT
4. Display crosshatch pattern with red and blue lines and
black field.
5. Adjust H.STAT and V.STAT with 4 pole magnet. Use 4
pole magnet, not "HSTAT" and "VSTAT".
4 Pole Magnet
6. Display crosshatch pattern with white lines and black field.
7. Adjust HMC and VMC with 6 pole magnet.
6 Pole Magnet
8. Display crosshatch pattern with red and blue lines and
black field.
9. If necessary, repeat steps 5-8.
10. Change "CONV_OFF_NDX" to "3".
11. Adjust H.TILT with TLH plate.
TLH movement
12. Adjust XCV with XCV VR.
XCV movement
13. Adjust YCH with YCH VR.
YCH movement
RB
14. Adjust V.TILT with TLV VR.
TLV movement
15. If necessary, repeat steps 3-14 to make the
optimum condition for the entire screen.
16. Fix 4-pole magnet, 6-pole magnet and XCV VR
with white paint
Zero Position NECK Ass'y
R B B R
bb
a
a
A
B