— 11 —
SECTION 5
ELECTRICAL ADJUSTMENTS
CD SECTION
Precautions for Adjustment
1. Before beginning adjustment, set the equipment to service mode.
After the completion of adjustment, be sure to reset the service
mode.
For more information, see “ Service Mode (service program) ”
on page 10.
2. Perform adjustments in the order given.
3. Use YEDS-18 disk (Part No.:3-702-101-01) unless otherwise
indicated.
4. Power supply voltage requirement: DC2.5V in battery terminal
HOLD switch : OFF
VOLUME : Minimum
ESP switch : OFF
BASS BOOST switch : NORM
AVLS switch : OFF
RESUME switch : OFF
Before Beginning Adjustment
Set the equipment to service mode (See page 10) and check the
following. If there is an error, repair the equipment.
• Checking of the sled motor
1. Open the upper panel.
2. Press the + and = keys and check that the optical pick-up
can move smoothly without sluggishness or abnormal noise in
innermost periphery → outermost periphery → innermost
periphery
+ :The optical pick-up moves outwardly.
= :The optical pick-up moves inwardly.
• Checking of focus searching
1. Open the upper panel.
2. Press the + key. (Focus searching operation is activated
continuously.)
3. Check the object lens of the optical pick-up for smooth up/down
motion without sluggishness or abnormal noise.
4. Press the p key.
Check that focus searching operation is deactivated. If not, again
press the p key slightly longer.
VCC Adjustment
Adjustment Procedure:
1. Set the equipment to service mode stop state. (See page 10.)
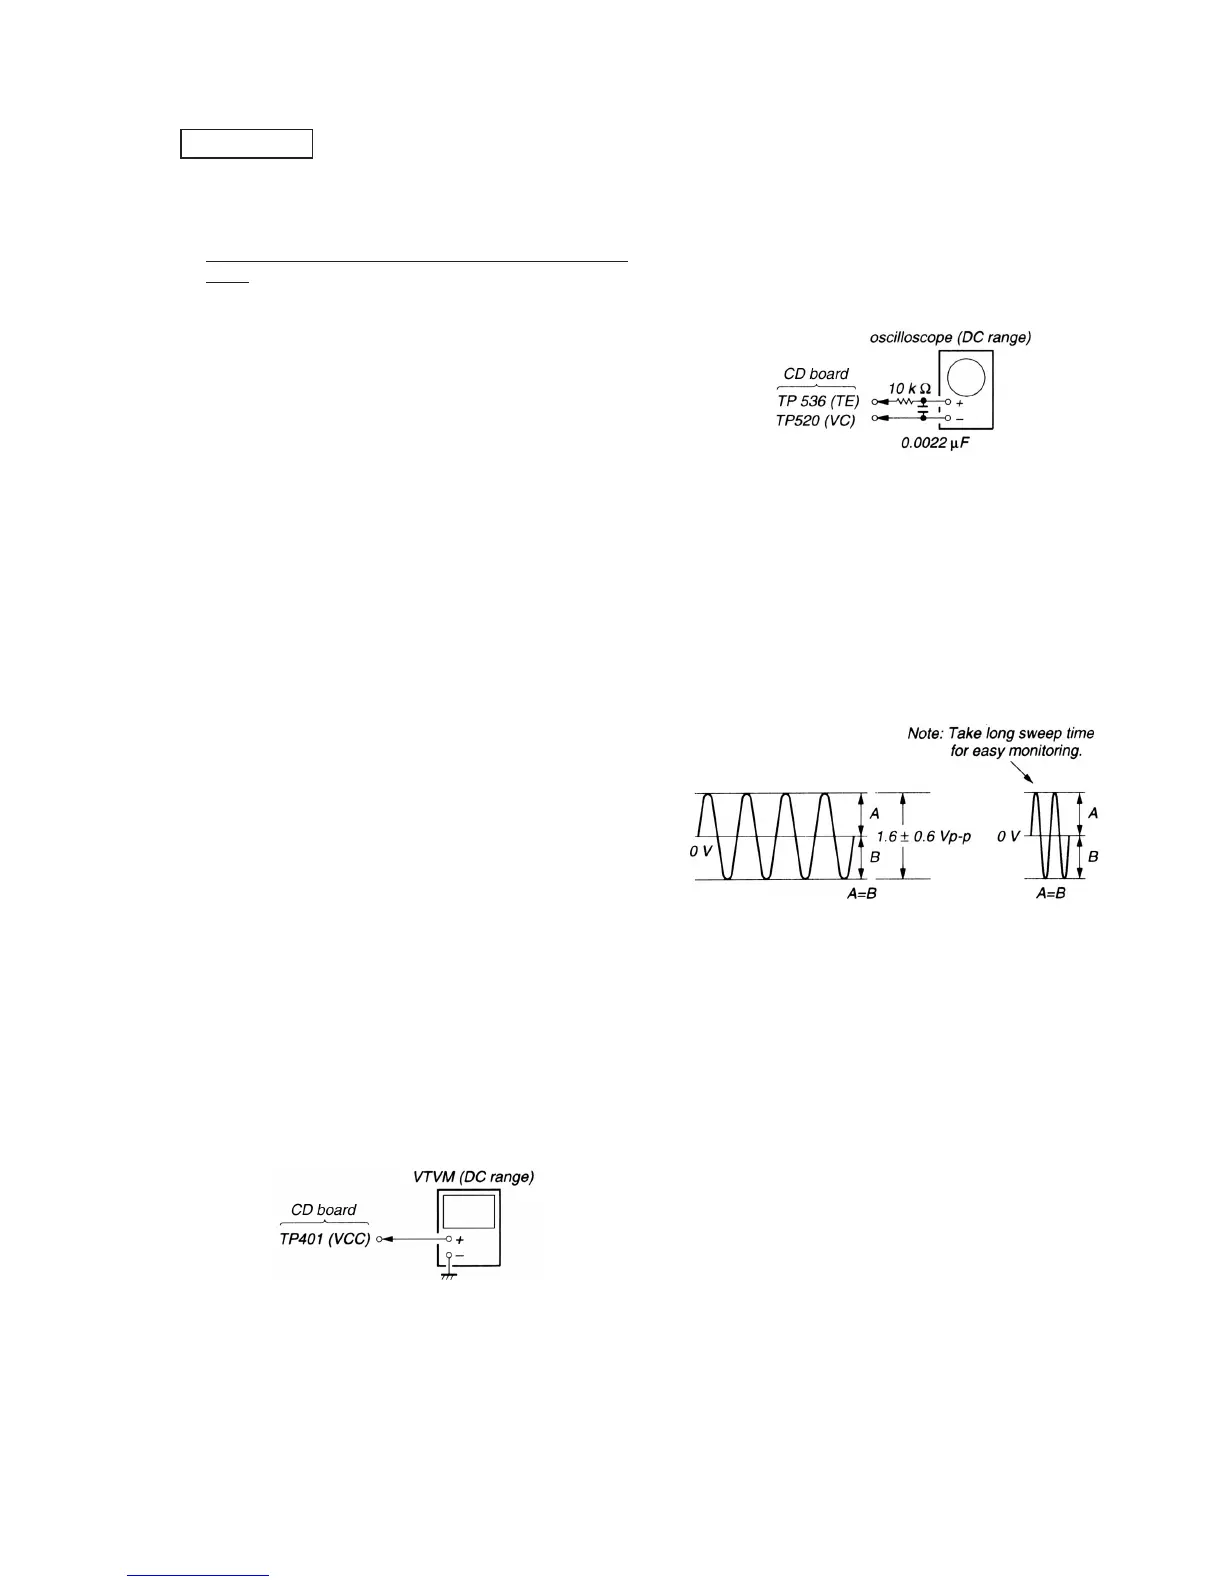
2. Connect the VTVM to TP401 (VCC) of the CD board.
3. Adjust RV401 on the CD board so that the reading on VTVM
goes 2.75±0.05V.
4. After the completion of adjustment, reset service mode. (See
page 10.)
Adjustment Location: CD board (See page 14.)
Tracking Balance Adjustment
Condition:
• Hold the set in horizontal state.
Adjustment Procedure:
1. Connect the oscilloscope to TP536 (TE) of the CD board.
2. Connect TP562 to TP520 (VC) of the CD board.
3. Set the equipment to service mode stop state. (See page 10.)
4. Move the optical pick-up by pressing the + and =keys.
5. Put the disk (YEDS-18).
6. Press the ^ key.
From focus searching, focus is turned ON while entering
CLV drawing-in mode. Tracking and sled are turned OFF.
7. Adjust RV501 so that the waveform on the oscilloscope becomes
up/down symmetrical with an axis of 0V.
8. Stop removing of the disk motor by pressing the p key.
9. After adjustment, disconnect between TP562 and TP520 (VC)
and release the service mode. (See page 10.)
Adjustment Location: CD board (See page 14.)
[
]



 To Next Page