25
GB
Getting Started
Step 3: Performing the
Quick Setup
Follow the Steps below to make the basic
adjustments for using the system.
Displayed items vary depending on the area.
1 Turn on the TV.
2 Press [/1.
Note
• Make sure that the function is set to “DVD”
(page 28).
3 Switch the input selector on your TV so
that the signal from the system
appears on the TV screen.
[Press [ENTER] to run QUICK SETUP.]
appears at the bottom of the TV screen. If
this message does not appear, recall the
Quick Setup display (page 26).
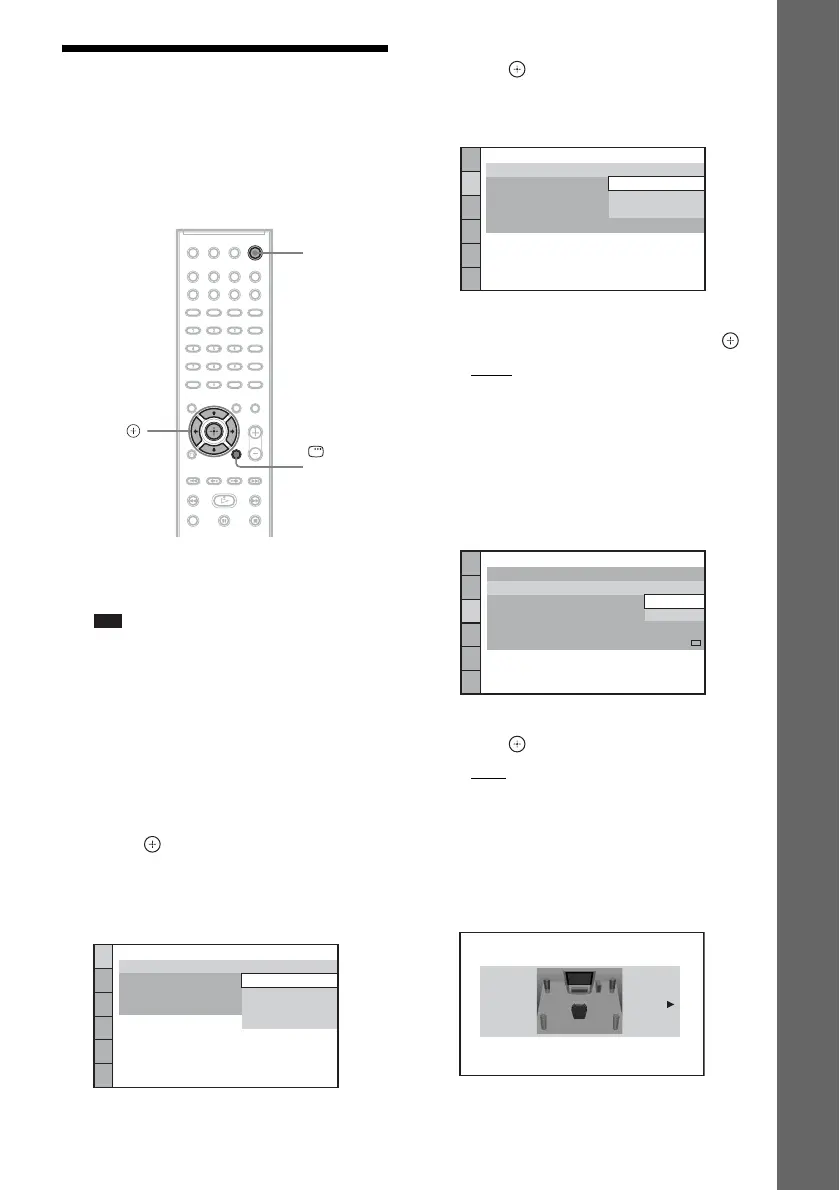
4 Press without inserting a disc.
The Setup Display for selecting the
language used in the on-screen display
appears.
5 Press X/x to select a language, then
press .
The Setup Display for selecting the aspect
ratio of the TV to be connected appears.
6 Press X/x to select the setting that
matches your TV type, then press .
• [16:9]: For a wide-screen TV or a 4:3
standard TV with a wide-screen mode
(page 52)
• [4:3 LETTER BOX] or [4:3 PAN SCAN]:
For a 4:3 standard TV (page 52)
The Setup Display for the Control for
HDMI function appears.
7 Press X/x to select the setting, then
press .
• [ON]: The Control for HDMI function
(page 61) is set to on.
• [OFF]: The Control for HDMI function is
set to off.
The Setup Display for selecting the speaker
formation appears.
"/1
DISPLAY
C/X/x/c,
LANGUAGE SETUP
MENU:
OSD:
AUDIO:
SUBTITLE:
ENGLISH
ENGLISH
FRENCH
SPANISH
PORTUGUESE
VIDEO SETUP
PROGRESSIVE
(COMPONENT OUT)
:
TV TYPE:
4:3 OUTPUT:
COLOR SYSTEM
(VIDEO CD)
:
16:9
AUTO
PAUSE MODE:
16:9
4:3 LETTER BOX
4:3 PAN SCAN
HDMI SETUP
HDMI RESOLUTION:
VOLUME LIMIT:
AUTO
(1920x1080p)
OFF
SD
YCBCR/RGB(HDMI):
JPEG RESOLUTION:
AUDIO(HDMI):
CONTROL FOR HDMI:
ON
ON
OFF
SPEAKER FORMATION
STANDARD


 To Next Page