72
Copying images to your computer
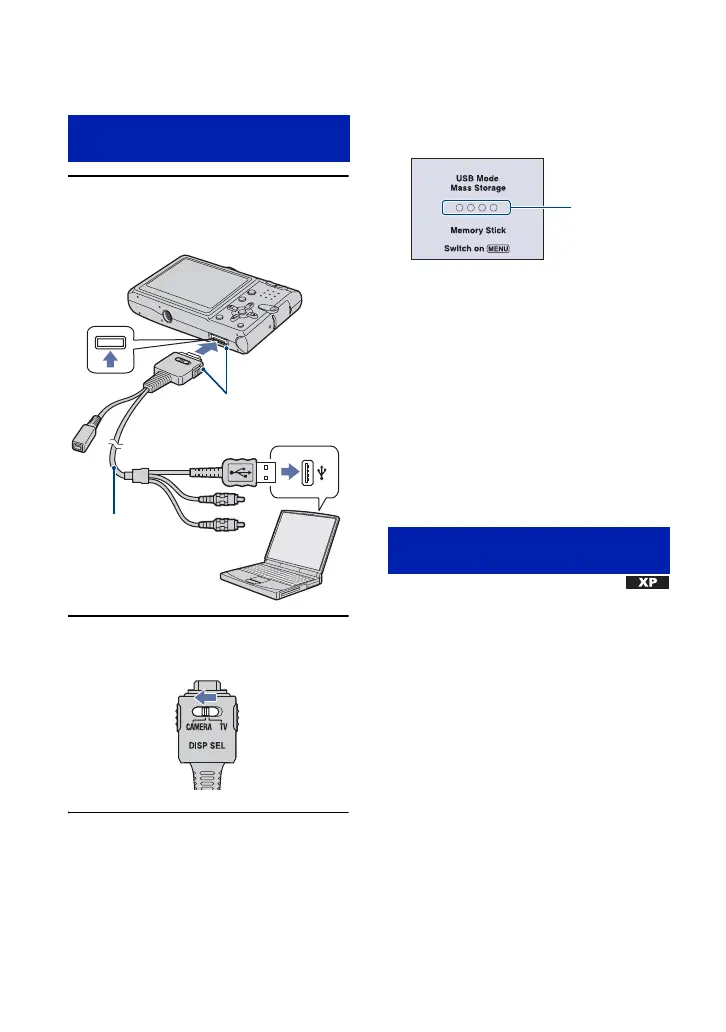
1 Connect the camera to your
computer.
2 Set the switch on the cable for
multi-use terminal to “CAMERA”.
• With Windows XP, the AutoPlay wizard
appears on the desktop.
“USB Mode Mass Storage” appears on the
screen of the camera.
When a USB connection is established for
the first time, your computer automatically
runs a program to recognize the camera.
Wait for a while.
* During communication, the access indicators
turn red. Do not operate the computer until the
indicators turn white.
• If “USB Mode Mass Storage” does not appear,
set [USB Connect] to [Mass Storage] (page 64).
• When the software (supplied) has been installed,
the [Import Images] screen (page 79) may be
displayed. In this case, you can import images
using “Picture Motion Browser” directly.
• For Windows 2000/Me, follow the procedure
explained in “Stage 3-B: Copying images to a
Computer” on page 74.
• For Windows XP, when the wizard screen does
not appear automatically, follow the procedure
explained in “Stage 3-B: Copying images to a
Computer” on page 74.
This section describes an example of
copying images to a “My Documents”
folder.
Stage 2: Connecting the camera
and your computer
Cable for multi-
use terminal
1 To a USB jack
2 To the multi connector
Stage 3-A: Copying images to a
computer
Access
indicators*