11
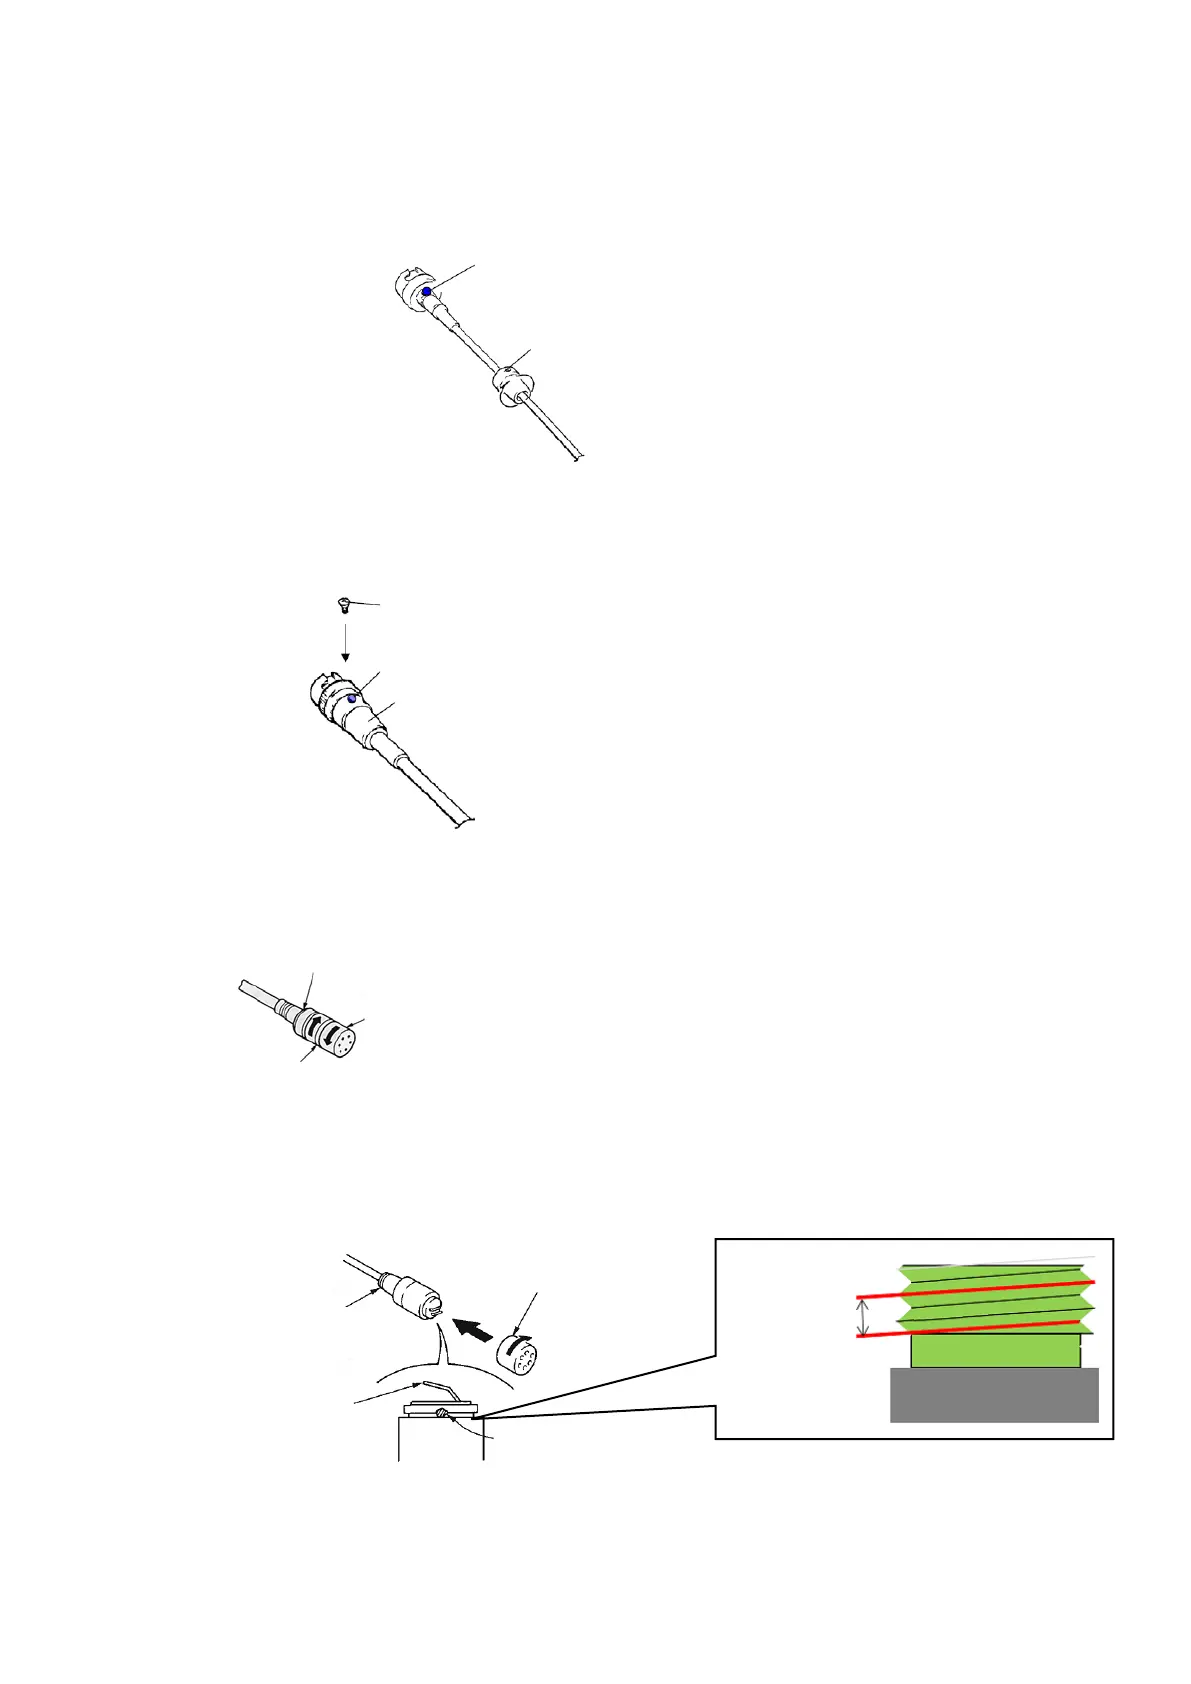
3-4. Attaching the connector cover
1) Applying the locking agent for screw
Apply the locking agent for screw (ThreeBond 1401B:7-432-114-11 or equivalent) as indicated
by the blue dot in Fig. 12 and attache the connector cover.
2) Fixing the connector cover
Apply the locking agent for screw (ThreeBond 1401B:7-432-114-11 or equivalent) to the screw
hole on the connector cover and tighten the supplied screw. (tightening torque: 0.08Nm) (Fig. 13)
3-5. Removal of the capsule ASSY
The capsule ASSY can be removed as shown in the Fig. 14.
3-6. Note on handling the capsule ASSY
Reassemble the capsule ASSY as shown in Fig. 15.
Tightening torque:
0.11 - 0.12Nm
Clean the contact spring
with ethanol.
apply locking
agent for screw
Locking agent for screw
Apply half of outer circumferential
surface indicated in Fig. 16.
Position to apply: screw hole on the connector
Position to apply: 2 teeth of the screw of connector (with 5mm of width)