GTK-XB60
GTK-XB60
1919
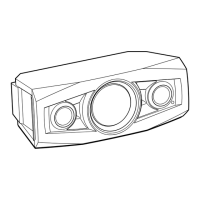
2-19. SPEAKER UNIT (TW)
7ZHHWHUFDEOHDQG/('ERDUGFDEOHVHWWLQJ
3 terminal
(wide)
3 terminal
(narrow)
4 speaker unit (TW)
(tweeter: left)
3 terminal
(wide)
3 terminal
(narrow)
4 speaker unit (TW)
(tweeter: right)
front side
top side
bottom side
1 Draw the tweeter cable out
of the four grooves in front
panel.
2 two screws
(M3 u 10)
–5HDUYLHZ–
left side
groove
groove
groove
groove
top side
bottom side
2 screw
(M3 u 10)
2 screw
(M3 u 10)
OK
NG
SECTION 3
TEST MODE
Buttons and indicators position:
CHARGE
– Top view –
ADD
RL
STAMINA FUNCTION
USB AUDIO IN
SOFTWARE VERSION
It can confi rm the software version.
Procedure:
1. Press the [
1
] button to turn the power on.
2. Press the [FUNCTION] button to select the AUDIO IN func-
tion.
3. Press two buttons of the [u] and [ADD] simultaneously for
5 seconds.
4. Each software version are shown by the fl ashing frequency of
LEDs simultaneously.
Example:
• When the MCU version is “v12”, the [ADD L] LED fl ashes 1
time, the [ADD R] LED fl ashes 2 times.
ADD
RL
Flash
(1 time)
Flash
(2 times)
• When the MPEG version is “v14”, the [STAMINA] LED
fl ashes 1 time, the [CHARGE] LED fl ashes 4 times.
CHARGE
STAMINA FUNCTION
Flash
(1 time)
Flash
(4 times)
• When the BT version is “v062”, the [AUDIO IN] LED does
not fl ash, the [ ] LED fl ashes 6 times, the [USB] LED fl ashes
2 times.
USB AUDIO IN
Flash
(6 time)
flash
(2 times)
Not flash
FACTORY RESET
It can reset all settings and clear the Bluetooth linked list. Execute
this mode when returning the this unit to the customer.
Procedure:
1. Press the [
1
] button to turn the power on.
2. Press two buttons of the [FUNCTION] and [–] simultaneously
for 5 seconds.
3. The [ ], [USB], [AUDIO IN] and [
1
] LEDs fl ashes 2 times,
and then reboot the system.
CHARGE
USB AUDIO IN
flash
(2 times)
flash
(2 times)

 Loading...