HT-NT5
6
NETWORK AND NFC CONNECTION CHECKING METH-
OD
When the MB-1509 board or WLAN/BT combo card is replaced,
check the connection of wireless/wired LAN and NFC.
1. Checking method of wireless LAN connection
Necessary equipment:
• TV monitor
• Access point supporting WPS
Procedure:
1. Connect this unit with TV monitor.
2. Touch the [
1
] button to turn the power on.
3. Press the [HOME] button on the remote commander, display
the home screen.
4. Press the [V]/[v] buttons on the remote commander to select
the “
Setup”, and press the [ ] button on the remote com-
mander.
5. Press the [V]/[v] buttons on the remote commander to select
the “Network Settings”, and press the [ ] button on the remote
commander.
6. Press the [V]/[v] buttons on the remote commander to select
the “Internet Settings”, and press the [ ] button on the remote
commander.
7. Press the [V]/[v] buttons on the remote commander to select
the “Wireless Setup”, and press the [ ] button on the remote
commander.
8. Press the [V]/[v] buttons on the remote commander to select
the “Wi-Fi Protected Setup™ (WPS)”, and press the [ ] but-
ton on the remote commander.
9. The message “Start” is displayed.
10. Press the [ ] button on the remote commander, and press the
[WPS] button on the access point.
11. When wireless LAN connection is completed, “Wireless Con-
nection: OK” and “Internet Access: OK” is displayed.
Note: Refer to the Operating Instructions about details of the connection
method.
2. Checking method of wired LAN connection
Necessary equipment:
• TV monitor
• Router
• Network LAN cable
Procedure:
1. Connect this unit with TV monitor.
2. Connect this unit to the router with the network LAN cable.
3. Touch the [
1
] button to turn the power on.
4. Press the [HOME] button on the remote commander, display
the home screen.
5. Press the [V]/[v] buttons on the remote commander to select
the “ Setup”, and press the [ ] button on the remote com-
mander.
6. Press the [V]/[v] buttons on the remote commander to select
the “Network Settings”, and press the [ ] button on the remote
commander.
7. Press the [V]/[v] buttons on the remote commander to select
the “Internet Settings”, and press the [ ] button on the remote
commander.
8. Press the [V]/[v] buttons on the remote commander to select
the “Wired Setup”, and press the [ ] button on the remote
commander.
9. Press the [V]/[v] buttons on the remote commander to select
the “Auto”, and press the [b] button on the remote command-
er.
10. The “The network will be confi gured with the following set-
tings” screen is display, and press the [b] button on the remote
commander.
11. Press the [V]/[v] buttons on the remote commander to select
the “Save & Connect”, and press the [
] button on the remote
commander.
12. When wired LAN connection is completed, “Physical Connec-
tion: OK” and “Internet Access: OK” is displayed.
Note: Refer to the Operating Instructions about details of the connection
method.
3. Checking method of NFC connection
Necessary equipment:
• NFC-compatible mobile device such as a smartphone, tablet or
music player (OS: Android™ 2.3.3 or later, excluding Android
3.x)
Procedure:
1. Touch the [
1
] button to turn the power on.
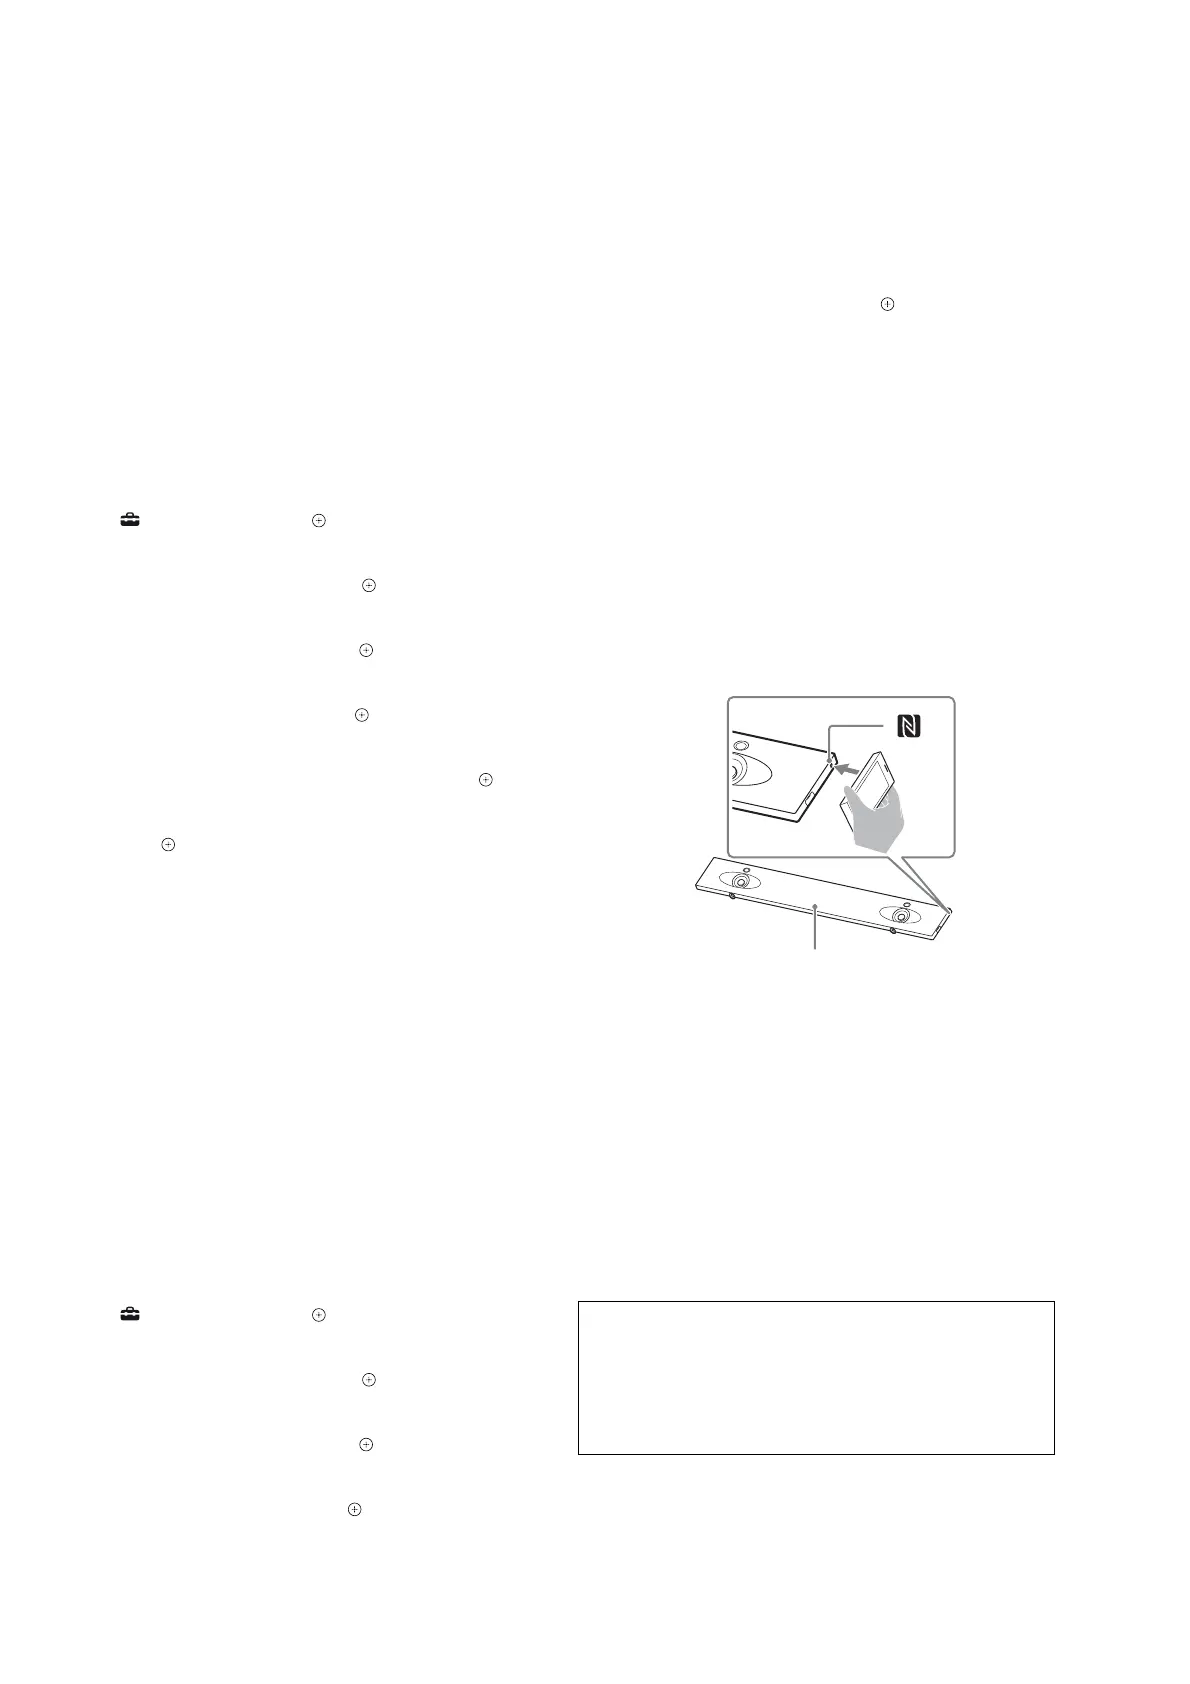
2. Touch the N mark on this unit with the mobile device.
BLUETOOTH indicator
– Front view –
3. Make sure that the BLUETOOTH indicator lights in blue.
(A connection between the system and mobile device has been
established)
4. Start audio playback with the music application on the con-
nected mobile device.
Note: After checking of NFC connection, be sure to delete the pairing
information before returning this unit to the customer.
NOTICE OF MAC ADDRESS CHANGE TO CUSTOM-
ERS
When the MB-1509 board or WLAN/BT combo card is replaced,
the MAC address has been changed.
Print the following explanations, and pass it to the customer with
the repaired unit when returning the customer repaired unit.
Note of the MAC address change:
The MAC address of this unit was changed along with this repair.
Please set it again if you are using the MAC address fi ltering function
of access point device of connection destination.
MAC address can be confi rmed from the settings menu screen of this
unit. Please refer to the “Using the Various Functions/Settings” of Op-
erating Instructions for details.
 Loading...