Attaching a lens
GB
27
GB
Notes
• When attaching a lens, do not press the lens release button.
• Do not use force when attaching a lens.
• E-mount lenses are not compatible with this camera.
• When you use a lens for which a tripod socket is provided, attach the lens onto the
tripod using the tripod socket provided to help balance the weight of the lens.
• When carrying the camera with a lens attached, hold both the camera and the lens
firmly.
• Do not hold the part of the lens that is extended for the zoom or focus adjustment.
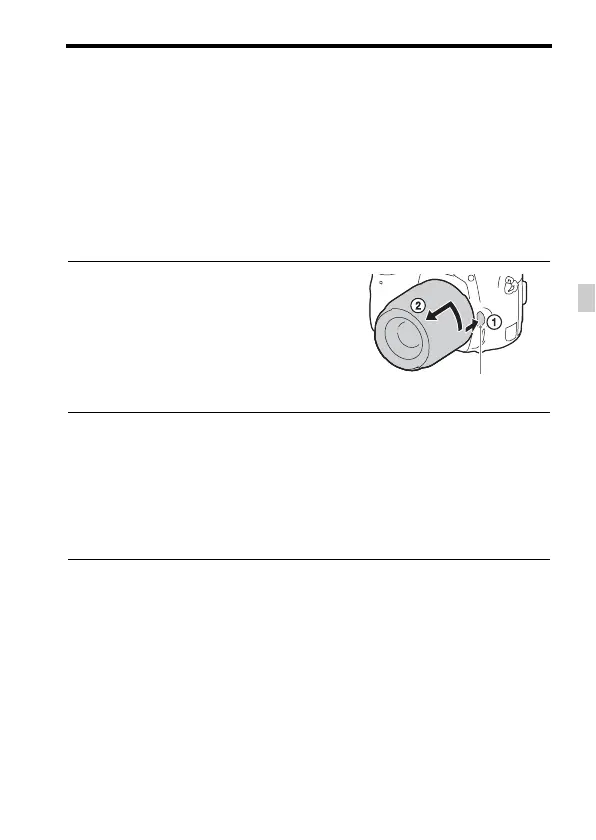
To remove the lens
Notes on changing the lens
When changing the lens, if dust or debris gets inside the camera and
adheres to the surface of the image sensor (the part that converts the light to
an electric signal), it may appear as dark spots on the image, depending on
the shooting environment.
The camera is equipped with an anti-dust function to prevent dust from
landing on the image sensor. However, always make sure to change the
lens quickly somewhere away from dusty locations when attaching/
removing a lens.
1 Press the lens release button all
the way in and turn the lens
counterclockwise until it stops.
2 Attach the caps to the front and rear of the lens and the body
cap to the camera.
• Before you attach them, remove any dust from them.
• A rear lens cap is not supplied with the DT 18-55mm F3.5-5.6 SAM II Lens
Kit. If storing the lens without attaching it to the camera, purchase Rear
Lens Cap ALC-R55.
Lens release button